
- Getting Started
- Creating Your First Funnel
- CartFlows Funnel Step Types
- Starting a Funnel from a Product Page
- How to Edit and Customise Funnel Steps
- Using CartFlows with or without Store Checkout
- How to Add /Assign Products to a Checkout Step
- How to Create One-Click Upsell and Downsell Offers
- How to Use Canvas Mode to Visualize Your Sales Funnel
- Hiding Fields on the Checkout Page
- Installing WooCommerce
- Using WooCommerce
- Adding Products in WooCommerce
- Using Your Theme's Header & Footer in a Step
- Embedding a Checkout Form on the Checkout Page
- Hiding WooCommerce Pages and Products
- Using Pricing Tables
- Adding an Affiliate Program
- Setting a Funnel as the Homepage
- Dynamic Offers aka Rule Engine
- Instant Layout for Checkout and Thank You Step
- Adding Products from the URL to the Checkout Page
- Deleting Plugin Data During Uninstallation
- Importing Ready-Made Templates for Funnels and Steps
- Importing and Exporting Funnels and Step
- URL Parameters
- Replacing the Main Checkout Order with an Upsell or Downsell
- Rolling back to a Previous Version
- Using the "Order Custom Field" Rule of Dynamic Offers with Custom Field Editor
- Optin
- Separate Orders
- Setting Up Pre-Checkout Upsell
- Refund Offer
- Applying a Coupon from the URL
- How to Create a Direct Buy-Now Checkout Link for a Product
- How Coupons Work in CartFlows?
- User role manager
- Instant Layout for Upsell and Downsell
- CartFlows Smart Login
- How to Set Preferred Countries on the Checkout Page
- CartFlows Product Options
- How to Set Up Two Step Checkout in CartFlows
- How to Set Up Multistep Checkout in CartFlows
- How to Customize the CartFlows Thank You Page
- How to Set Global Styling for a CartFlows Funnel
- How to Close a Checkout After a Date or Number of Orders
- Google Address Autocomplete
- Flatsome UX Builder
- ActiveCampaign
- Paypal Reference Transactions
- How PaypPal/Stripe Works
- Enabling Enfold Avia Layout Builder
- Setting Up Authorize.net for Upsell & Downsell
- Supported Payment Gateways
- Setting Quantity and Discount for Products on the Checkout Page
- Adding Custom Payment Gateway Support for One-Click Upsell and Downsell
- Funnel in Test Mode
- Troubleshooting Plugin and Theme Conflicts
- Resolving the "Please Select a Simple, Virtual, and Free Product" Error
- Fixing Endless Loading on the Checkout Page
- Fixing the "We can't seem to find an order for you." Error on the Thank You Page
- Troubleshooting License Activation Issues
- Fixing the "Checkout ID Not Found" Error
- Fixing the "Session Expired" Error Message
- Resolving "Order Does Not Exist" Error on Upsell/Downsell Page
- Fixing the "Sorry, This Product Cannot Be Purchased" Error
- Disabling Auto-fill of Address Fields Based on Zip Code
- Enabling Theme's Scripts & Styles Without Changing Page Template
- Disabling Auto-fill of Checkout Fields
- Allowing Cache Plugins to Cache CartFlows Pages
- Changing the "Choose a Variation" Text
- VAT Field Not Displaying for WooCommerce EU/UK VAT Compliance Plugin
- Enabling the Product Tab on Store Checkout
- Displaying the Order Summary Open on Mobile Devices
- Refreshing the Checkout Page After CartFlows AJAX Calls
- Overview
- Installing Modern Cart Starter
- Installing Modern Cart Pro
- Activating License Key
- Customizing General Settings
- Customizing Cart Tray Labels
- Customizing Cart Icon Settings
- Customizing Cart Tray Styling
- Understanding the Product Recommendations Feature
- Controlling Product Recommendation Source for Empty Cart
CartFlows Instant Layout for Checkout & Thank You Step
CartFlows offers an Instant layout for Checkout and Thank you steps designed for a quick and seamless purchase experience. This layout features a clean and minimal user interface, optimized for selling items like e-books, music, and other digital goods. It removes unnecessary distractions and skips the need for page builders, offering a fast and simple checkout process.
This layout includes a modern, conversion-focused design with essential customization options. It’s ideal for users who want a straightforward solution that integrates seamlessly with their existing CartFlows funnels or store checkout.
How to Setup Instant Layout
Step 1: Go to the funnel in which you would like to enable the Instant Layout.
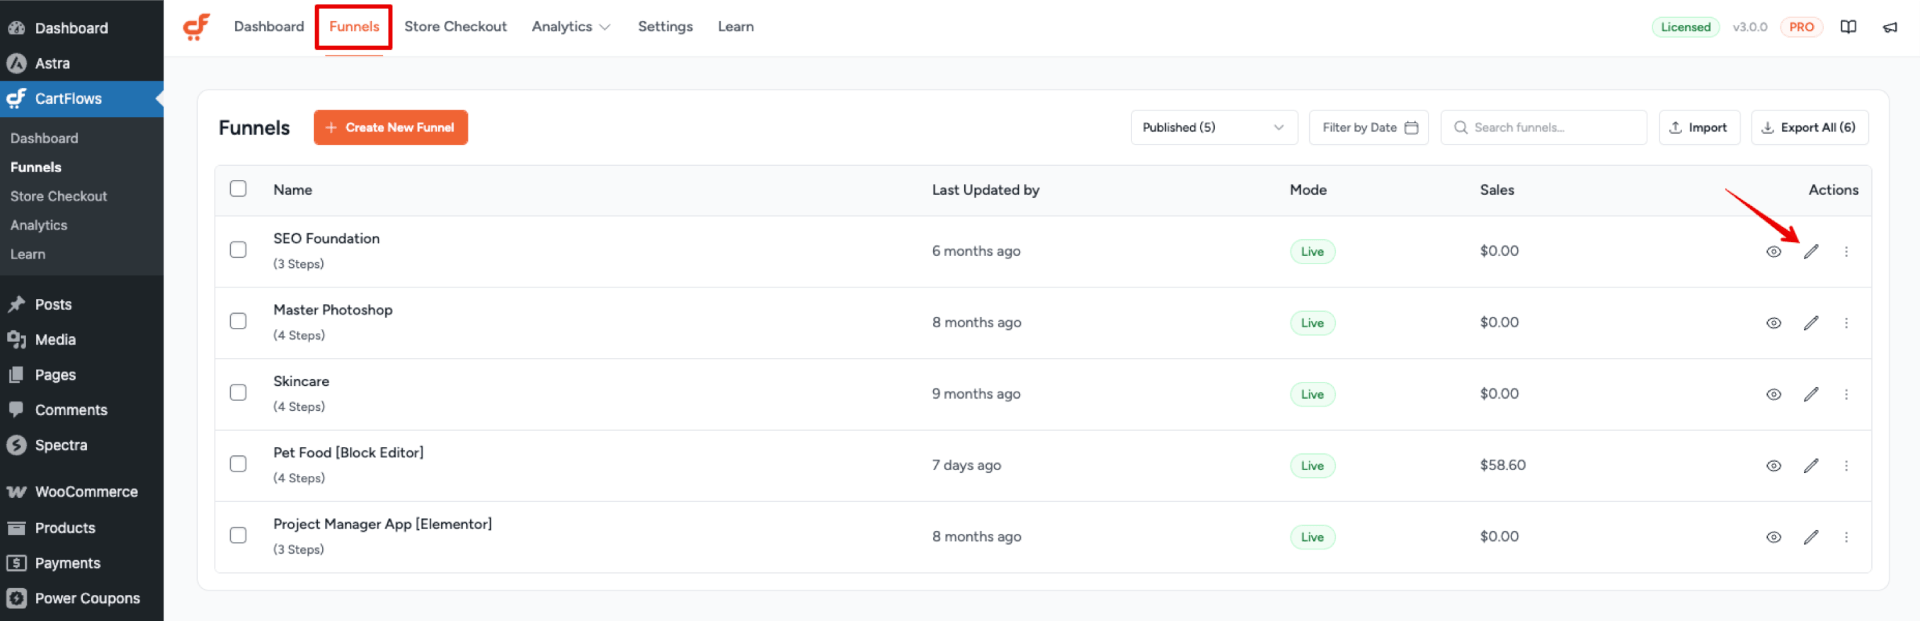
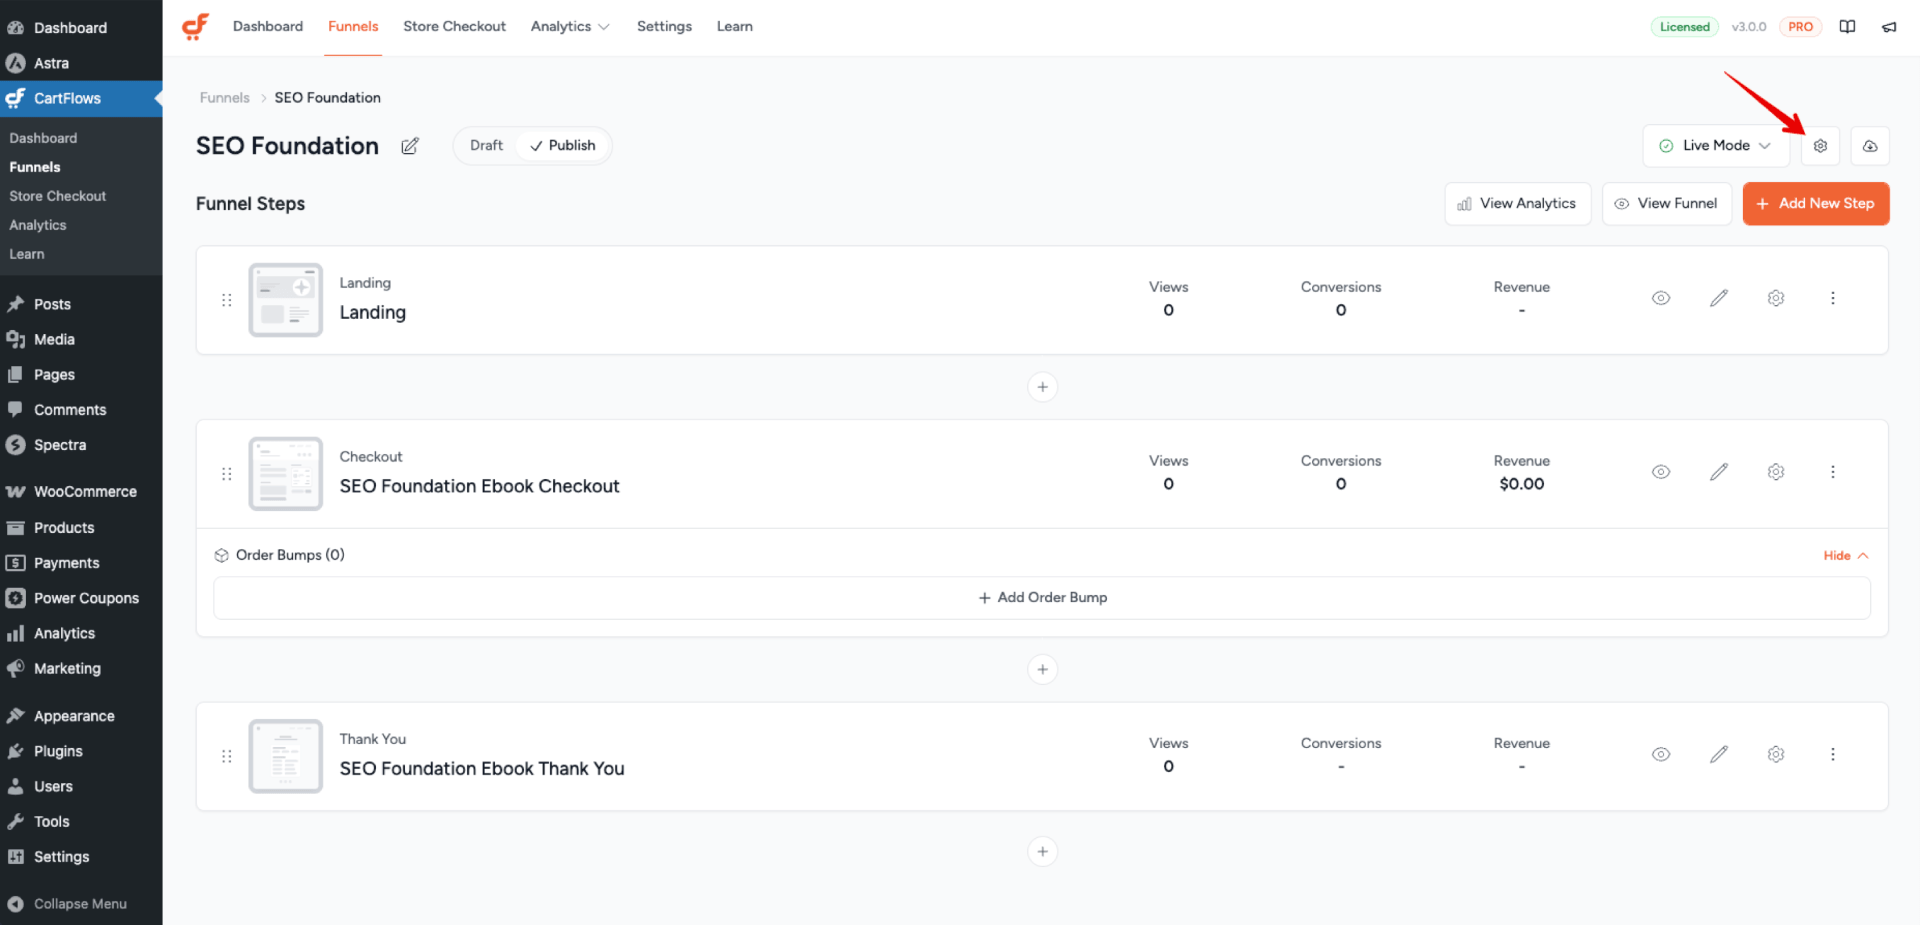
Step 2: Click the Funnel Settings button (cog icon) in the top-right corner of the screen.
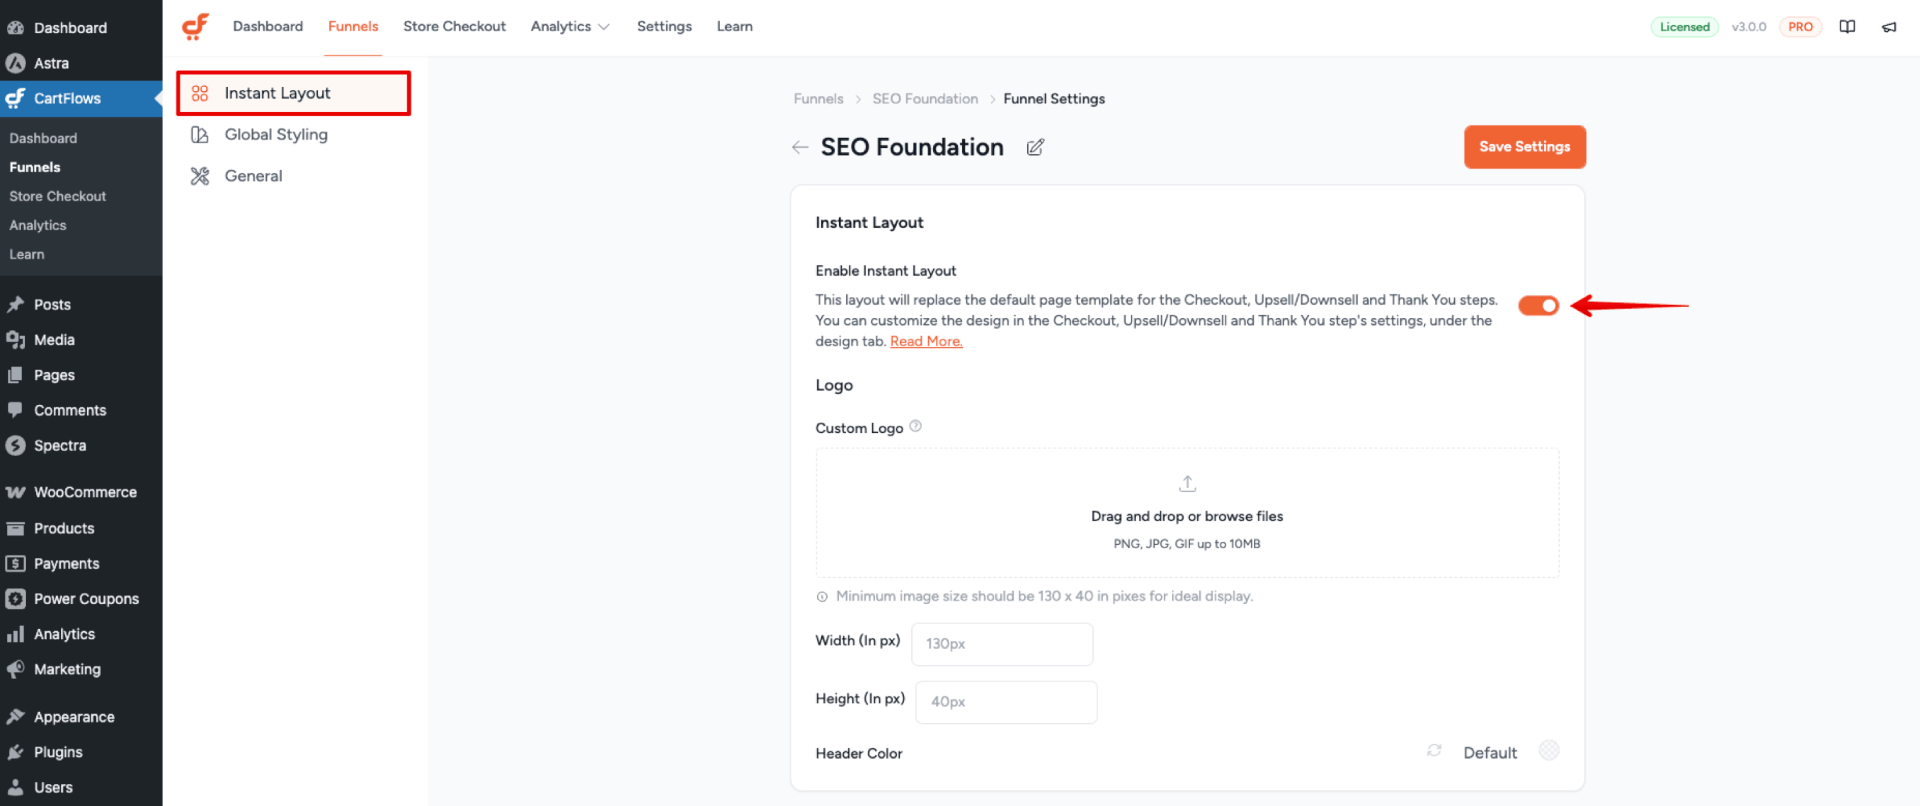
Step 5: Navigate to the Instant Layout section on the sidebar and enable the toggle to activate the Instant layout.
Why the Company Field Isn’t Visible in the Instant Layout
When the Instant Layout is enabled, the Company field is not displayed on the checkout page. This applies even if the field is turned on in the Checkout Field Editor.
This is intentional. As mentioned above, the Instant Layout is built around a minimal, distraction-free checkout aimed at quick purchases of digital products such as e-books, courses, and music. Fields that aren’t essential to completing the order are left out so buyers see fewer inputs and can complete the purchase faster. The Company field falls into that category, so this layout doesn’t render it.
You’ll also find this noted directly in the editor. Open your Checkout step, go to the Checkout Field Editor, and hover over the help icon next to the Company field. The tooltip reads:
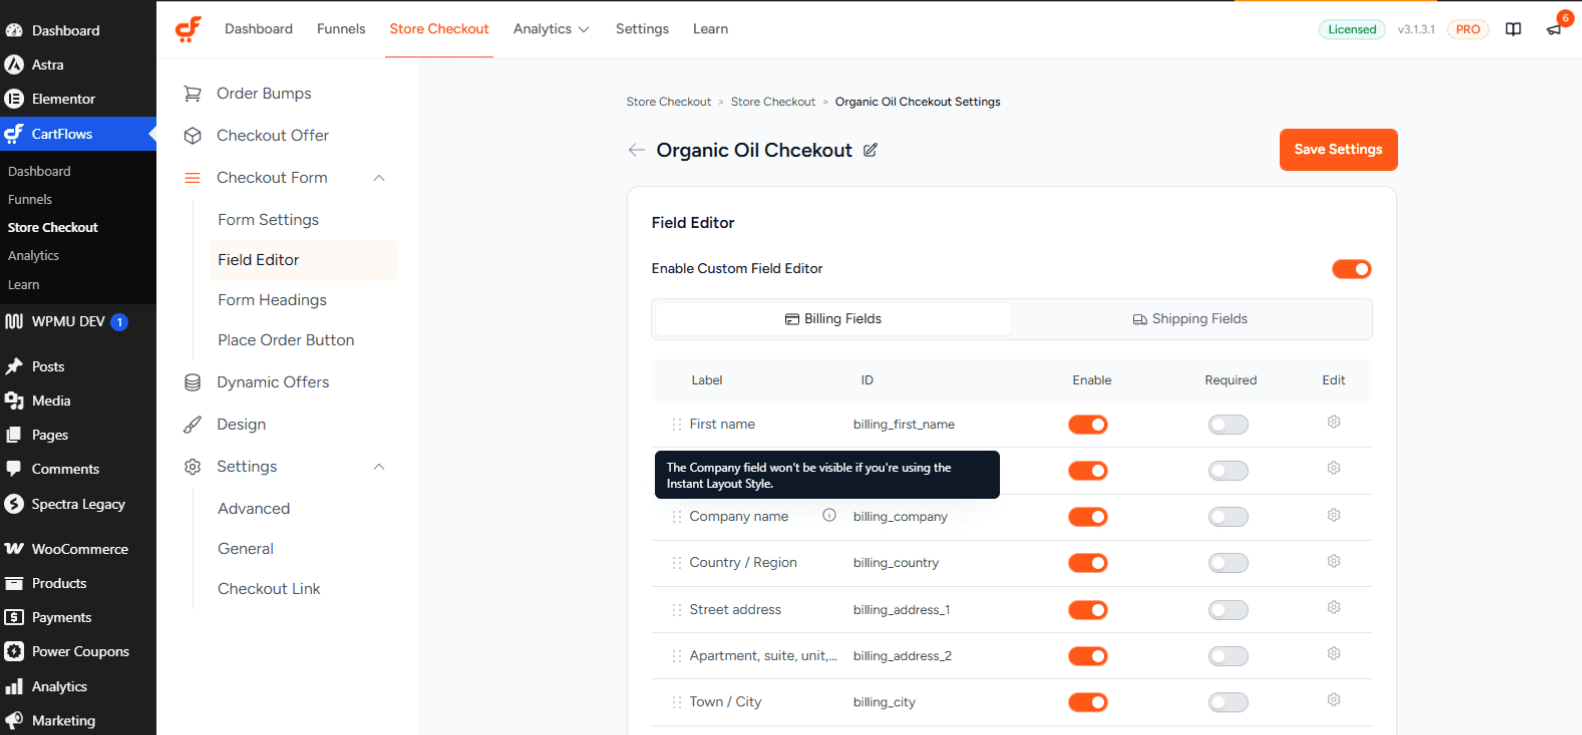
If collecting a company name is a requirement for your store, we recommend using one of the other checkout layouts instead. Those display the Company field normally once it’s enabled in the Checkout Field Editor.
Why Step Editing Is Disabled in the Instant Layout
When the Instant Layout is enabled for a funnel, you won’t be able to edit its steps directly with a page builder. This is expected rather than a problem. The Instant Layout renders its own ready-made design, which is exactly what lets it skip the page builder, so there is no builder canvas to open.
Hovering over the disabled edit option shows this note:
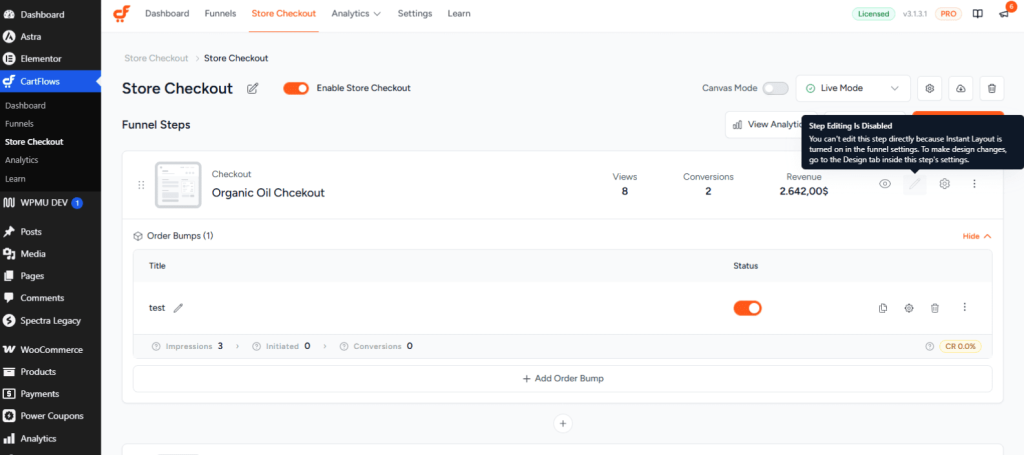
All of the Instant Layout’s appearance settings live in that Design tab. Open the step, go to Design, and you’ll find the options for customizing how your Instant page looks.
If you need full control over the page with a page builder, turn the Instant Layout toggle off in the funnel settings. The step will then open in your page builder as usual
We don't respond to the article feedback, we use it to improve our support content.