
- Getting Started
- Creating Your First Funnel
- CartFlows Funnel Step Types
- Starting a Funnel from a Product Page
- How to Edit and Customise Funnel Steps
- Using CartFlows with or without Store Checkout
- How to Add /Assign Products to a Checkout Step
- How to Create One-Click Upsell and Downsell Offers
- How to Use Canvas Mode to Visualize Your Sales Funnel
- Hiding Fields on the Checkout Page
- Installing WooCommerce
- Using WooCommerce
- Adding Products in WooCommerce
- Using Your Theme's Header & Footer in a Step
- Embedding a Checkout Form on the Checkout Page
- Hiding WooCommerce Pages and Products
- Using Pricing Tables
- Adding an Affiliate Program
- Setting a Funnel as the Homepage
- Dynamic Offers aka Rule Engine
- Instant Layout for Checkout and Thank You Step
- Adding Products from the URL to the Checkout Page
- Deleting Plugin Data During Uninstallation
- Importing Ready-Made Templates for Funnels and Steps
- Importing and Exporting Funnels and Step
- URL Parameters
- Replacing the Main Checkout Order with an Upsell or Downsell
- Rolling back to a Previous Version
- Using the "Order Custom Field" Rule of Dynamic Offers with Custom Field Editor
- Adding Order Bumps to WooCommerce Sales Funnel
- Replacing the First Product on Checkout with Order Bump
- Dynamic (Conditional) Order Bumps
- Order Bump AI
- Positions and Styles
- How to Auto-Apply a Coupon When an Order Bump Is Accepted
- How to Add Variable Products to an Order Bump
- How to A/B Test Order Bumps in CartFlows
- Google Address Autocomplete
- Flatsome UX Builder
- ActiveCampaign
- Paypal Reference Transactions
- How PaypPal/Stripe Works
- Enabling Enfold Avia Layout Builder
- Setting Up Authorize.net for Upsell & Downsell
- Supported Payment Gateways
- Setting Quantity and Discount for Products on the Checkout Page
- Adding Custom Payment Gateway Support for One-Click Upsell and Downsell
- Funnel in Test Mode
- Troubleshooting Plugin and Theme Conflicts
- Resolving the "Please Select a Simple, Virtual, and Free Product" Error
- Fixing Endless Loading on the Checkout Page
- Fixing the "We can't seem to find an order for you." Error on the Thank You Page
- Troubleshooting License Activation Issues
- Fixing the "Checkout ID Not Found" Error
- Fixing the "Session Expired" Error Message
- Resolving "Order Does Not Exist" Error on Upsell/Downsell Page
- Fixing the "Sorry, This Product Cannot Be Purchased" Error
- Disabling Auto-fill of Address Fields Based on Zip Code
- Enabling Theme's Scripts & Styles Without Changing Page Template
- Disabling Auto-fill of Checkout Fields
- Allowing Cache Plugins to Cache CartFlows Pages
- Changing the "Choose a Variation" Text
- VAT Field Not Displaying for WooCommerce EU/UK VAT Compliance Plugin
- Enabling the Product Tab on Store Checkout
- Displaying the Order Summary Open on Mobile Devices
- Refreshing the Checkout Page After CartFlows AJAX Calls
- Overview
- Installing Modern Cart Starter
- Installing Modern Cart Pro
- Activating License Key
- Customizing General Settings
- Customizing Cart Tray Labels
- Customizing Cart Icon Settings
- Customizing Cart Tray Styling
- Understanding the Product Recommendations Feature
- Controlling Product Recommendation Source for Empty Cart
How the Add Products Separately Setting Affects the Cart
The Frequently Bought Together section has one setting that decides what happens after a shopper taps the add button. It controls whether the products arrive in the cart as independent items or as a set that stays together.
How It Works
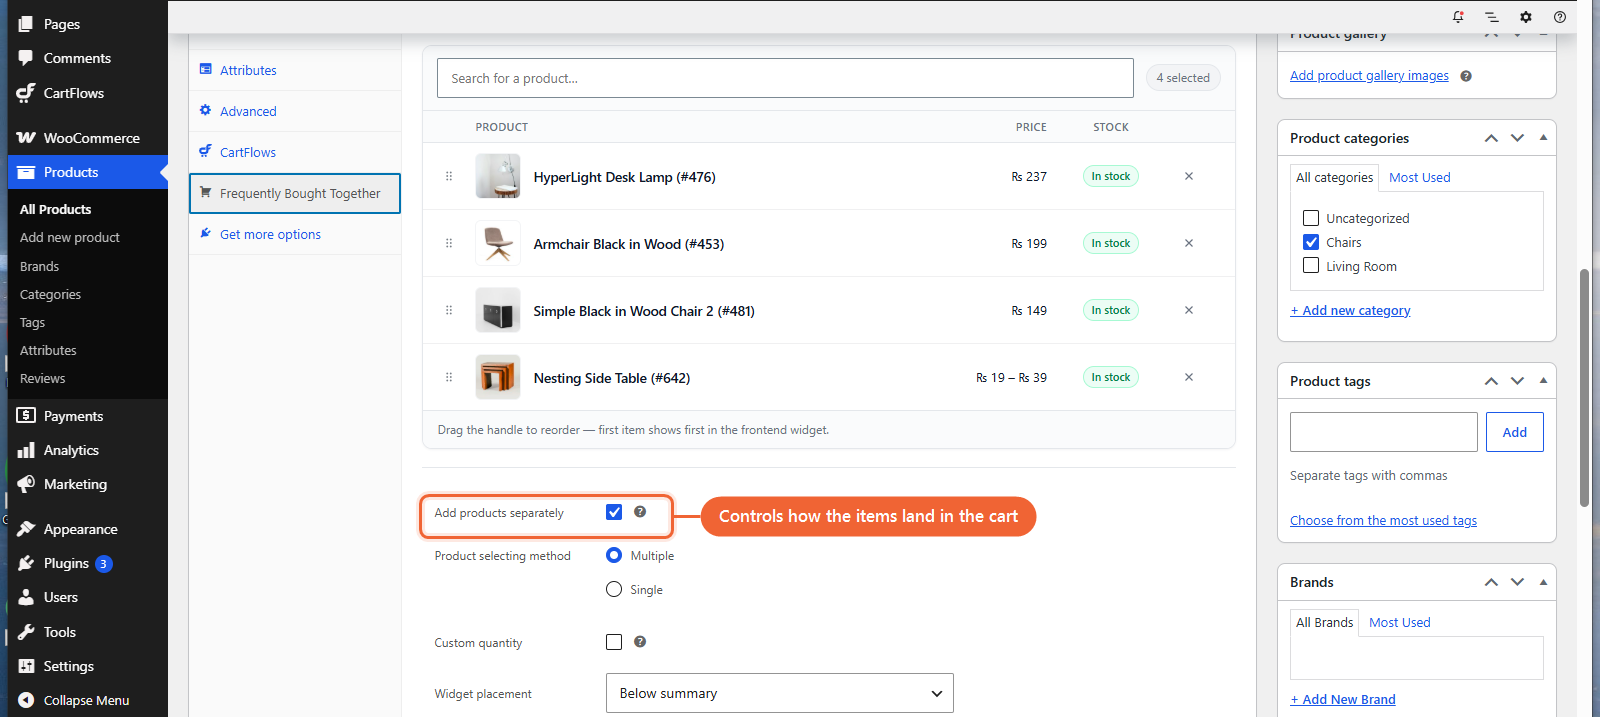
The setting is called Add products separately, and it sits with the rest of the section’s options on the product you are editing.
- Ticked, every product becomes its own cart line and behaves like anything else in the cart.
- Unticked, the products added from that section are treated as one set, and removing the main product removes the rest with it.
- Either way the prices are unchanged. This setting groups items, it does not discount them.
Where to Find It
Step 1. Go to Products and open the product whose section you want to change.
Step 2. Scroll to the Product data box and click the Frequently Bought Together tab.
Step 3. Tick or untick Add products separately, then update the product.
The setting belongs to that one product, so you can group the items on a product where it makes sense and leave everything else independent.
With the Setting Ticked
This is how a new product starts out, and it is the option most stores want.
Each product the shopper selected lands in the cart as its own line, exactly as if they had visited each product page and added them one at a time. Nothing links the lines together.
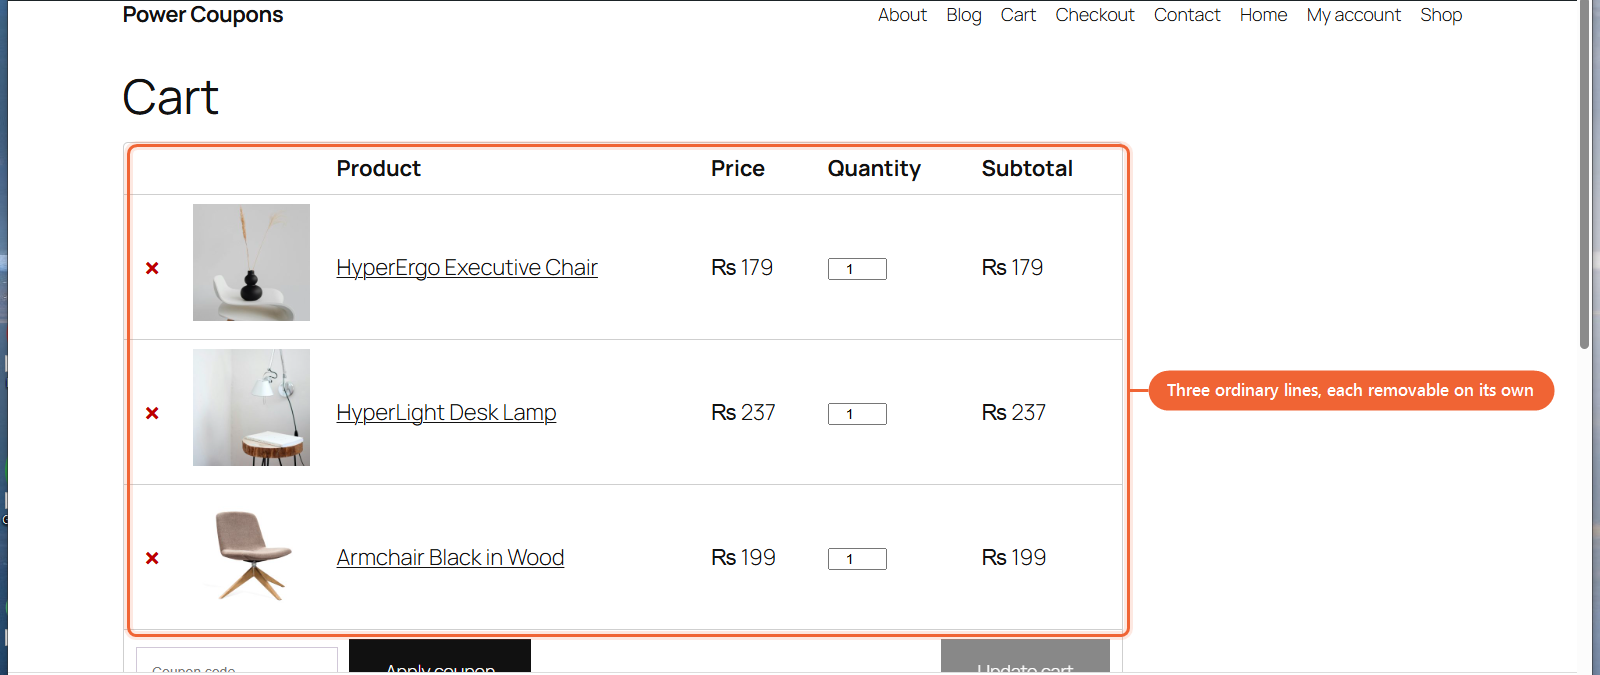
That means the shopper stays in full control. If they change their mind about the main product and remove it, the companions they liked are still there.
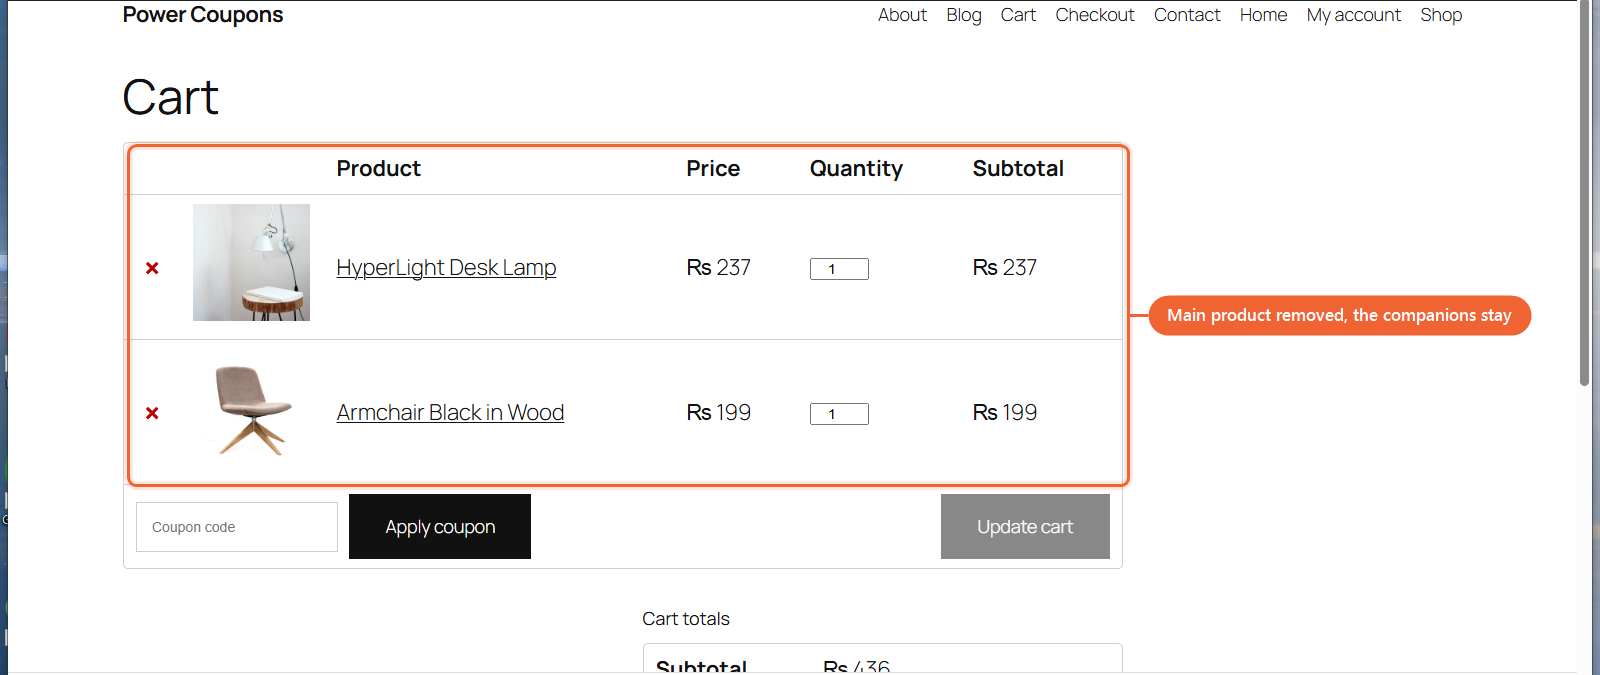
With the Setting Unticked
Now the products are treated as a set that belongs together.
The lines still look the same in the cart, but they are linked behind the scenes. Removing the main product removes every companion that came with it, so a shopper cannot end up with an accessory for something they are no longer buying.

A few details worth knowing:
- Removing just a companion only removes that one. The rest of the set is untouched.
- Adding the same set again merges into the existing lines rather than creating duplicates.
- Items already sitting in a shopper’s cart keep the behaviour they were added with, so changing the setting does not rewrite carts that are already in progress.
Which One to Choose
Think about whether the companions make sense on their own.
- Leave it ticked when each product stands up by itself, such as a lamp offered alongside a desk. A shopper who drops the desk may still want the lamp.
- Untick it when the companions only exist because of the main product, such as a case made for one specific device. Removing the device should take the case with it.
Frequently Asked Questions
We don't respond to the article feedback, we use it to improve our support content.