
- Getting Started
- Creating Your First Funnel
- CartFlows Funnel Step Types
- Starting a Funnel from a Product Page
- How to Edit and Customise Funnel Steps
- Using CartFlows with or without Store Checkout
- How to Add /Assign Products to a Checkout Step
- How to Create One-Click Upsell and Downsell Offers
- How to Use Canvas Mode to Visualize Your Sales Funnel
- Hiding Fields on the Checkout Page
- Installing WooCommerce
- Using WooCommerce
- Adding Products in WooCommerce
- Using Your Theme's Header & Footer in a Step
- Embedding a Checkout Form on the Checkout Page
- Hiding WooCommerce Pages and Products
- Using Pricing Tables
- Adding an Affiliate Program
- Setting a Funnel as the Homepage
- Dynamic Offers aka Rule Engine
- Instant Layout for Checkout and Thank You Step
- Adding Products from the URL to the Checkout Page
- Deleting Plugin Data During Uninstallation
- Importing Ready-Made Templates for Funnels and Steps
- Importing and Exporting Funnels and Step
- URL Parameters
- Replacing the Main Checkout Order with an Upsell or Downsell
- Rolling back to a Previous Version
- Using the "Order Custom Field" Rule of Dynamic Offers with Custom Field Editor
- Adding Order Bumps to WooCommerce Sales Funnel
- Replacing the First Product on Checkout with Order Bump
- Dynamic (Conditional) Order Bumps
- Order Bump AI
- Positions and Styles
- How to Auto-Apply a Coupon When an Order Bump Is Accepted
- How to Add Variable Products to an Order Bump
- How to A/B Test Order Bumps in CartFlows
- Google Address Autocomplete
- Flatsome UX Builder
- ActiveCampaign
- Paypal Reference Transactions
- How PaypPal/Stripe Works
- Enabling Enfold Avia Layout Builder
- Setting Up Authorize.net for Upsell & Downsell
- Supported Payment Gateways
- Setting Quantity and Discount for Products on the Checkout Page
- Adding Custom Payment Gateway Support for One-Click Upsell and Downsell
- Funnel in Test Mode
- Troubleshooting Plugin and Theme Conflicts
- Resolving the "Please Select a Simple, Virtual, and Free Product" Error
- Fixing Endless Loading on the Checkout Page
- Fixing the "We can't seem to find an order for you." Error on the Thank You Page
- Troubleshooting License Activation Issues
- Fixing the "Checkout ID Not Found" Error
- Fixing the "Session Expired" Error Message
- Resolving "Order Does Not Exist" Error on Upsell/Downsell Page
- Fixing the "Sorry, This Product Cannot Be Purchased" Error
- Disabling Auto-fill of Address Fields Based on Zip Code
- Enabling Theme's Scripts & Styles Without Changing Page Template
- Disabling Auto-fill of Checkout Fields
- Allowing Cache Plugins to Cache CartFlows Pages
- Changing the "Choose a Variation" Text
- VAT Field Not Displaying for WooCommerce EU/UK VAT Compliance Plugin
- Enabling the Product Tab on Store Checkout
- Displaying the Order Summary Open on Mobile Devices
- Refreshing the Checkout Page After CartFlows AJAX Calls
- Overview
- Installing Modern Cart Starter
- Installing Modern Cart Pro
- Activating License Key
- Customizing General Settings
- Customizing Cart Tray Labels
- Customizing Cart Icon Settings
- Customizing Cart Tray Styling
- Understanding the Product Recommendations Feature
- Controlling Product Recommendation Source for Empty Cart
CartFlows Order Bump AI
CartFlows Pro includes Order Bump AI, a set of AI-assisted tools that help you choose which product to offer as an order bump and write the copy that goes with it. Instead of guessing which add-on will appeal to a shopper, or staring at a blank text field for the bump’s title and description, you can let AI make suggestions you can accept, tweak, or ignore.
This guide walks you through how Order Bump AI works, how to turn it on for a checkout step, and what your shoppers actually see.
How Order Bump AI Works
Order Bump AI adds two independent tools to any order bump on your checkout: one for picking the product, and one for writing the text around it.
- Product suggestions — AI looks at the product already in the bump (or a pool of products you choose) and recommends the one most likely to appeal to a shopper, along with a short reason.
- Automatic matching — Instead of one fixed product, you can let AI choose from a pool per shopper, based on what’s already in their cart.
- Written copy — AI can write the bump’s title, description, highlight text, and checkbox label for you, offering a few options to pick from.
Your shoppers never see anything labeled “AI.” They just see a normal order bump on checkout, one that’s more likely to be relevant to what they’re already buying.
How to Set Up Order Bump AI
Order Bump AI is configured per order bump, so you can use it on some bumps and leave others exactly as they are.
Step 1. From the WordPress admin, go to CartFlows → Funnels and open the funnel that contains your checkout step.
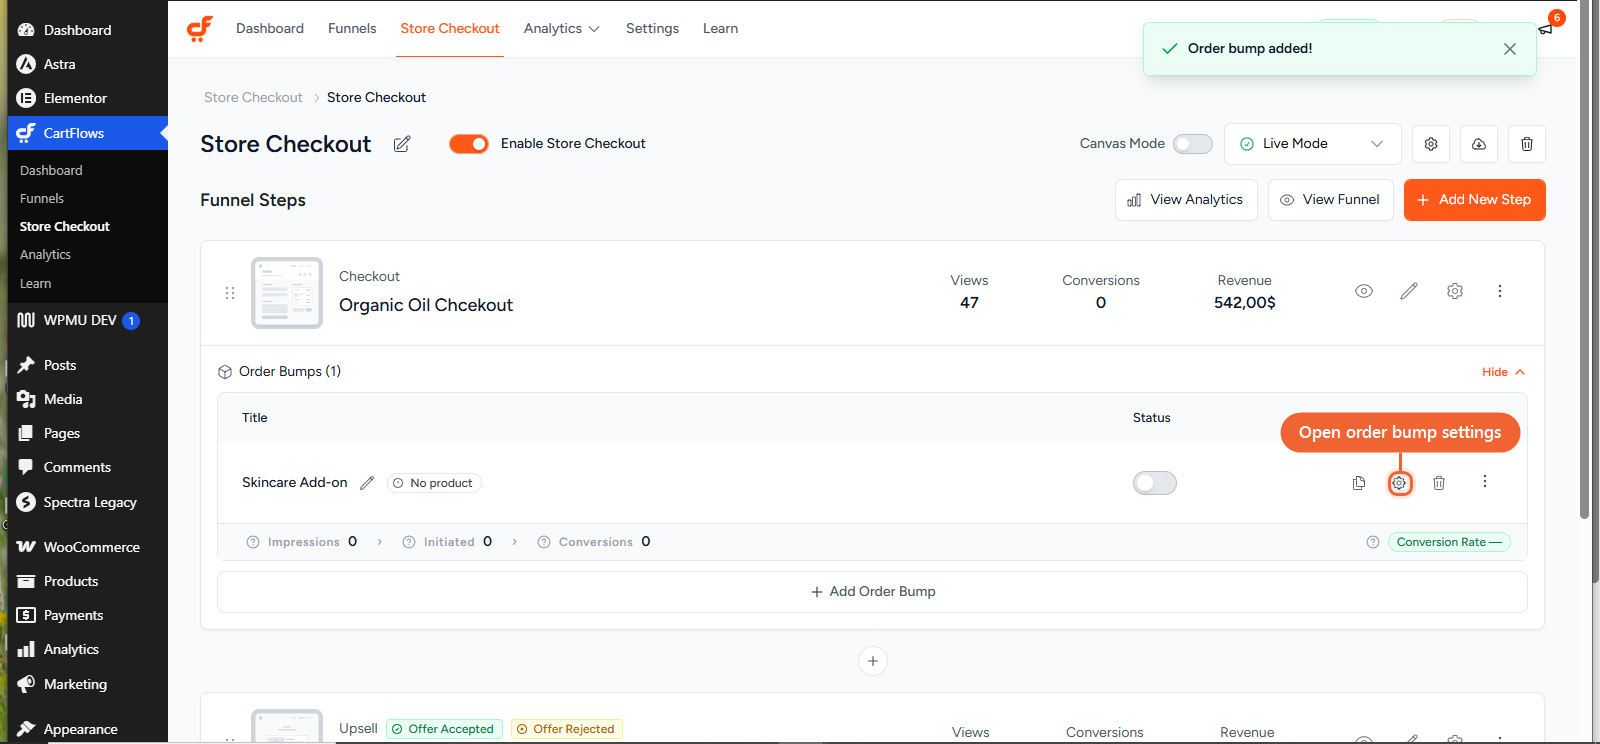
Step 2. Under that checkout step, you’ll see an Order Bumps section. If you don’t have one yet, click Add Order Bump and give it a name.
Step 3. Click the gear icon on the order bump you want to set up.
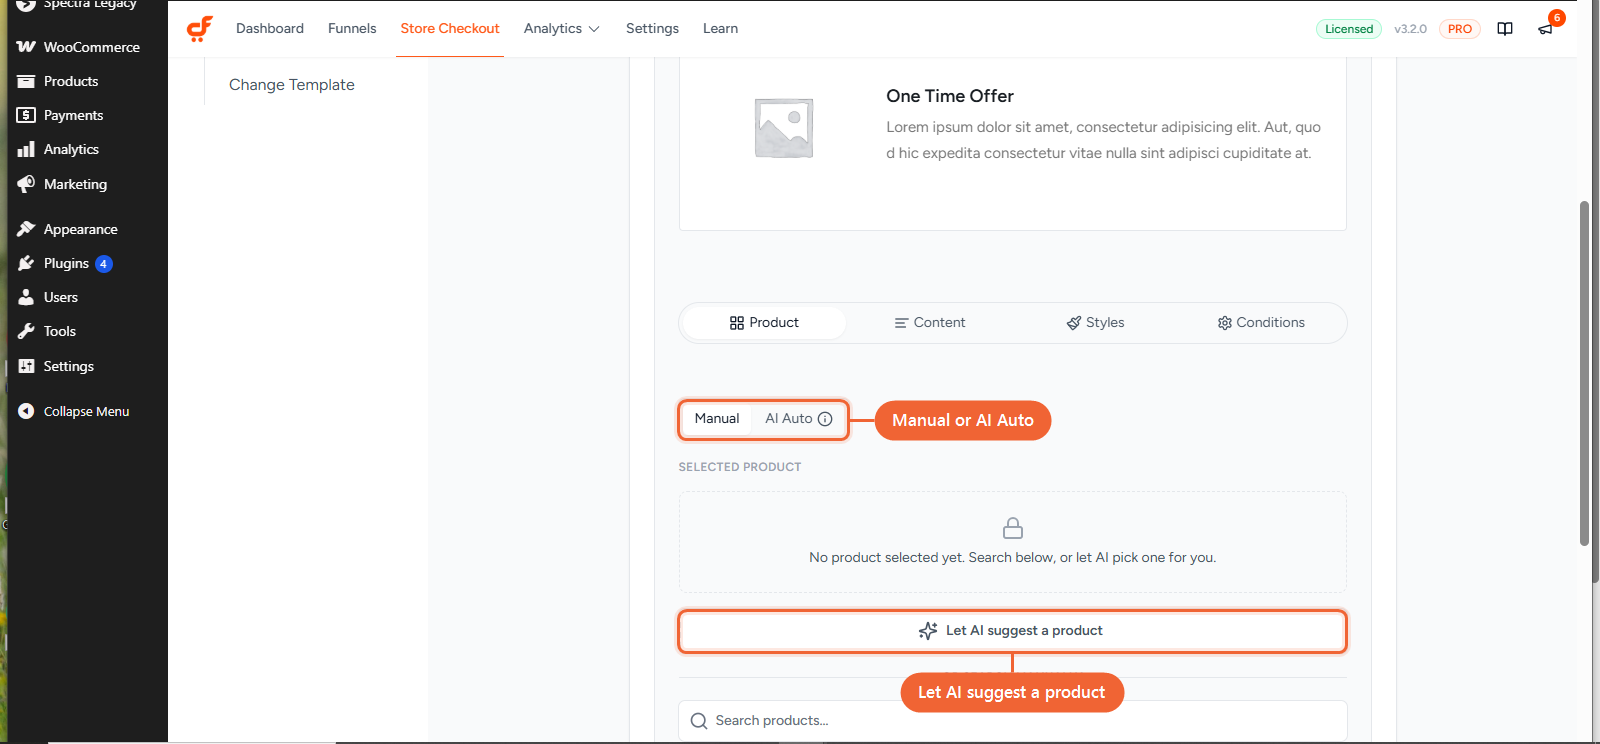
Step 4. On the Product tab, choose how you want the product selected:
- Manual (default) — Pick one fixed product for the bump, as usual.
- AI Auto — Build a pool of eligible products, and each shopper is shown whichever one AI judges most relevant to their cart.
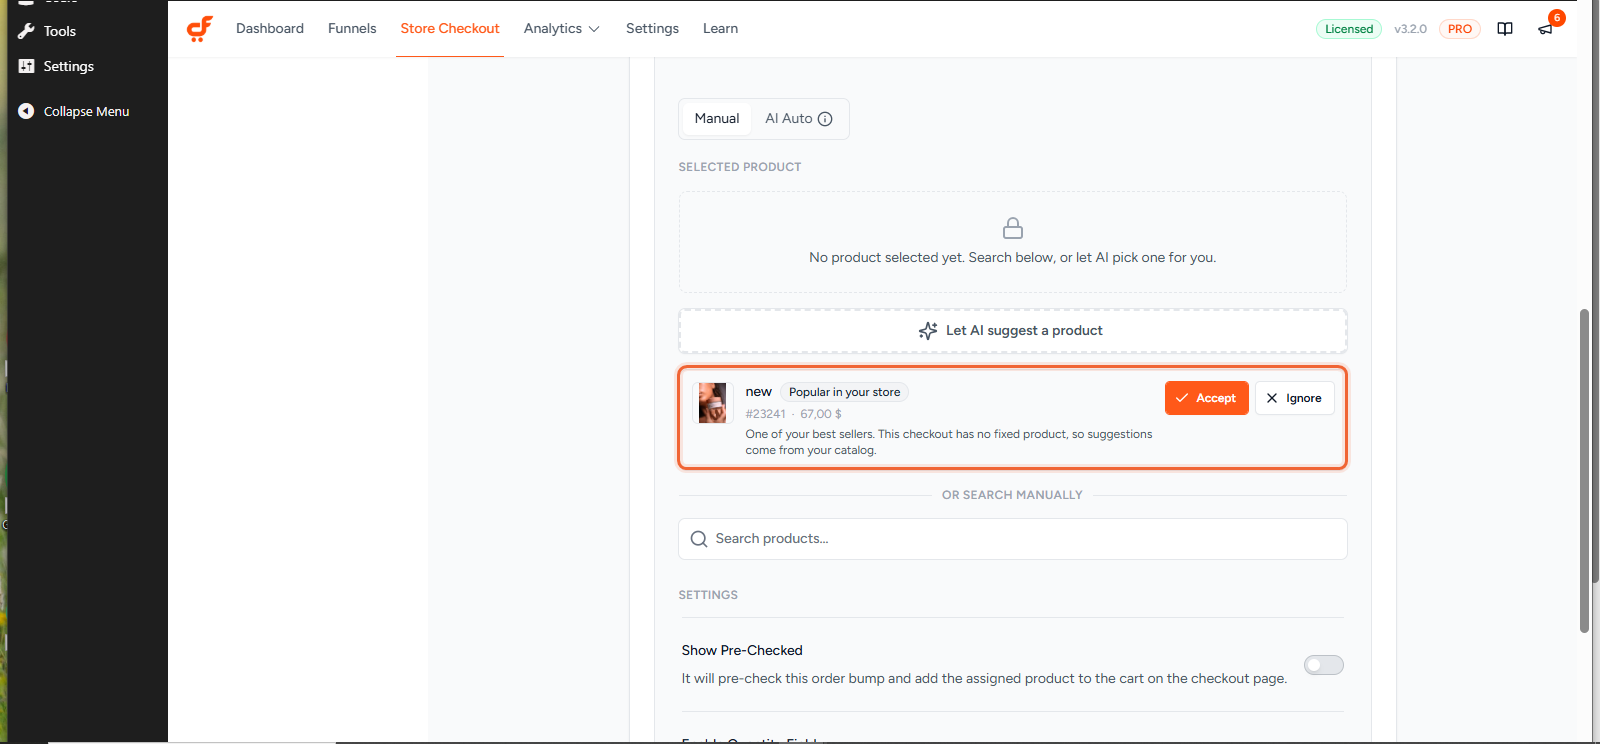
Step 5. If you’re using Manual mode, click Let AI suggest a product. AI returns one recommended product with a relevance badge and a short reason. Click Accept to use it, or Ignore to pick a different product yourself.
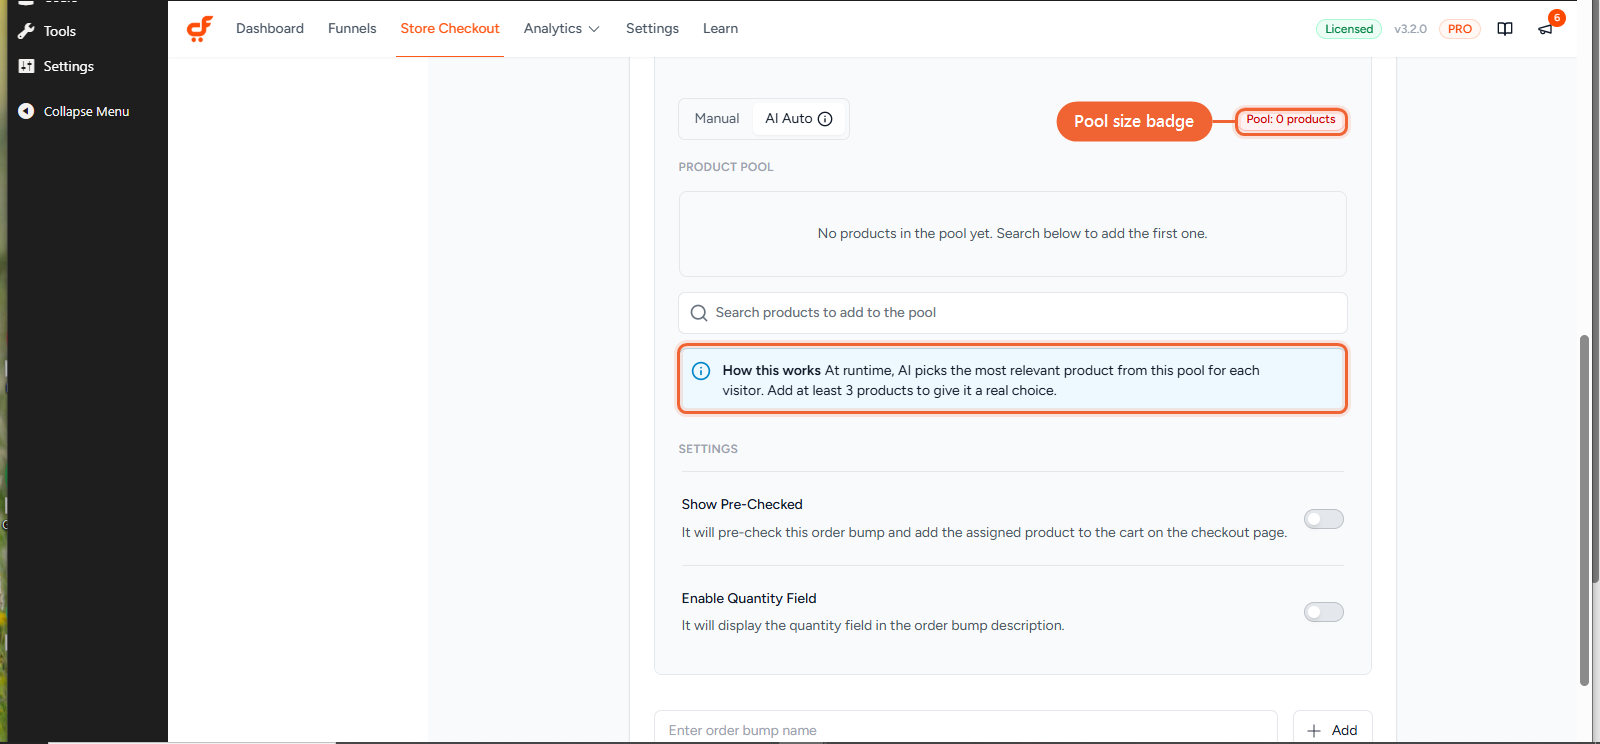
Step 6. If you’re using AI Auto mode, search for and add products to the pool. Each product keeps its own quantity and discount settings. Aim for at least 3 products in the pool. If you’re under that, you’ll see a badge reminding you that more products give AI better matches to work with.
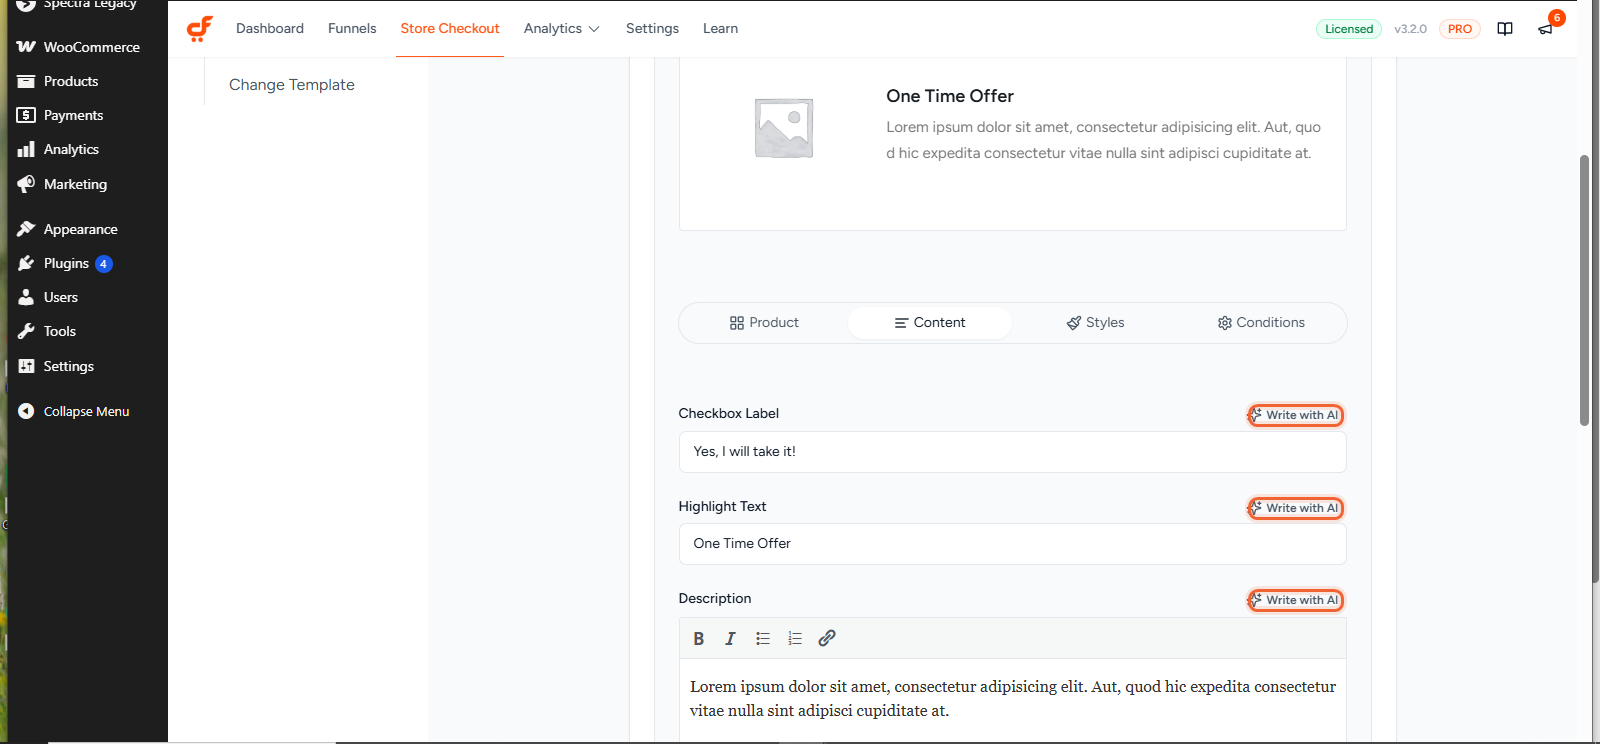
Step 7. Go to the Content tab. Next to the Checkbox Label, Highlight Text, and Description fields, click Write with AI. Review the options AI generates and click one to apply it, or click Regenerate for new options.
Step 8. Click Save Settings at the top right.
Order Bump AI is now active on that order bump.
Connecting to CartFlows AI
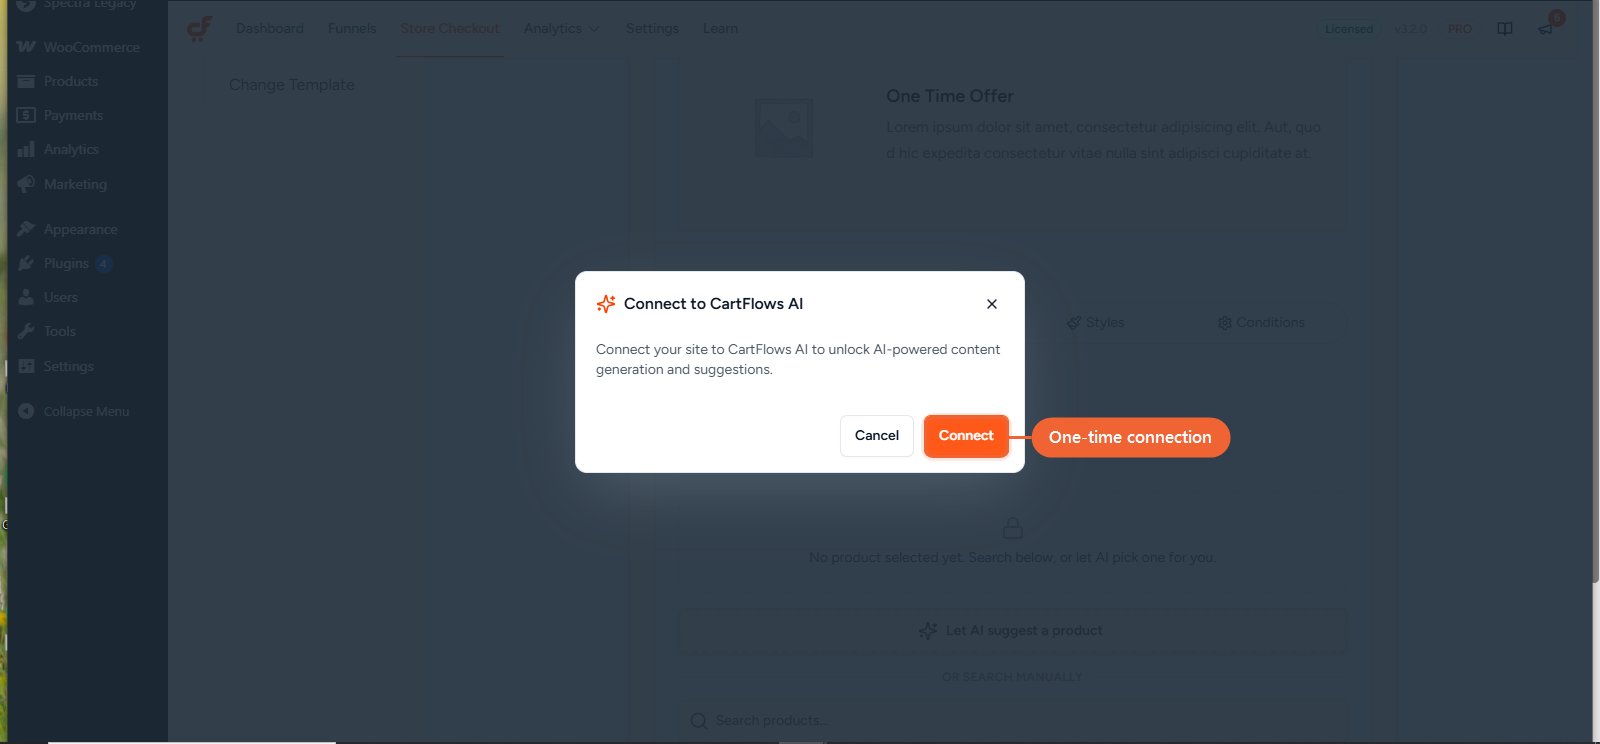
The first time you use any AI tool in CartFlows, you’ll be asked to Connect to CartFlows AI. This is a one-time, free account connection, separate from your CartFlows Pro license, and only users who can manage your site’s settings can set it up.
Order Bump AI in Action
On the frontend, an order bump set up with Order Bump AI looks exactly like any other order bump. There’s no AI label or badge shown to shoppers.
The one difference shoppers may notice is with AI Auto mode: since the product shown can vary from one shopper to the next based on their cart, two people checking out at the same time might see different bump offers. Once a shopper has been shown a product (or accepted the bump), that same product stays consistent for them through the rest of checkout.
If AI can’t find a suitable product for a shopper’s cart, for example if your product pool is too narrow, the bump is simply skipped rather than showing something irrelevant.
Frequently Asked Questions
We don't respond to the article feedback, we use it to improve our support content.