- Hiding Fields on the Checkout Page
- Installing WooCommerce
- Using WooCommerce
- Using Your Theme's Header & Footer in a Step
- Embedding a Checkout Form on the CartFlows Checkout Page
- Hiding WooCommerce Pages and Products
- Using Pricing Tables
- Adding an Affiliate Program
- Setting a Funnel as the Homepage
- GDPR Compliance
- Dynamic Offers aka Rule Engine
- Instant Layout for Checkout and Thank You Step
- Adding Products from the URL to the Checkout Page
- Setting Up A/B Testing for Steps
- Deleting Plugin Data During Uninstallation
- Importing Ready-Made Templates for Funnels and Steps
- Importing and Exporting Funnels and Step
- URL Parameters
- Replacing the Main Checkout Order with an Upsell or Downsell
- Rolling back to a Previous Version
- Using the "Order Custom Field" Rule of Dynamic Offers with Custom Field Editor
- Optin
- Separate Orders
- Setting Up Pre-Checkout Upsell
- Refund Offer
- Applying a Coupon from the URL
- CartFlows Instant Layout Now Available for Upsell & Downsell Steps
- Google Address Autocomplete
- Flatsome UX Builder
- ActiveCampaign
- Paypal Reference Transactions
- How PaypPal/Stripe Works
- Enabling Enfold Avia Layout Builder
- Setting Up Authorize.net for Upsell & Downsell
- Supported Payment Gateways
- Setting Up A/B Testing with Google Optimize
- Setting Quantity and Discount for Products on the Checkout Page
- Funnel in Test Mode
- Troubleshooting Plugin and Theme Conflicts
- Resolving the "Please Select a Simple, Virtual, and Free Product" Error
- Fixing Endless Loading on the Checkout Page
- Fixing the "We can't seem to find an order for you." Error on the Thank You Page
- Fixing the "Checkout ID Not Found" Error
- Fixing the "Session Expired" Error Message
- Resolving "Order Does Not Exist" Error on Upsell/Downsell Page
- Fixing the "Sorry, This Product Cannot Be Purchased" Error
- Resolving "No Product is Selected" Error
- Disabling Auto-fill of Address Fields Based on Zip Code
- Enabling Theme's Scripts & Styles Without Changing Page Template
- Disabling Auto-fill of Checkout Fields
- Allowing Cache Plugins to Cache CartFlows Pages
- Changing the "Choose a Variation" Text
- VAT Field Not Displaying for WooCommerce EU/UK VAT Compliance Plugin
- Enabling the Product Tab on Store Checkout
- Displaying the Order Summary Open on Mobile Devices
- Refreshing the Checkout Page After CartFlows AJAX Calls
How to Add Products to the Checkout Page via URL
CartFlows Pro includes a feature that allows you to add products directly to the Checkout page using URL parameters. This makes it easy to dynamically pre-fill the cart based on the link a user clicks — great for personalized offers, email campaigns, and landing pages.
This documentation explains how the feature works, how to structure your URLs, and how to find the product ID required for this functionality.
How the Feature Works
This feature is enabled by default in CartFlows Pro — there’s no need to activate it manually. All you need to do is:
- Use a product ID in the URL to add that item to the cart on the Checkout page
- Optionally include the quantity for each item
When a user opens the Checkout page URL with the appropriate parameter(s), the specified product(s) will automatically appear in the cart.
URL Parameters Format
To add a product to the Checkout page via URL, use the following parameters:
- ?wcf-add-to-cart=product_id
- &wcf-qty=quantity (optional – defaults to 1 if not specified)
Single Product Example
If you want to add Product ID 3 with a quantity of 4, the URL would look like:
https://yourdomain.com/checkout-page/?wcf-add-to-cart=3&wcf-qty=4If you omit the wcf-qty parameter, the default quantity will be 1.
Multiple Products Example
To add multiple products with different quantities, separate each ID and quantity with commas. For example:
https://yourdomain.com/checkout-page/?wcf-add-to-cart=3,6&wcf-qty=4,8This will add Product ID 3 with quantity 4 and Product ID 6 with quantity 8.
Important Notes
If you’ve already selected products in the backend of the Checkout step, and you also pass product IDs via URL — only the products from the URL will be used. The backend-selected products will be ignored.
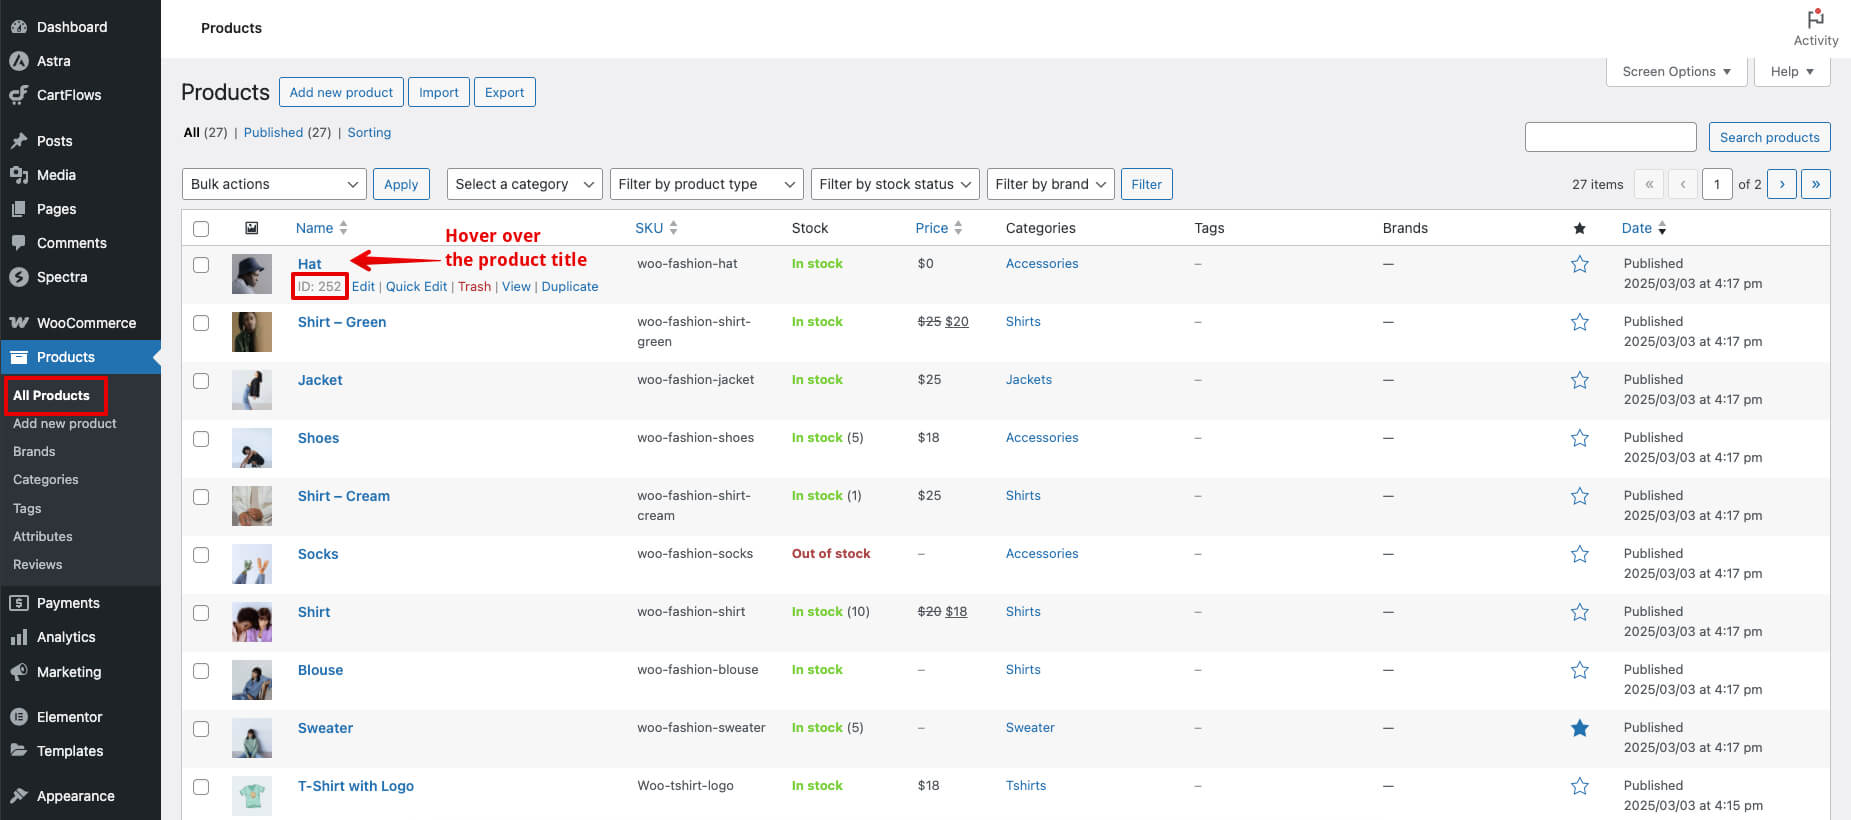
How to Find the Product ID
To locate a product’s ID in WooCommerce:
- Go to Products > All Products in your WordPress admin
- Hover your mouse over the product title
- You’ll see the product ID appear below the product title

We don't respond to the article feedback, we use it to improve our support content.
