- Google Address Autocomplete
- Flatsome UX Builder
- ActiveCampaign
- Paypal Reference Transactions
- How PaypPal/Stripe Works
- Enabling Enfold Avia Layout Builder
- Setting Up Authorize.net for Upsell & Downsell
- Supported Payment Gateways
- Setting Up A/B Testing with Google Optimize
- Setting Quantity and Discount for Products on the Checkout Page
- Adding Custom Support for Payment Gateways in One-Click Upsell & Downsell
- Creating Subscription Products in WooCommerce for CartFlows Pages
- Supported Multi-Currency Plugins
- Enabling/Disabling Shipping Fields and Ship to Different Address
- Enabling/Adding Coupons on the Checkout Page
- Displaying Account Creation Fields on the Checkout Page
- Setting Up Square Gateway for Upsell & Downsell
- CartFlows Elementor Widgets
- CartFlows Beaver Builder Modules
- CartFlows Block Editor Blocks
- Importing Divi Templates
- Bricks Builder
- OttoKit
- Connecting Stripe Payment Gateway
- LearnDash
- Facebook Pixel
- How to Enable TikTok Pixel Tracking in CartFlows?
- Google Ads Pixel
- How to Enable Pinterest Pixel Tracking in CartFlows?
- How to Enable Snapchat Pixel Tracking in CartFlows?
- Using CartFlows with Beaver Builder
- Hiding Fields on the Checkout Page
- Installing WooCommerce
- Using WooCommerce
- Using Your Theme's Header & Footer in a Step
- Embedding a Checkout Form on the CartFlows Checkout Page
- Hiding WooCommerce Pages and Products
- Using Pricing Tables
- Adding an Affiliate Program
- Setting a Flow as the Homepage
- Dynamic Offers aka Rule Engine
- Instant Layout for Checkout and Thank You Step
- Adding Products from the URL to the Checkout Page
- Setting Up A/B Testing for Steps
- Deleting Plugin Data During Uninstallation
- Importing Ready-Made Templates for Flows and Steps
- Importing and Exporting Funnels and Individual Page Builder Templates
- URL Parameters
- Replacing the Main Checkout Order with an Upsell or Downsell
- Rolling back to a Previous Version
- Flow in Test Mode
- Troubleshooting Plugin and Theme Conflicts
- Resolving the "Please Select a Simple, Virtual, and Free Product" Error
- Resolving the Endless Loading Issue on Checkout
- Resolving the "Order Not Found" Error on Thank You Page
- Resolving the "Checkout ID Not Found" Error
- Resolving the "Session Expired" Error
- Resolving "Order Does Not Exist" Error on Upsell/Downsell Page
- Fixing the "Sorry, This Product Cannot Be Purchased" Error
- Resolving "No Product is Selected" Error
- Disabling Auto-fill of Address Fields Based on Zip Code
- Enabling Theme's Scripts & Styles Without Changing Page Template
- Disabling Auto-fill of Checkout Fields
- Allowing Cache Plugins to Cache CartFlows Pages
- Changing the "Choose a Variation" Text
- VAT Field Not Displaying for WooCommerce EU/UK VAT Compliance Plugin
- Enabling the Product Tab on Store Checkout
- Displaying the Order Summary Open on Mobile Devices
OttoKit Integration in CartFlows
With CartFlows’ new OttoKit integration, WooCommerce store owners can automate and streamline tasks to boost efficiency and engagement. OttoKit enables easy setup of workflows to track actions, like opt-ins or upsell responses, directly from the CartFlows UI. This integration supports targeted marketing, CRM updates, and email triggers based on user interactions, all without switching tools.
What is OttoKit?
OttoKit is an automation platform designed to connect different apps and streamline tasks by setting up automated workflows (or “triggers”) based on specific events or actions.
Visit OttoKit website: https://ottokit.com/.
How to use OttoKit Integration?
Step 1: In your CartFlows dashboard, find a new menu option labeled ‘Automation’.
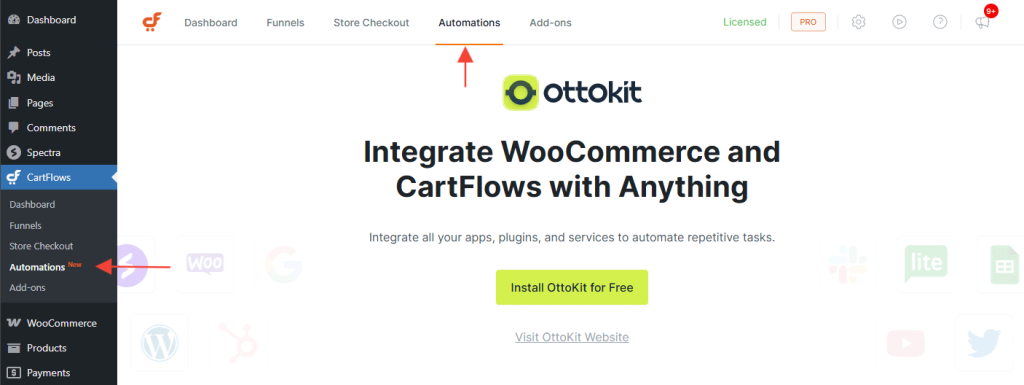
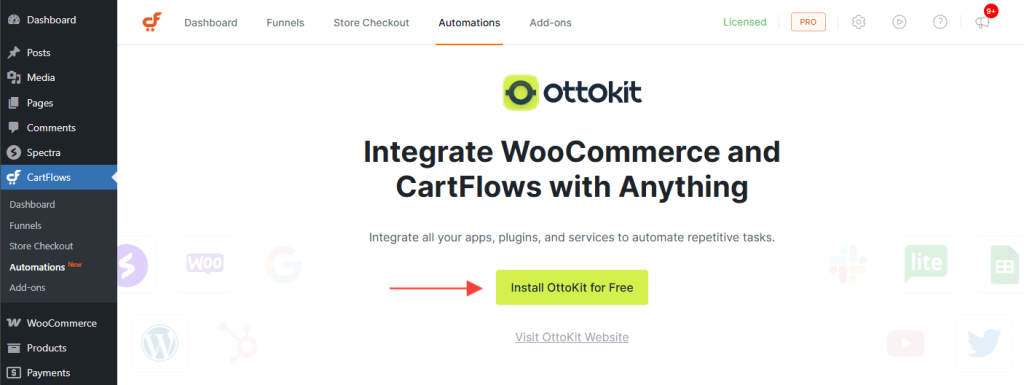
Step 2: If you do not have ‘OttoKit’ installed already, you can install ‘OttoKit’ from the ‘Automations’ tab or If you already have ‘OttoKit’ installed, you will see the option to ‘Create Workflow’.
To create workflows specific to individual funnel steps (like checkout, upsell, or downsell), follow these steps:
Step 1: Open the funnel editing page, and locate the ‘Automation’ option within the options menu for the checkout, upsell, or downsell step.
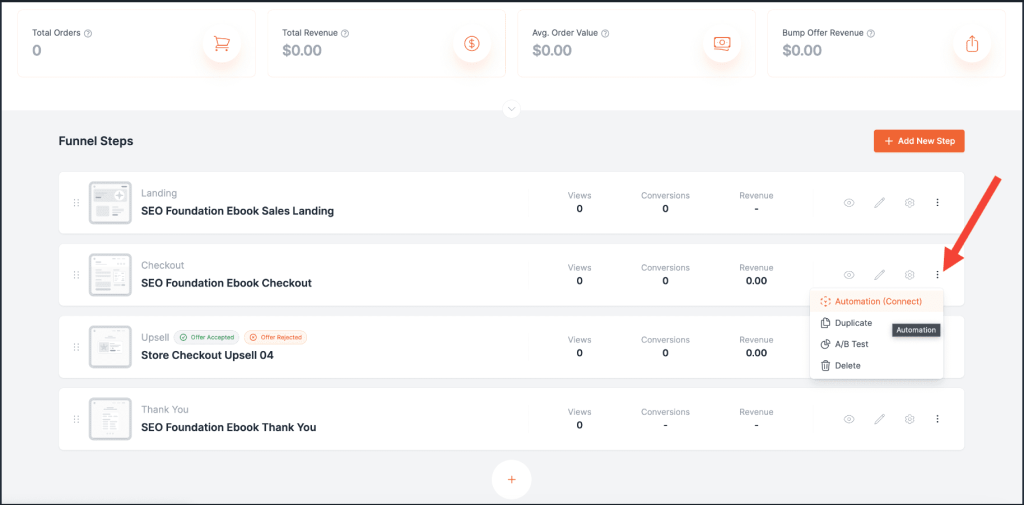
Step 2: Click ‘Automation’ to open a dedicated OttoKit window where you can set up workflows specifically for that step.
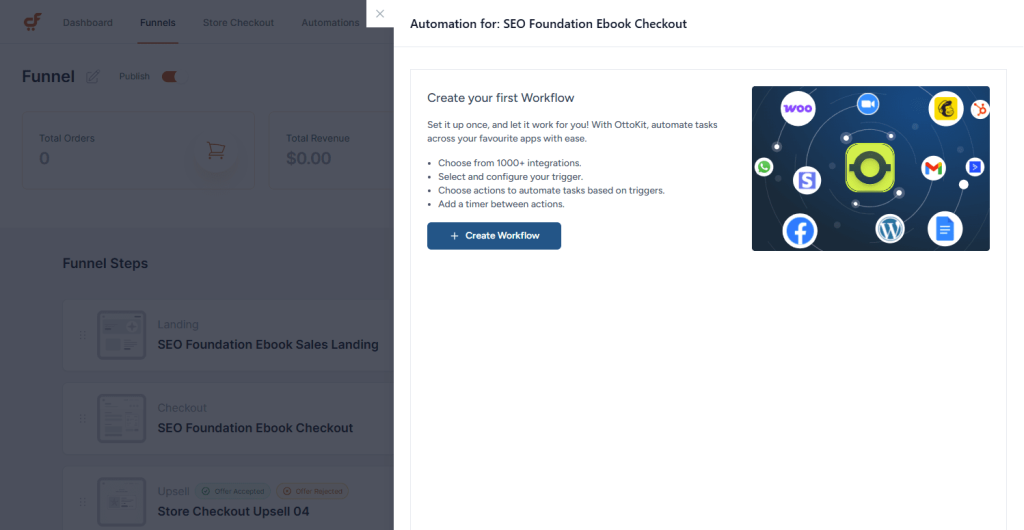
Pro tip: The created Workflows will also show up independently in your OttoKit account. Any changes you make will be reflected on both your CartFlows dashboard and the OttoKit account.
Example: Add users who declined the upsell into Google Sheets
Create an automation workflow in OttoKit by selecting ‘CartFlows’ as the app and choosing ‘Upsell Declined’ as the event.

Connect OttoKit to CartFlows. If you need help with this, refer to this article: https://ottokit.com/docs/connect-suretriggers-with-wordpress-plugins/ and Connect OttoKit with WordPress.

In the Configure tab, select your funnel and the upsell step.

Go to the Test tab, click ‘Fetch Data’ to check the connection, and then click ‘Save.’

For the next step, choose the action app by searching for or selecting it; in this example, we’re using Google Sheets.
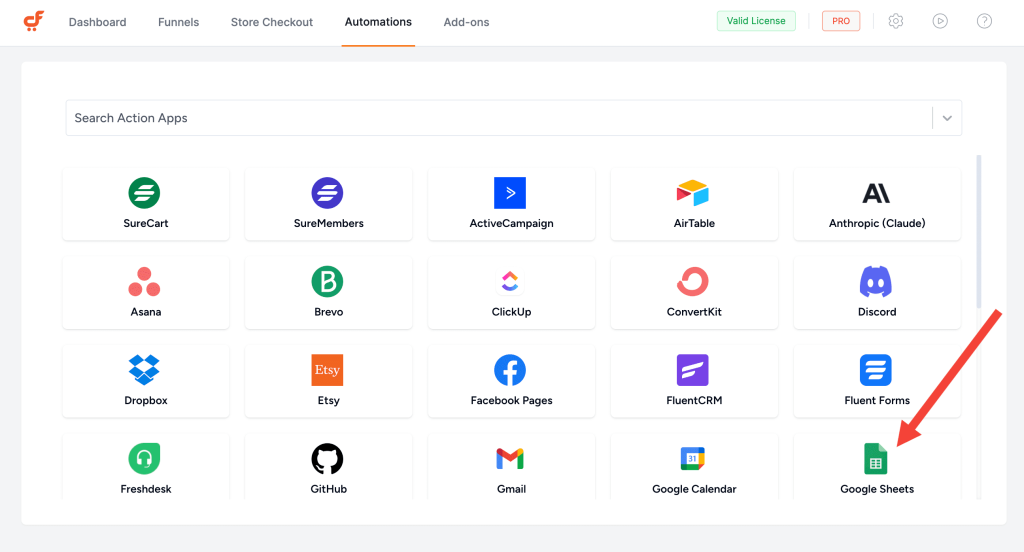
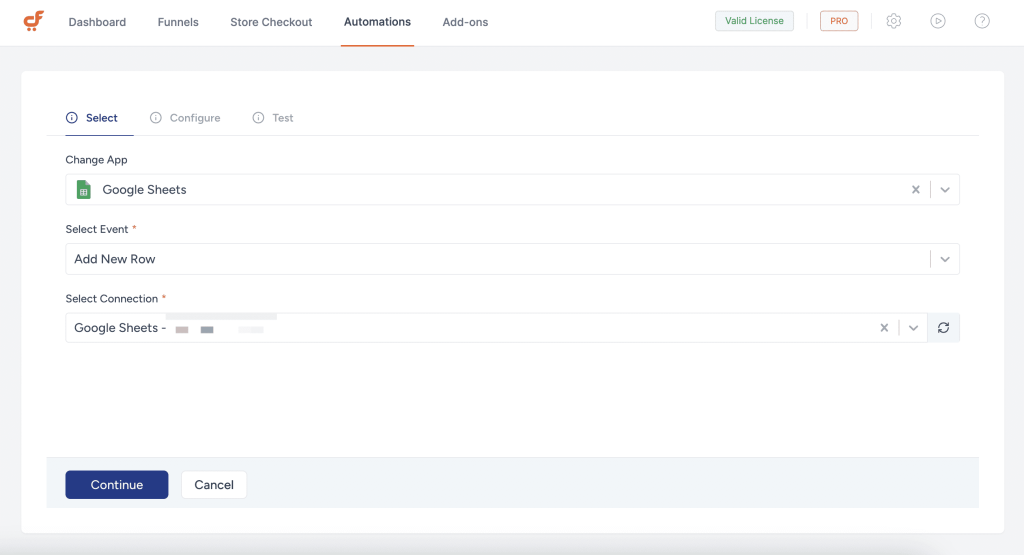
Connect Google Sheets, and choose the event type—’Add New Row’ in this case. Then, select your spreadsheet and worksheet.

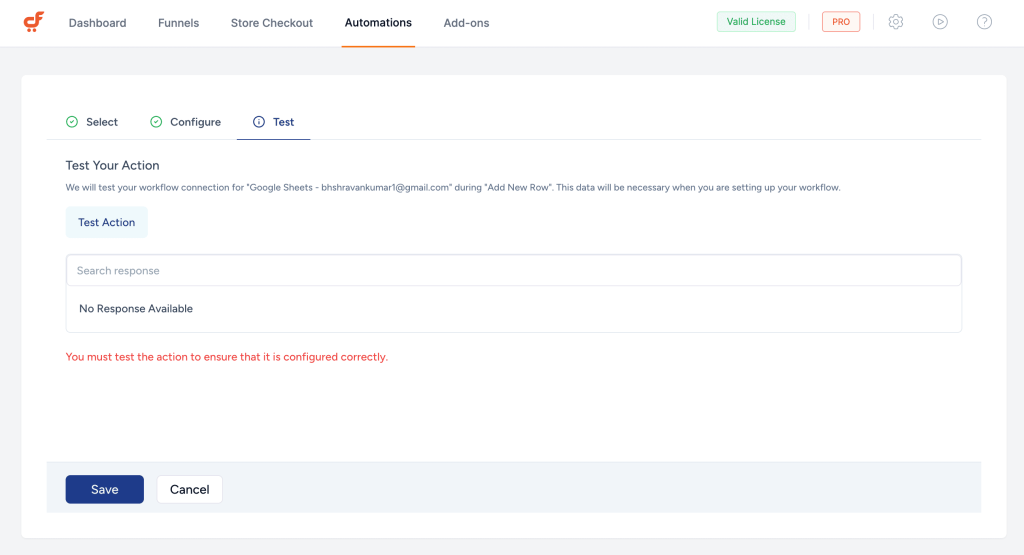
Test the connection by clicking ‘Test Action.’
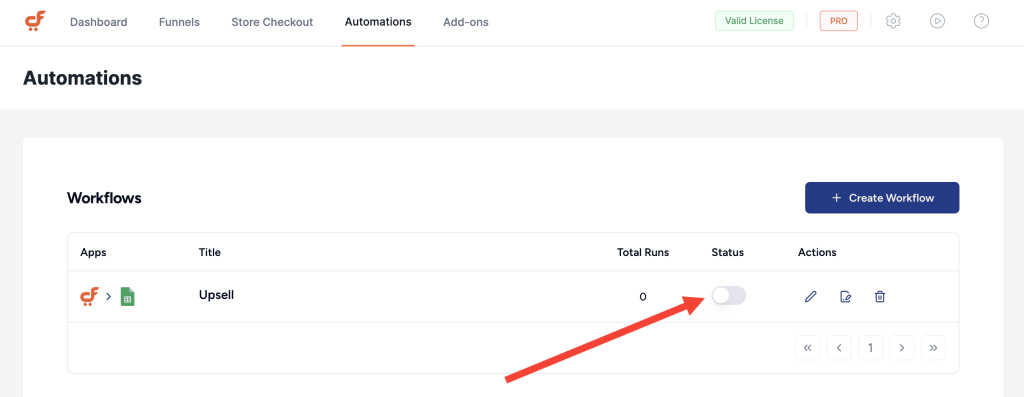
Once done, activate the workflow. Now, each time a user declines the upsell, their information will automatically be added to your Google Sheets.
We don't respond to the article feedback, we use it to improve our support content.
