- Hiding Fields on the Checkout Page
- Installing WooCommerce
- Using WooCommerce
- Using Your Theme's Header & Footer in a Step
- Embedding a Checkout Form on the CartFlows Checkout Page
- Hiding WooCommerce Pages and Products
- Using Pricing Tables
- Adding an Affiliate Program
- Setting a Funnel as the Homepage
- GDPR Compliance
- Dynamic Offers aka Rule Engine
- Instant Layout for Checkout and Thank You Step
- Adding Products from the URL to the Checkout Page
- Setting Up A/B Testing for Steps
- Deleting Plugin Data During Uninstallation
- Importing Ready-Made Templates for Funnels and Steps
- Importing and Exporting Funnels and Step
- URL Parameters
- Replacing the Main Checkout Order with an Upsell or Downsell
- Rolling back to a Previous Version
- Using the "Order Custom Field" Rule of Dynamic Offers with Custom Field Editor
- Optin
- Separate Orders
- Setting Up Pre-Checkout Upsell
- Refund Offer
- Applying a Coupon from the URL
- Instant Layout for Upsell and Downsell
- Google Address Autocomplete
- Flatsome UX Builder
- ActiveCampaign
- Paypal Reference Transactions
- How PaypPal/Stripe Works
- Enabling Enfold Avia Layout Builder
- Setting Up Authorize.net for Upsell & Downsell
- Supported Payment Gateways
- Setting Up A/B Testing with Google Optimize
- Setting Quantity and Discount for Products on the Checkout Page
- Funnel in Test Mode
- Troubleshooting Plugin and Theme Conflicts
- Resolving the "Please Select a Simple, Virtual, and Free Product" Error
- Fixing Endless Loading on the Checkout Page
- Fixing the "We can't seem to find an order for you." Error on the Thank You Page
- Troubleshooting License Activation Issues
- Fixing the "Checkout ID Not Found" Error
- Fixing the "Session Expired" Error Message
- Resolving "Order Does Not Exist" Error on Upsell/Downsell Page
- Fixing the "Sorry, This Product Cannot Be Purchased" Error
- Disabling Auto-fill of Address Fields Based on Zip Code
- Enabling Theme's Scripts & Styles Without Changing Page Template
- Disabling Auto-fill of Checkout Fields
- Allowing Cache Plugins to Cache CartFlows Pages
- Changing the "Choose a Variation" Text
- VAT Field Not Displaying for WooCommerce EU/UK VAT Compliance Plugin
- Enabling the Product Tab on Store Checkout
- Displaying the Order Summary Open on Mobile Devices
- Refreshing the Checkout Page After CartFlows AJAX Calls
- Overview
- Installing Modern Cart Starter
- Installing Modern Cart for WooCommerce
- Activating License Key
- Customizing General Settings
- Customizing Cart Tray Labels
- Customizing Cart Icon Settings
- Customizing Cart Tray Styling
- Understanding the Product Recommendations Feature
- Controlling Product Recommendation Source for Empty Cart
CartFlows Instant Layout for Checkout & Thank You Step
CartFlows offers an Instant layout for Checkout and Thank you steps designed for quick, digital product sales. This layout features a clean and minimal user interface, optimized for selling items like e-books, music, and other digital goods. It removes unnecessary distractions and skips the need for page builders, offering a fast and simple checkout process.
Inspired by Shopify’s fast-checkout experience, this layout includes a modern, conversion-focused design with essential customization options. It’s ideal for users who want a straightforward solution that integrates seamlessly with their existing CartFlows funnels or store checkout.
How To Set Up Instant Layout
Step 1: Import a ready-made funnel or create one from scratch.
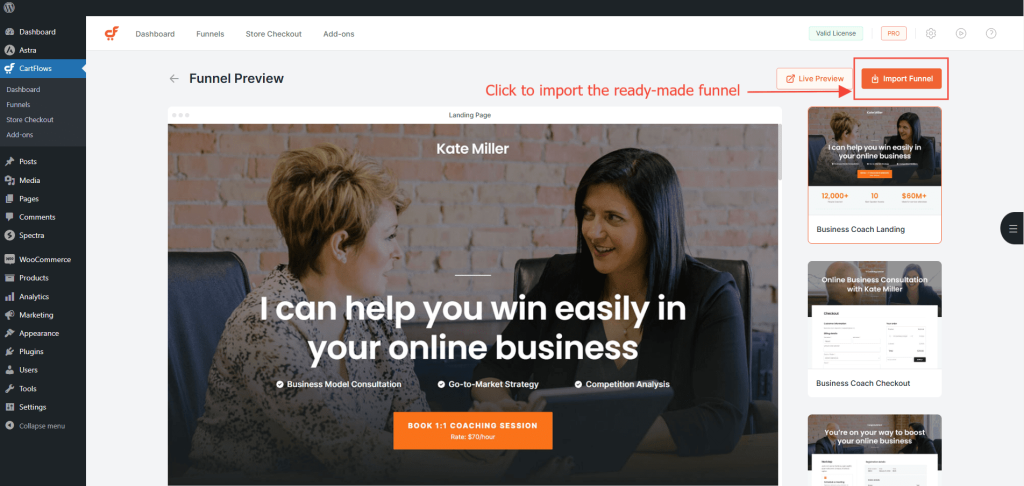
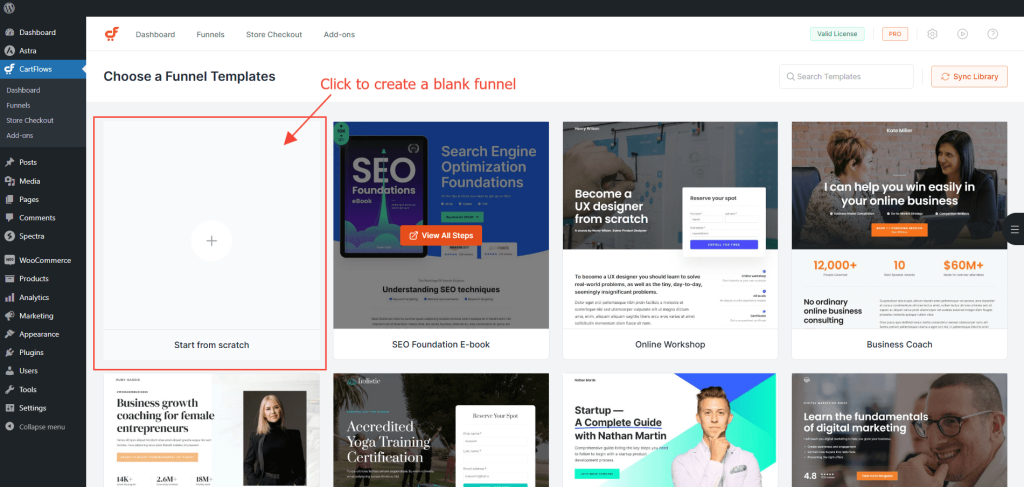
Step 2: Click on the funnel name to open the funnel steps.
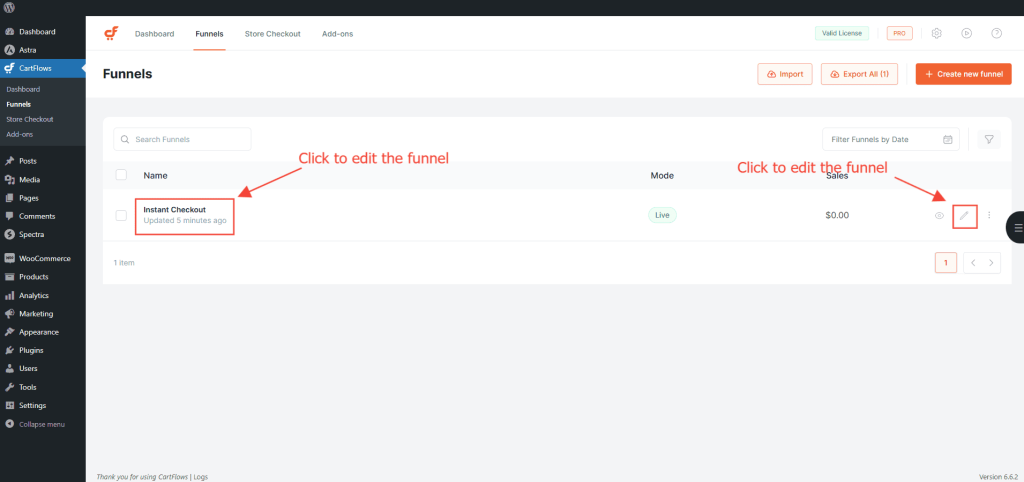
Step 3: On the funnel edit screen, you’ll see a list of all the steps in your funnel.
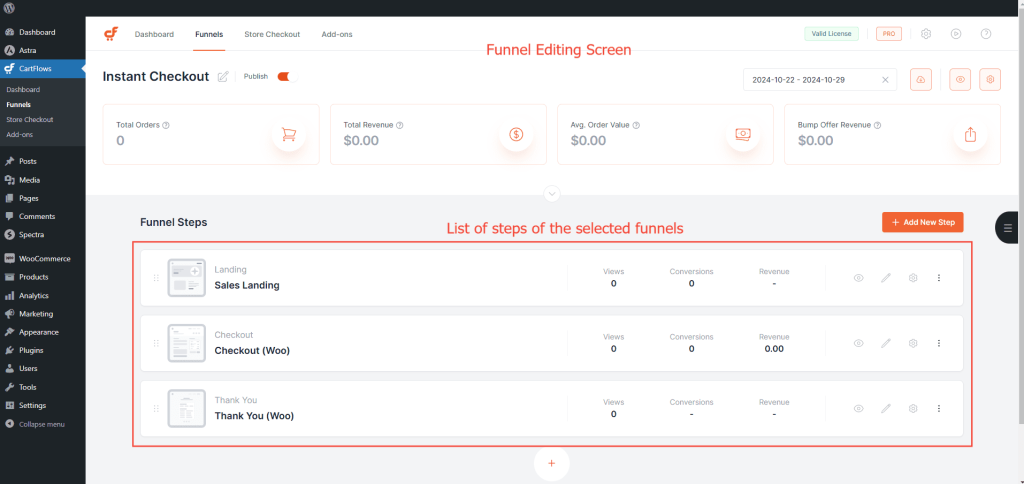
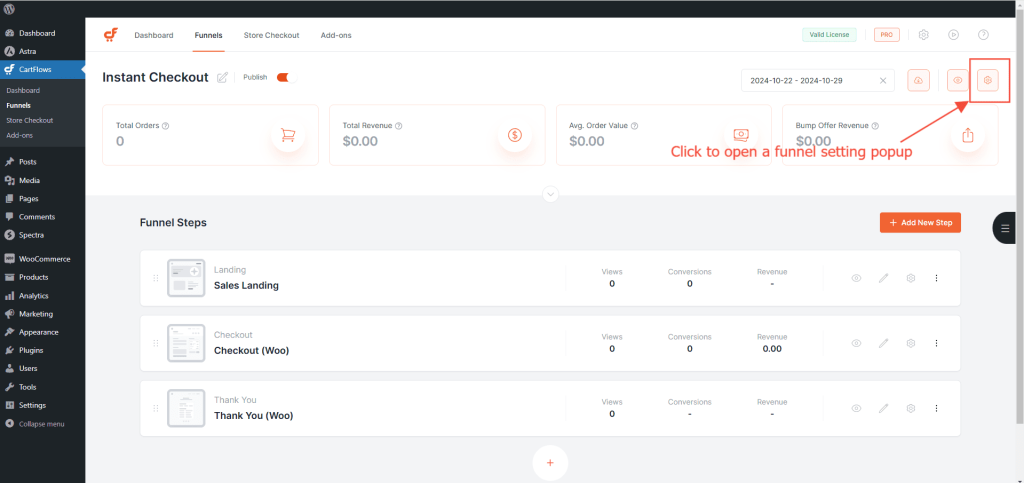
Step 4: Click the Settings button (cog icon) in the top-right corner of the screen.
Step 5: Navigate to the Instant Layout section.
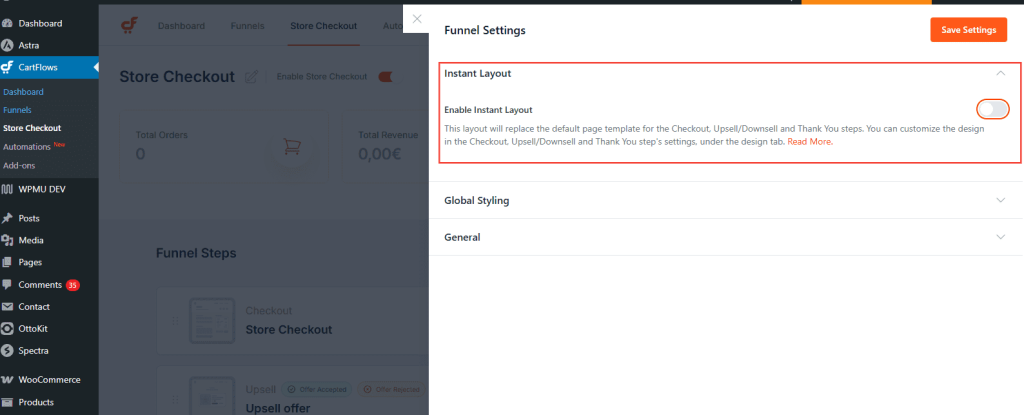
Step 6: Enable the toggle to activate the Instant layout for both the Checkout and Thank You steps.
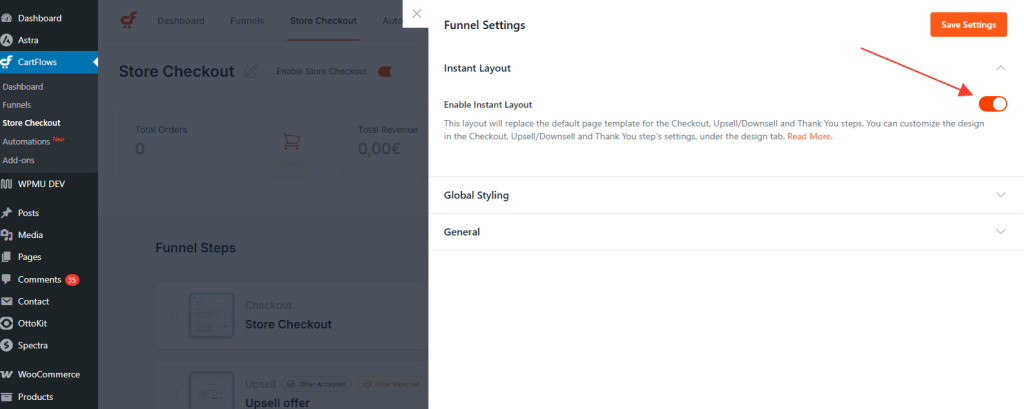
Once enabled, this layout will be applied immediately, giving your customers a fast and focused checkout experience.
We don't respond to the article feedback, we use it to improve our support content.