- Hiding Fields on the Checkout Page
- Installing WooCommerce
- Using WooCommerce
- Adding Products in WooCommerce
- Using Your Theme's Header & Footer in a Step
- Embedding a Checkout Form on the CartFlows Checkout Page
- Hiding WooCommerce Pages and Products
- Using Pricing Tables
- Adding an Affiliate Program
- Setting a Funnel as the Homepage
- Dynamic Offers aka Rule Engine
- Instant Layout for Checkout and Thank You Step
- Adding Products from the URL to the Checkout Page
- Setting Up A/B Testing for Steps
- Deleting Plugin Data During Uninstallation
- Importing Ready-Made Templates for Funnels and Steps
- Importing and Exporting Funnels and Step
- URL Parameters
- Replacing the Main Checkout Order with an Upsell or Downsell
- Rolling back to a Previous Version
- Google Address Autocomplete
- Flatsome UX Builder
- ActiveCampaign
- Paypal Reference Transactions
- How PaypPal/Stripe Works
- Enabling Enfold Avia Layout Builder
- Setting Up Authorize.net for Upsell & Downsell
- Supported Payment Gateways
- Setting Quantity and Discount for Products on the Checkout Page
- Adding Custom Payment Gateway Support for One-Click Upsell and Downsell
- Creating Subscription Products with CartFlows
- Supported Multi-Currency Plugins
- Enabling/Disabling Shipping Fields and Ship to Different Address
- Enabling/Adding Coupons on the Checkout Page
- Displaying Account Creation Fields on the Checkout Page
- Setting Up Square Gateway for Upsell & Downsell
- CartFlows Elementor Widgets
- CartFlows Beaver Builder Modules
- CartFlows Block Editor Blocks
- Importing Divi Templates
- Bricks Builder
- OttoKit
- Connecting Stripe Payment Gateway
- LearnDash
- Facebook Pixel
- TikTok Pixel Tracking
- Google Ads Pixel
- Pinterest Pixel Tracking
- How to Enable Snapchat Pixel Tracking in CartFlows?
- Funnel in Test Mode
- Troubleshooting Plugin and Theme Conflicts
- Resolving the "Please Select a Simple, Virtual, and Free Product" Error
- Fixing Endless Loading on the Checkout Page
- Fixing the "We can't seem to find an order for you." Error on the Thank You Page
- Troubleshooting License Activation Issues
- Fixing the "Checkout ID Not Found" Error
- Fixing the "Session Expired" Error Message
- Resolving "Order Does Not Exist" Error on Upsell/Downsell Page
- Fixing the "Sorry, This Product Cannot Be Purchased" Error
- Disabling Auto-fill of Address Fields Based on Zip Code
- Enabling Theme's Scripts & Styles Without Changing Page Template
- Disabling Auto-fill of Checkout Fields
- Allowing Cache Plugins to Cache CartFlows Pages
- Changing the "Choose a Variation" Text
- VAT Field Not Displaying for WooCommerce EU/UK VAT Compliance Plugin
- Enabling the Product Tab on Store Checkout
- Displaying the Order Summary Open on Mobile Devices
- Refreshing the Checkout Page After CartFlows AJAX Calls
- Overview
- Installing Modern Cart Starter
- Installing Modern Cart Pro
- Activating License Key
- Customizing General Settings
- Customizing Cart Tray Labels
- Customizing Cart Icon Settings
- Customizing Cart Tray Styling
- Understanding the Product Recommendations Feature
- Controlling Product Recommendation Source for Empty Cart
CartFlows Block Editor Blocks
CartFlows now includes native WordPress blocks, making it easier to build and customize your funnel steps using the Block Editor.
These blocks are designed to streamline the funnel-building process and are categorized into blocks available in both the Free and Pro versions.
Available Blocks
You’ll find dedicated blocks for each CartFlows funnel step:
- Next Step Button / Link Block
- Opt-in Form Block
- Checkout Form Block
- Upsell & Downsell Offer Blocks (includes variations and Accept/Reject options)
- Order Review Block (for Thank You page)
Note: Each block only appears within its relevant funnel step in the editor. For example, the Next Step Button block will only show when editing a Landing Page.
Step-Wise Breakdown of Blocks & Settings
1. Landing Page – Next Step Button Block
This block allows you to guide users to the next funnel step.
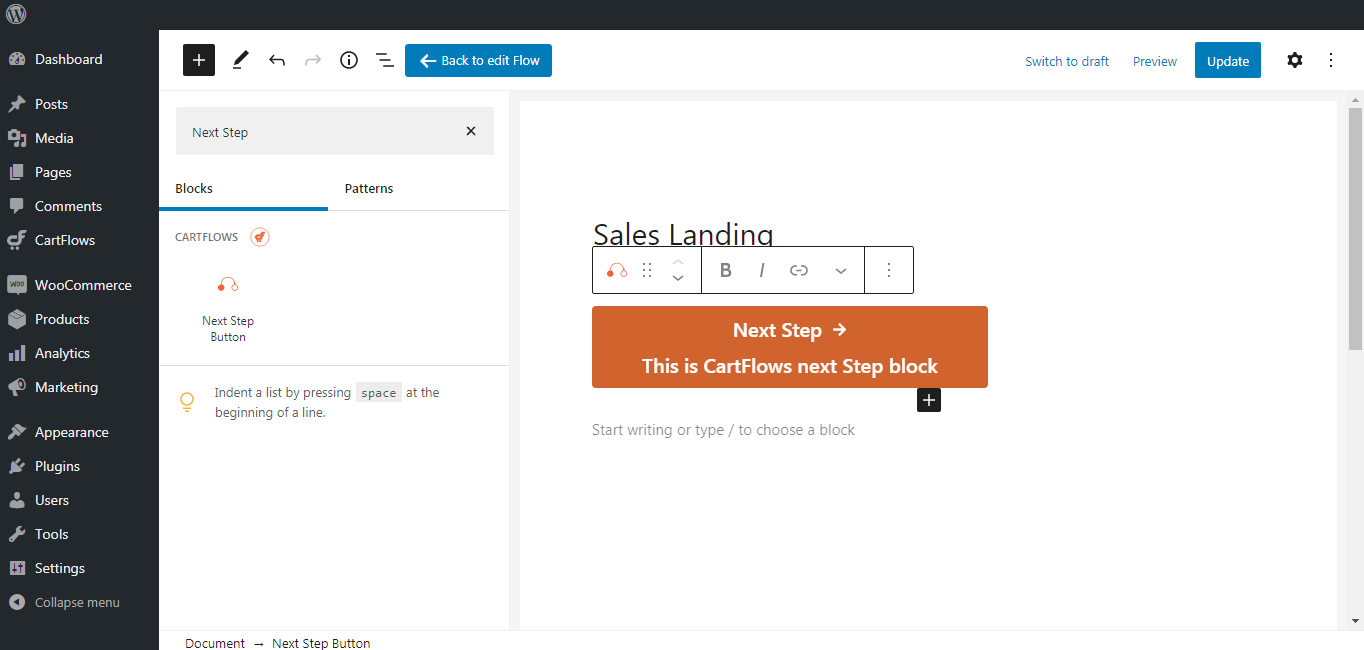
- General Tab: Adjust alignment, add icons, and customize text.
- Style Tab: Modify block and text colors, padding, margins, and icon styles.
- Content Tab: Customize font size, typography, and content styling.
- Advanced Tab: Add custom links or apply custom CSS for further control.
2. Opt-in Page – Opt-in Form Block
Use this block to collect lead information.
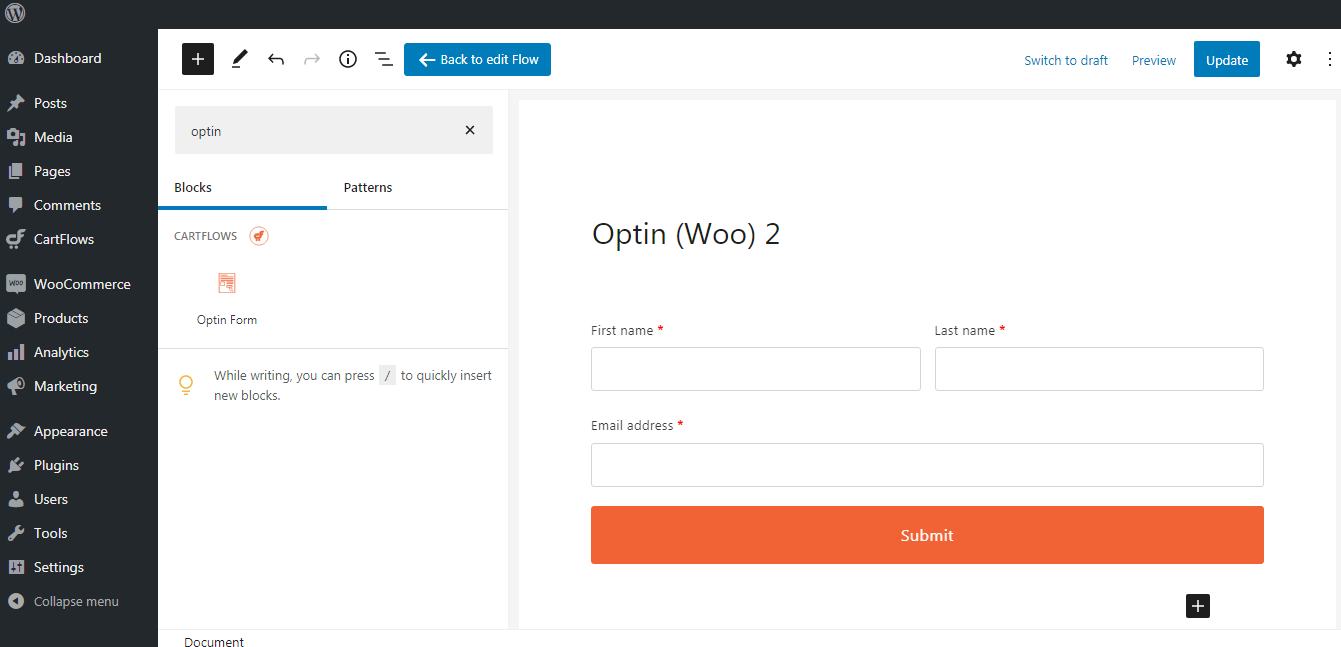
- General Tab: Control the primary color and global typography.
- Input Field Tab: Style input fields including color, alignment, and typography.
- Submit Button Tab: Customize the appearance of the submit button.
- Additional Tab: Add custom CSS to personalize the design.
3. Checkout Page – Checkout Form Block
Designed to handle everything from product details to payments.
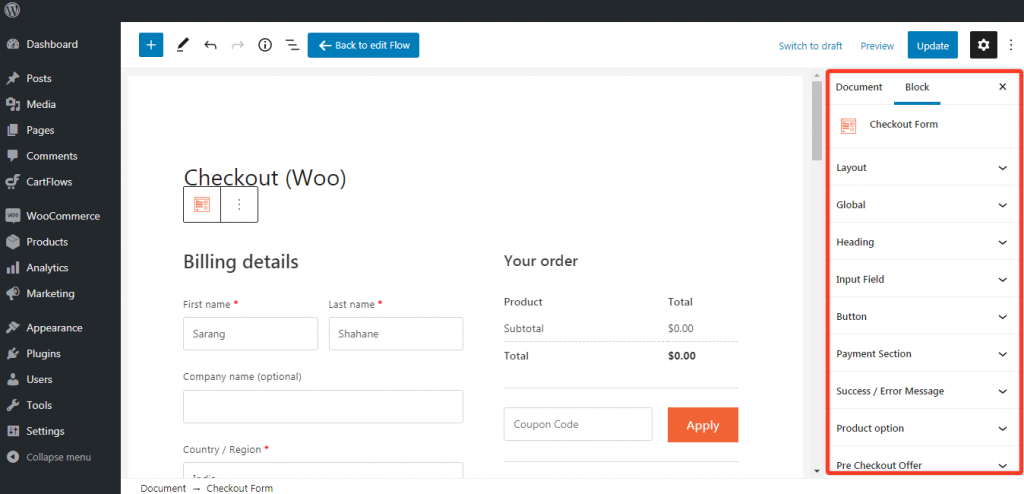
- Layout Tab: Choose between One-Column, Two-Column, or Two-Step layouts.
- Global Tab: Set global colors and typography for the entire form.
- Heading Tab: Style headings within the checkout form.
- Input Fields Tab: Adjust the look and feel of form fields.
- Button Tab: Design checkout and continue buttons.
- Payment Section Tab: Control the design of the payment methods section.
- Success/Error Messages Tab: Style messages that appear after submission.
- Product Options Tab: Customize how product variations are displayed.
- Order Bump Tab: Style and manage the Order Bump layout.
- Additional Tab: Add custom CSS for advanced tweaks.
4 & 5. Upsell & Downsell Pages – Offer Blocks
These pages support product variations and feature dynamic Offer Blocks for streamlined offer handling.
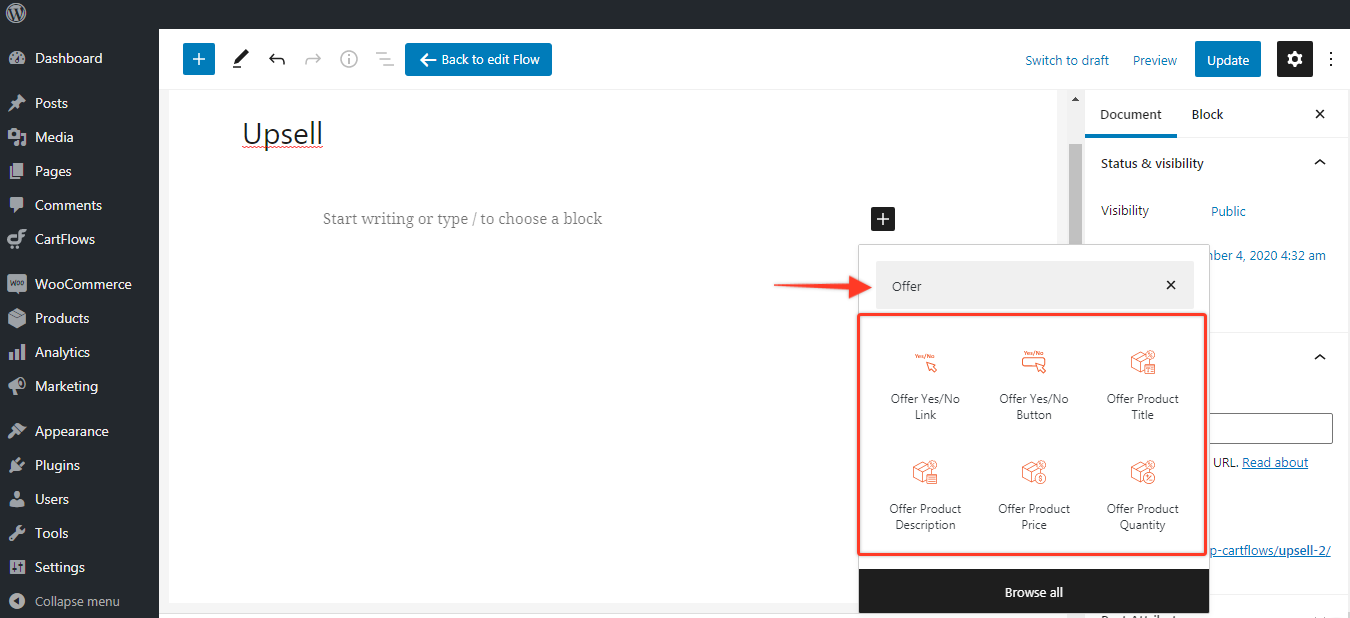
Available blocks for the Upsell & Downsell Pages :
- Offer Accept/Reject Button
- Offer Accept/Reject Link
- Offer Product Title
- Offer Product Price
- Offer Product Description
- Product Variations
- Quantity Selector
All content is dynamically rendered based on the offered product.
6. Thank You Page – Order Review Block
This block is used to display post-purchase information and order details.
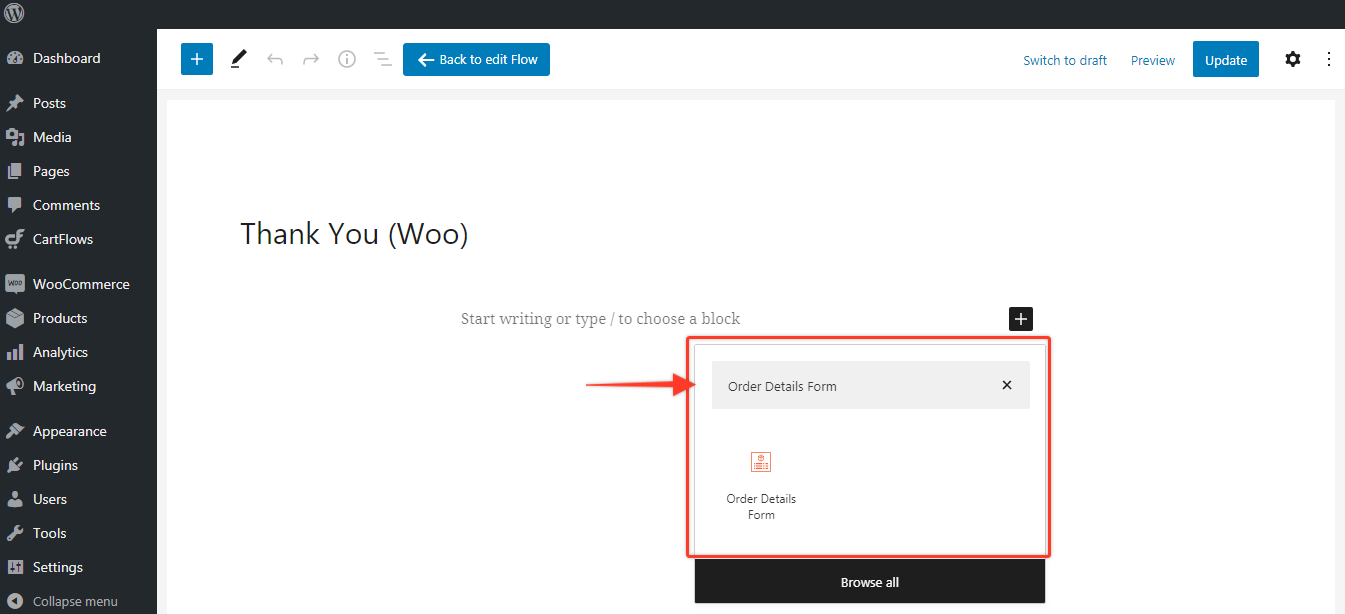
- General Tab: Show or hide order review sections.
- Spacing Tab: Adjust spacing between headings and sections.
- Heading Tab: Style the heading text and typography.
- Section Tab: Customize the text, colors, and fonts for each section.
- Order Review Tab: Manage order item styling.
- Downloads Tab: Display and style downloadable product info (if available).
- Order Details Tab: Customize text and design for order metadata.
- Customer Details Tab: Style billing and shipping details.
- Additional Tab: Add custom CSS as needed.
These Gutenberg blocks give you full control over the design of each step, without needing shortcodes. However, if you are using another page builder, you can continue using it with guidance from our dedicated documentation on shortcode placement.
We don't respond to the article feedback, we use it to improve our support content.