- Hiding Fields on the Checkout Page
- Installing WooCommerce
- Using WooCommerce
- Adding Products in WooCommerce
- Using Your Theme's Header & Footer in a Step
- Embedding a Checkout Form on the CartFlows Checkout Page
- Hiding WooCommerce Pages and Products
- Using Pricing Tables
- Adding an Affiliate Program
- Setting a Funnel as the Homepage
- Dynamic Offers aka Rule Engine
- Instant Layout for Checkout and Thank You Step
- Adding Products from the URL to the Checkout Page
- Setting Up A/B Testing for Steps
- Deleting Plugin Data During Uninstallation
- Importing Ready-Made Templates for Funnels and Steps
- Importing and Exporting Funnels and Step
- URL Parameters
- Replacing the Main Checkout Order with an Upsell or Downsell
- Rolling back to a Previous Version
- Google Address Autocomplete
- Flatsome UX Builder
- ActiveCampaign
- Paypal Reference Transactions
- How PaypPal/Stripe Works
- Enabling Enfold Avia Layout Builder
- Setting Up Authorize.net for Upsell & Downsell
- Supported Payment Gateways
- Setting Quantity and Discount for Products on the Checkout Page
- Adding Custom Payment Gateway Support for One-Click Upsell and Downsell
- Funnel in Test Mode
- Troubleshooting Plugin and Theme Conflicts
- Resolving the "Please Select a Simple, Virtual, and Free Product" Error
- Fixing Endless Loading on the Checkout Page
- Fixing the "We can't seem to find an order for you." Error on the Thank You Page
- Troubleshooting License Activation Issues
- Fixing the "Checkout ID Not Found" Error
- Fixing the "Session Expired" Error Message
- Resolving "Order Does Not Exist" Error on Upsell/Downsell Page
- Fixing the "Sorry, This Product Cannot Be Purchased" Error
- Disabling Auto-fill of Address Fields Based on Zip Code
- Enabling Theme's Scripts & Styles Without Changing Page Template
- Disabling Auto-fill of Checkout Fields
- Allowing Cache Plugins to Cache CartFlows Pages
- Changing the "Choose a Variation" Text
- VAT Field Not Displaying for WooCommerce EU/UK VAT Compliance Plugin
- Enabling the Product Tab on Store Checkout
- Displaying the Order Summary Open on Mobile Devices
- Refreshing the Checkout Page After CartFlows AJAX Calls
- Overview
- Installing Modern Cart Starter
- Installing Modern Cart Pro
- Activating License Key
- Customizing General Settings
- Customizing Cart Tray Labels
- Customizing Cart Icon Settings
- Customizing Cart Tray Styling
- Understanding the Product Recommendations Feature
- Controlling Product Recommendation Source for Empty Cart
How to Modify the Checkout Page Using the Backend Settings?
You can customize the way your Checkout Page looks simply by tweaking the configurations in the Checkout Layout section of the Checkout Step. To do this, from your WordPress admin dashboard, go to CartFlows menu > Funnels. Select a Flow and Edit.
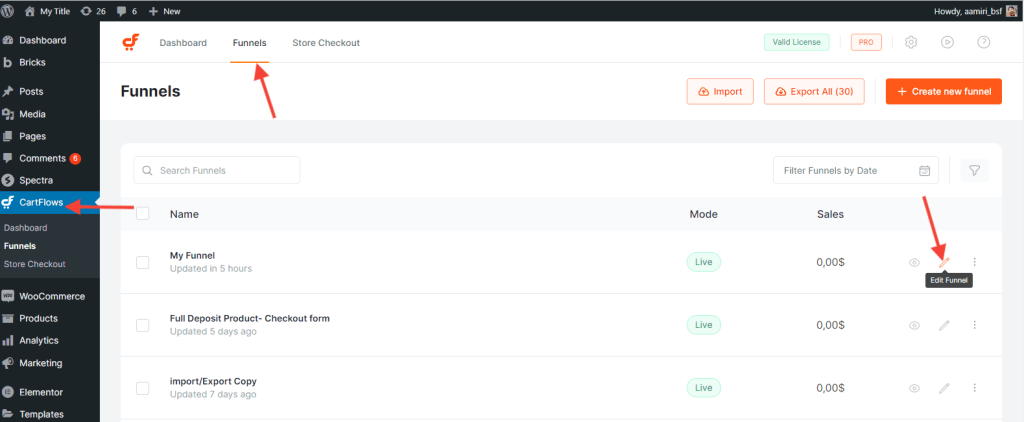
Click the corresponding Settings option for the Checkout Step in the Funnel.
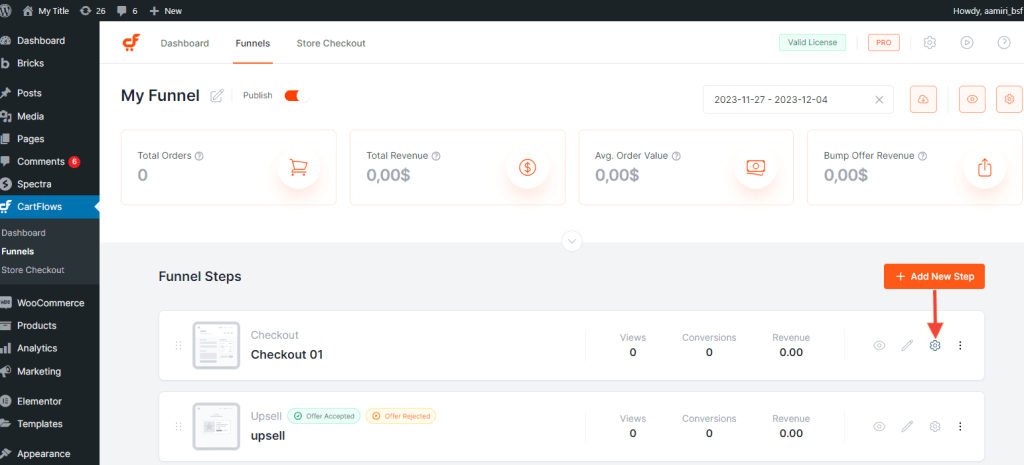
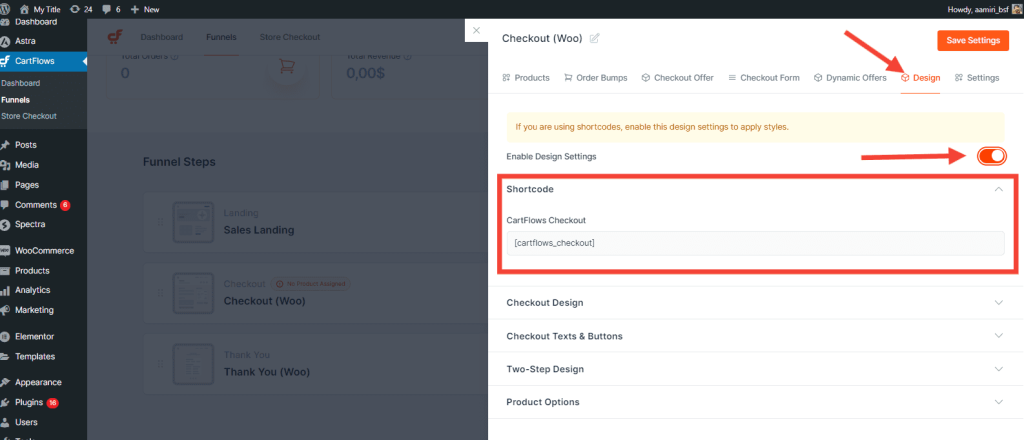
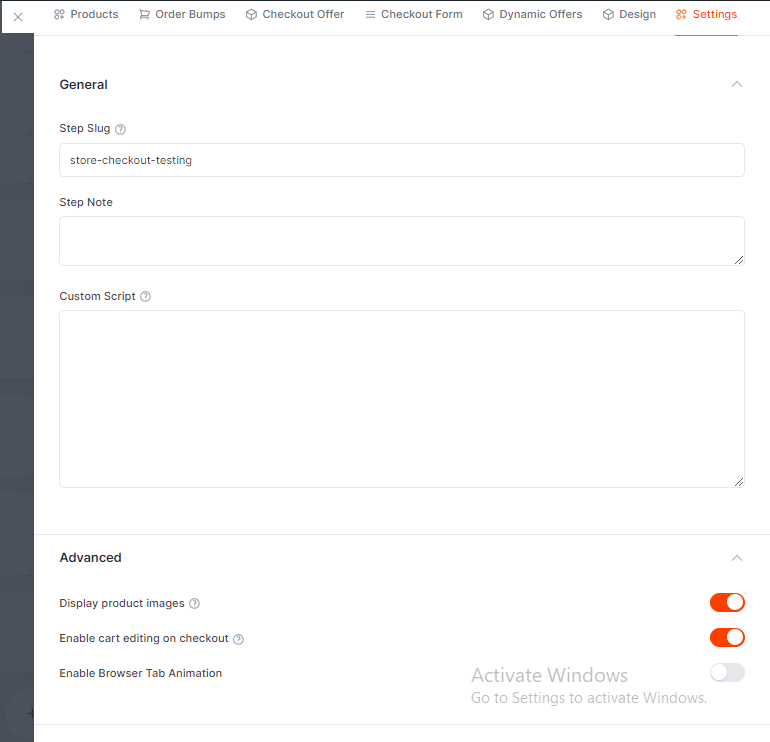
Upon clicking the “Settings” option, a tab smoothly slides into view, unveiling an array of available options and settings for your exploration.
Shortcode
This is where you can find the shortcode which you can add to your checkout page. It contains the billing checkout fields, shipping checkout fields, order details, and the Place Order button.
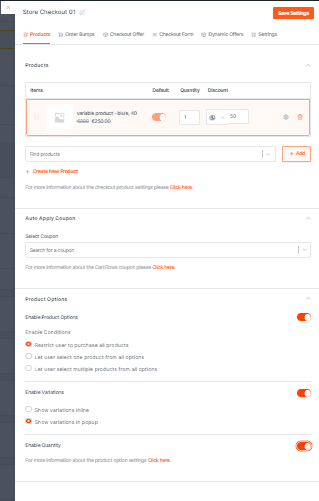
Select Product
This is where you add the product you would like to link to your checkout page. You can also add a coupon if you’re running a promotion for your product. Make sure that you enable coupons in the WooCommerce settings. Here, you can also configure restrictions, variations, and enable quantity.
Order Bump
If you want to add order bump to your checkout page, you can simply configure it in the Order Bump menu by clicking the corresponding order bump settings.
To learn more about adding an order bump, check out this article.
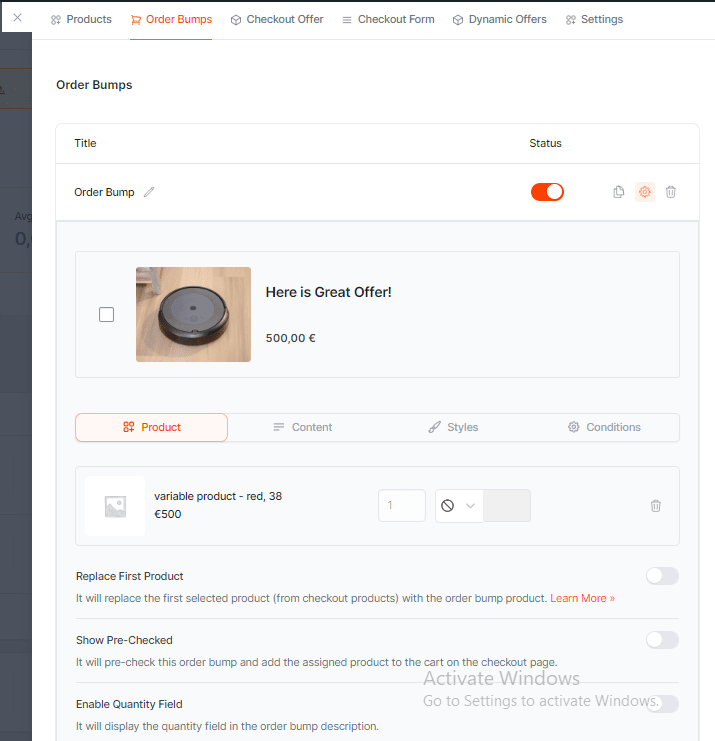

Checkout Offer
You can enable Checkout Offer if you want to offer a product or another related product to get your customers to buy more stuff before the payment is made. No matter which option they choose, yes or no, the order made is automatically processed.
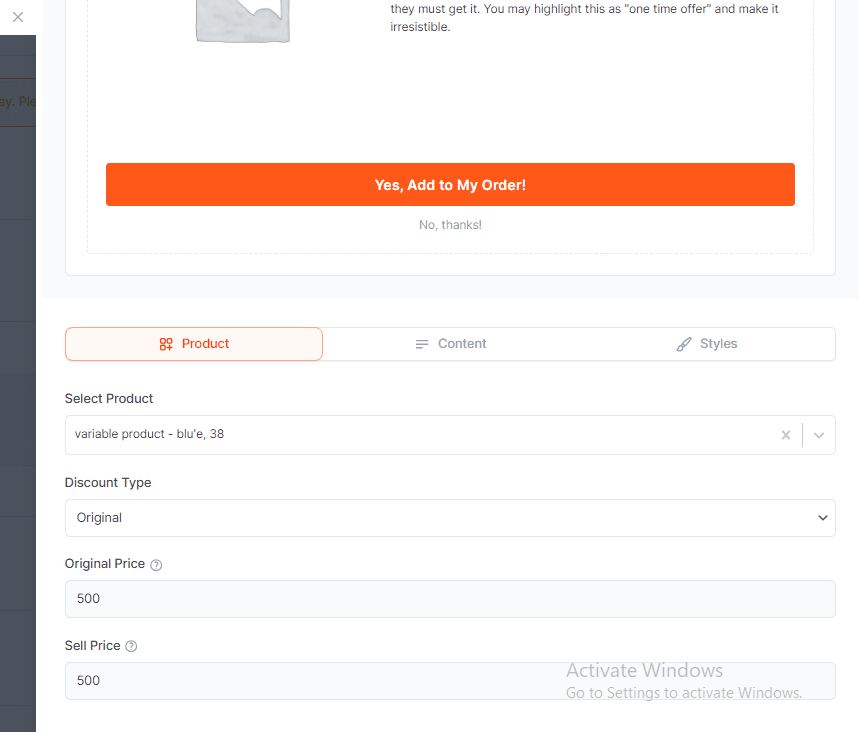

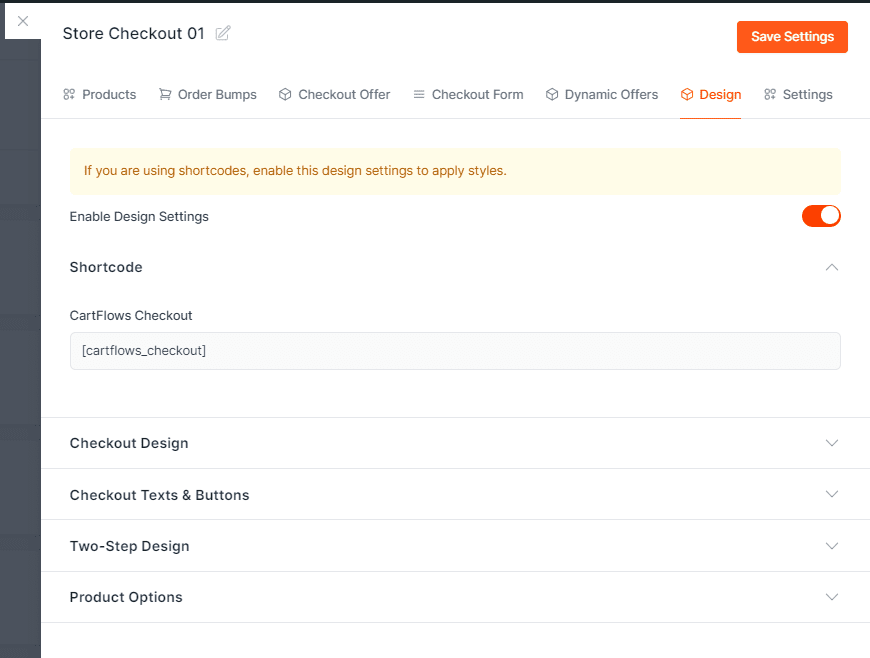
Checkout Design
This is where you can customize the checkout form. You can set it as one column, two-column, or two-step. You can also change the typography and the primary color. If you enable the Advance Options, you’ll be able to customize the heading, input fields, buttons, and background color.
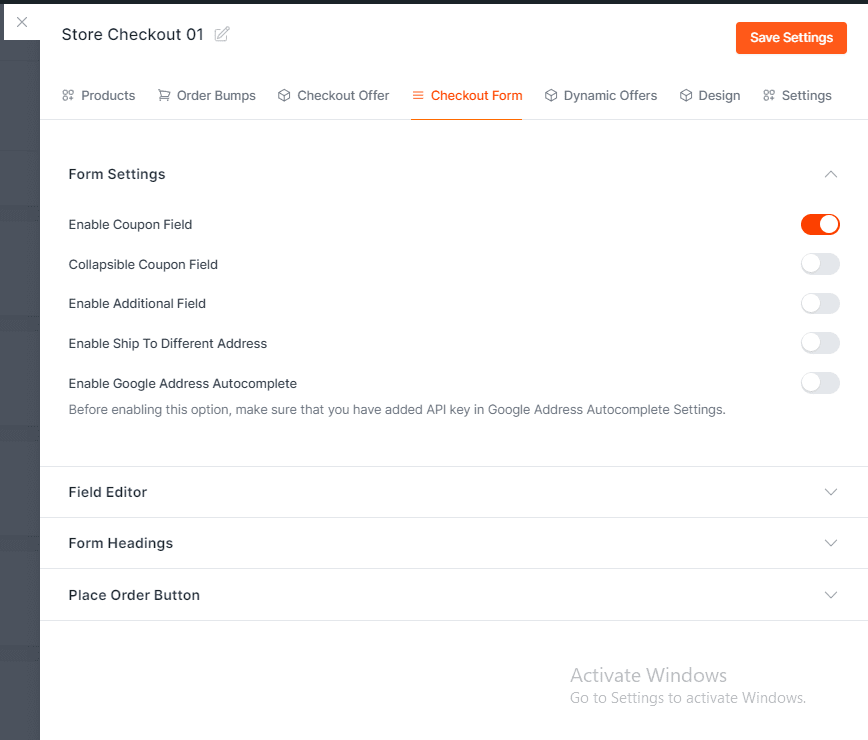
Checkout Fields
In this section, you’ll be able to customize the checkout fields.
- The Enable Coupon Field allows you to add a coupon field for the customers to enter the coupon code.
- The Enable Additional Field allows you to insert additional fields so you can get some more information about your customer.
- The Enable Ship To Different Address adds another address field for shipping.
- The Enable Google Address Autocomplete allows you to enable the Autocomplete address feature on that specific checkout. To learn more about configuring Google AutoComplete, check out this article.
Custom Script
Adding a custom script allows you to add live chat, bots, custom pixels, and more to your checkout page.
Important Notes
The design tab will only be visible if you are using a page builder other than Block Editor, Elementor, and Beaver builder
Enable the Design Tab for Shortcode Access
- To access the Design tab where the shortcode is available, ensure that your page builder is set to “Other” in the CartFlows settings.
- From your WordPress dashboard, go to CartFlows > Dashboard > Settings > General and select Other from the dropdown list.
- Click Save Settings.
We don't respond to the article feedback, we use it to improve our support content.