- Hiding Fields on the Checkout Page
- Installing WooCommerce
- Using WooCommerce
- Using Your Theme's Header & Footer in a Step
- Embedding a Checkout Form on the CartFlows Checkout Page
- Hiding WooCommerce Pages and Products
- Using Pricing Tables
- Adding an Affiliate Program
- Setting a Funnel as the Homepage
- GDPR Compliance
- Dynamic Offers aka Rule Engine
- Instant Layout for Checkout and Thank You Step
- Adding Products from the URL to the Checkout Page
- Setting Up A/B Testing for Steps
- Deleting Plugin Data During Uninstallation
- Importing Ready-Made Templates for Funnels and Steps
- Importing and Exporting Funnels and Step
- URL Parameters
- Replacing the Main Checkout Order with an Upsell or Downsell
- Rolling back to a Previous Version
- Google Address Autocomplete
- Flatsome UX Builder
- ActiveCampaign
- Paypal Reference Transactions
- How PaypPal/Stripe Works
- Enabling Enfold Avia Layout Builder
- Setting Up Authorize.net for Upsell & Downsell
- Supported Payment Gateways
- Setting Up A/B Testing with Google Optimize
- Setting Quantity and Discount for Products on the Checkout Page
- Funnel in Test Mode
- Troubleshooting Plugin and Theme Conflicts
- Resolving the "Please Select a Simple, Virtual, and Free Product" Error
- Fixing Endless Loading on the Checkout Page
- Fixing the "We can't seem to find an order for you." Error on the Thank You Page
- Troubleshooting License Activation Issues
- Fixing the "Checkout ID Not Found" Error
- Fixing the "Session Expired" Error Message
- Resolving "Order Does Not Exist" Error on Upsell/Downsell Page
- Fixing the "Sorry, This Product Cannot Be Purchased" Error
- Disabling Auto-fill of Address Fields Based on Zip Code
- Enabling Theme's Scripts & Styles Without Changing Page Template
- Disabling Auto-fill of Checkout Fields
- Allowing Cache Plugins to Cache CartFlows Pages
- Changing the "Choose a Variation" Text
- VAT Field Not Displaying for WooCommerce EU/UK VAT Compliance Plugin
- Enabling the Product Tab on Store Checkout
- Displaying the Order Summary Open on Mobile Devices
- Refreshing the Checkout Page After CartFlows AJAX Calls
- Overview
- Installing Modern Cart Starter
- Installing Modern Cart for WooCommerce
- Activating License Key
- Customizing General Settings
- Customizing Cart Tray Labels
- Customizing Cart Icon Settings
- Customizing Cart Tray Styling
- Understanding the Product Recommendations Feature
- Controlling Product Recommendation Source for Empty Cart
- Installing Free Version
- Installing Pro Version
- Activate License Key
- Configuring the Settings
- Enabling Webhooks
- Product Reports
- SMS Integration
- Shortcode Reference for Email Fields
- Filters to Customize Product Table
- Recovery Email Going to Spam
- Cookies/GDPR Compliance
- Emails not Sending
- Orders Not Capturing
- Dynamic Email Rules
- Excluding Products from Coupon
- Rolling Back to a Previous Version
How to Enable Webhooks in Cart Abandonment Recovery for WooCommerce
The Cart Abandonment Recovery plugin for WooCommerce includes webhook support to help automate actions like sending coupon codes or follow-up notifications when a customer abandons the checkout process.
This allows seamless integration with automation tools like Zapier, so you can customize what happens after an abandonment event, for example, automatically emailing a unique coupon code.
Where to Find the Webhook Setting
To enable Webhooks, follow these steps:
- Go to your WordPress dashboard.
- Navigate to WooCommerce > Cart Abandonment.
- Click on the Settings tab.
- Locate the Webhook section and enable the Webhook Toggle.
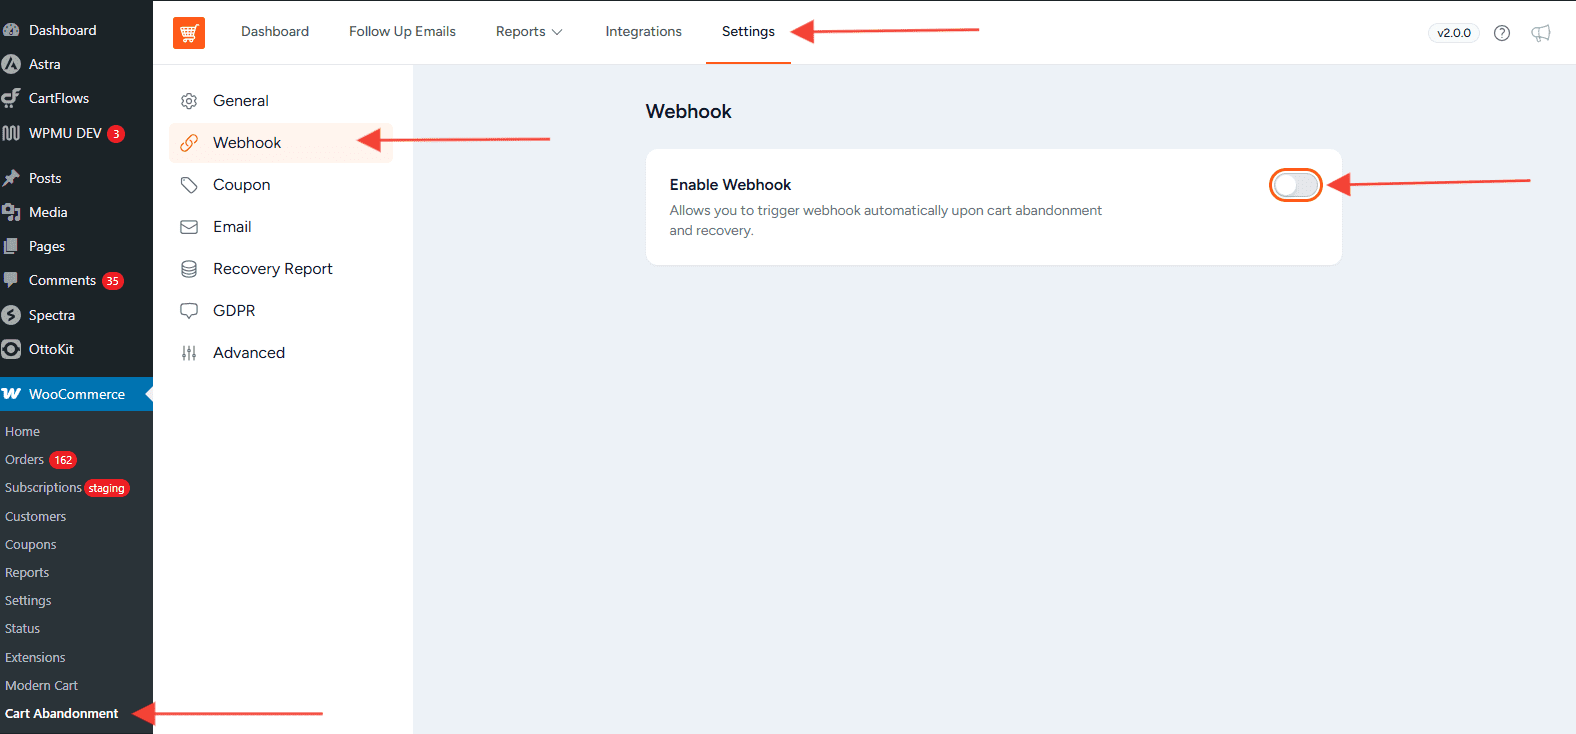
Once enabled, you’ll be able to paste a webhook URL from your preferred automation platform.
How Webhooks Work
A webhook acts like a listener. When a shopper abandons the checkout, the plugin triggers the webhook to perform an action — such as:
- Sending an email with a coupon code.
- Notifying your CRM or marketing tool.
- Logging the event in an external system.
You can create and manage this logic using services like Zapier.
How to Set Up a Webhook with Zapier
Here’s how to configure a webhook using Zapier:
Step 1: Create a Zap
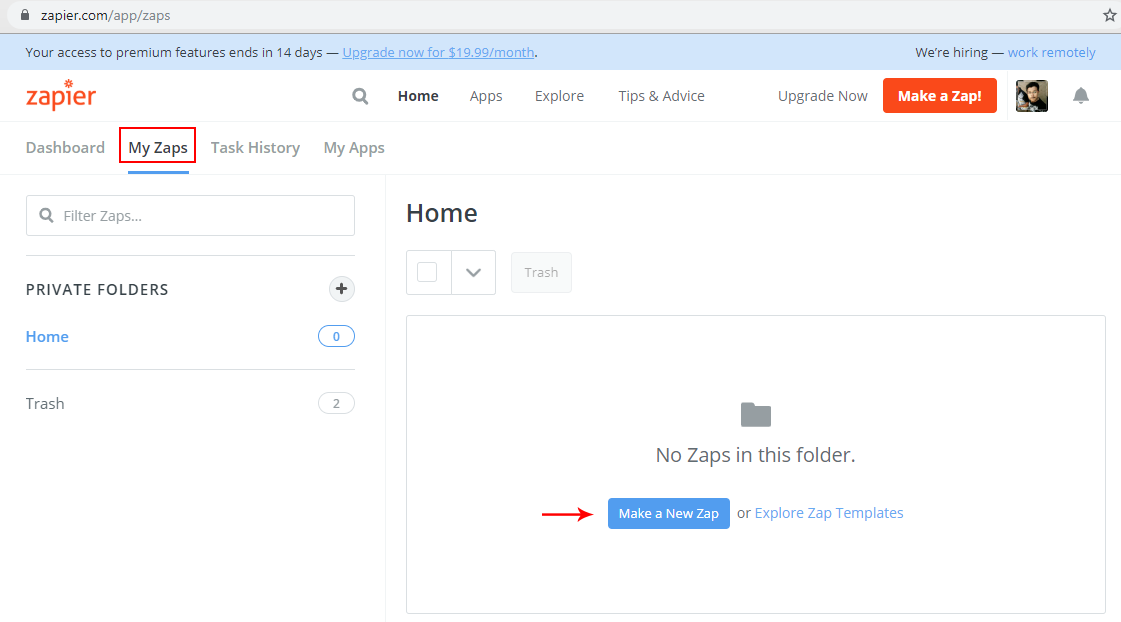
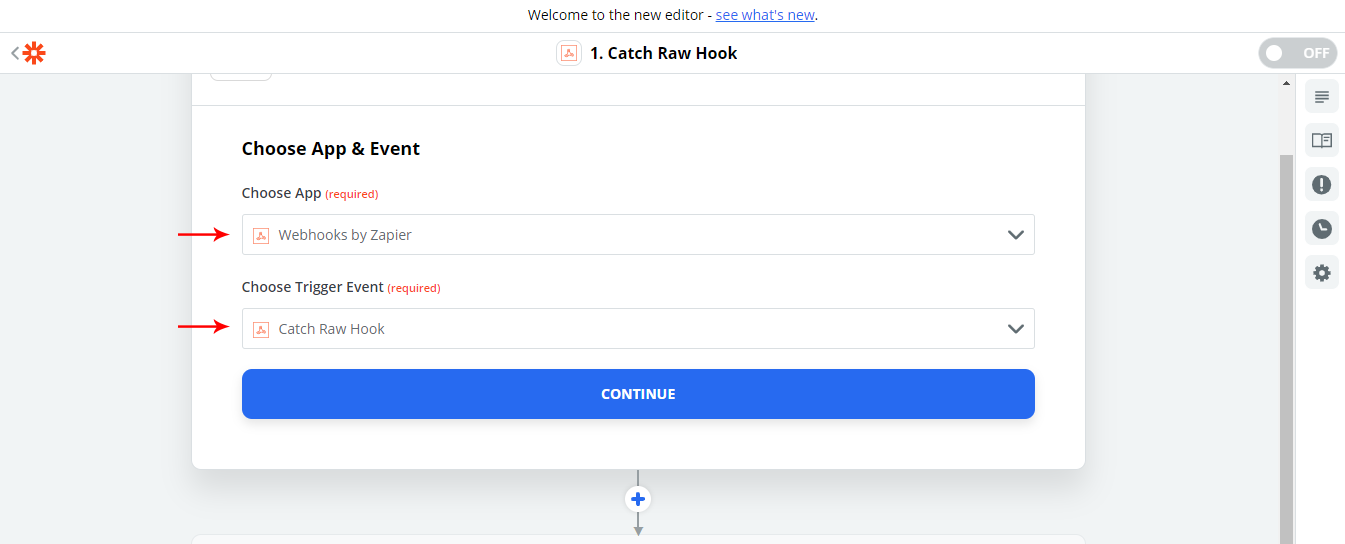
Step 2: Add a Webhook Trigger
- For the trigger app, search and select Webhooks by Zapier.
- Choose the Catch Raw Hook trigger and click Continue.
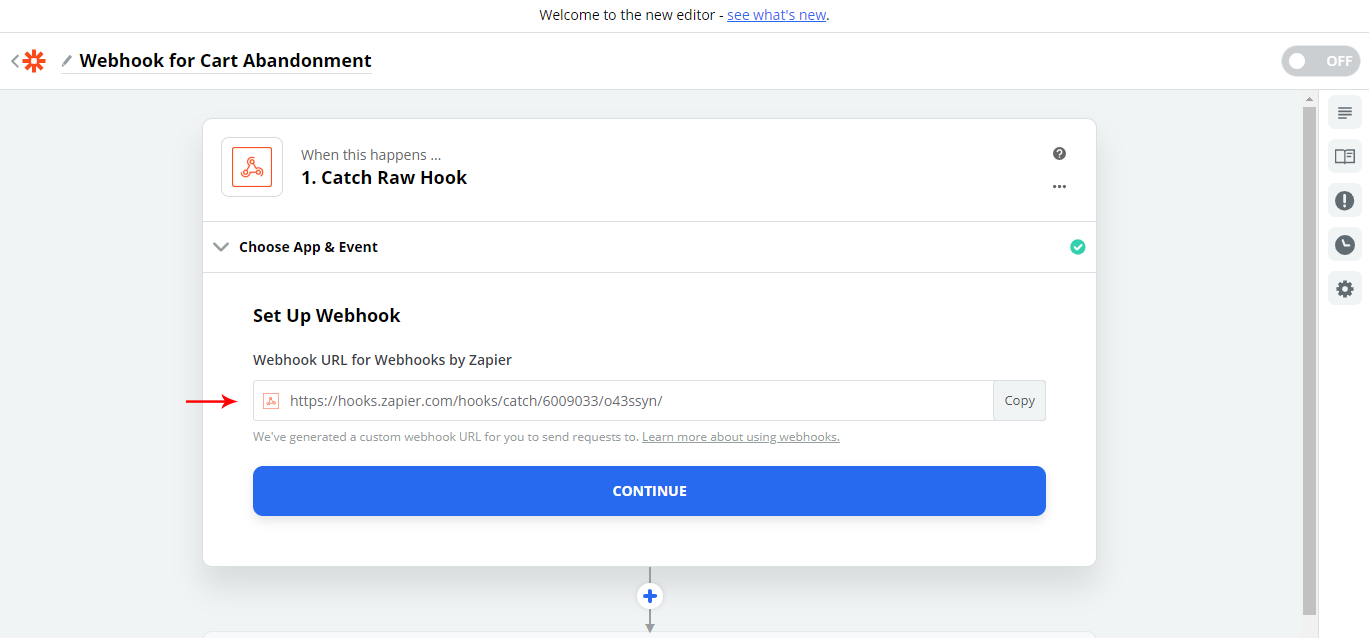
Step 3: Copy the Webhook URL
- Zapier will generate a webhook URL. Copy it.
Step 4: Paste the Webhook URL in Plugin Settings
- Go back to WooCommerce > Cart Abandonment > Settings > Webhook.
- Paste the Zapier webhook URL.
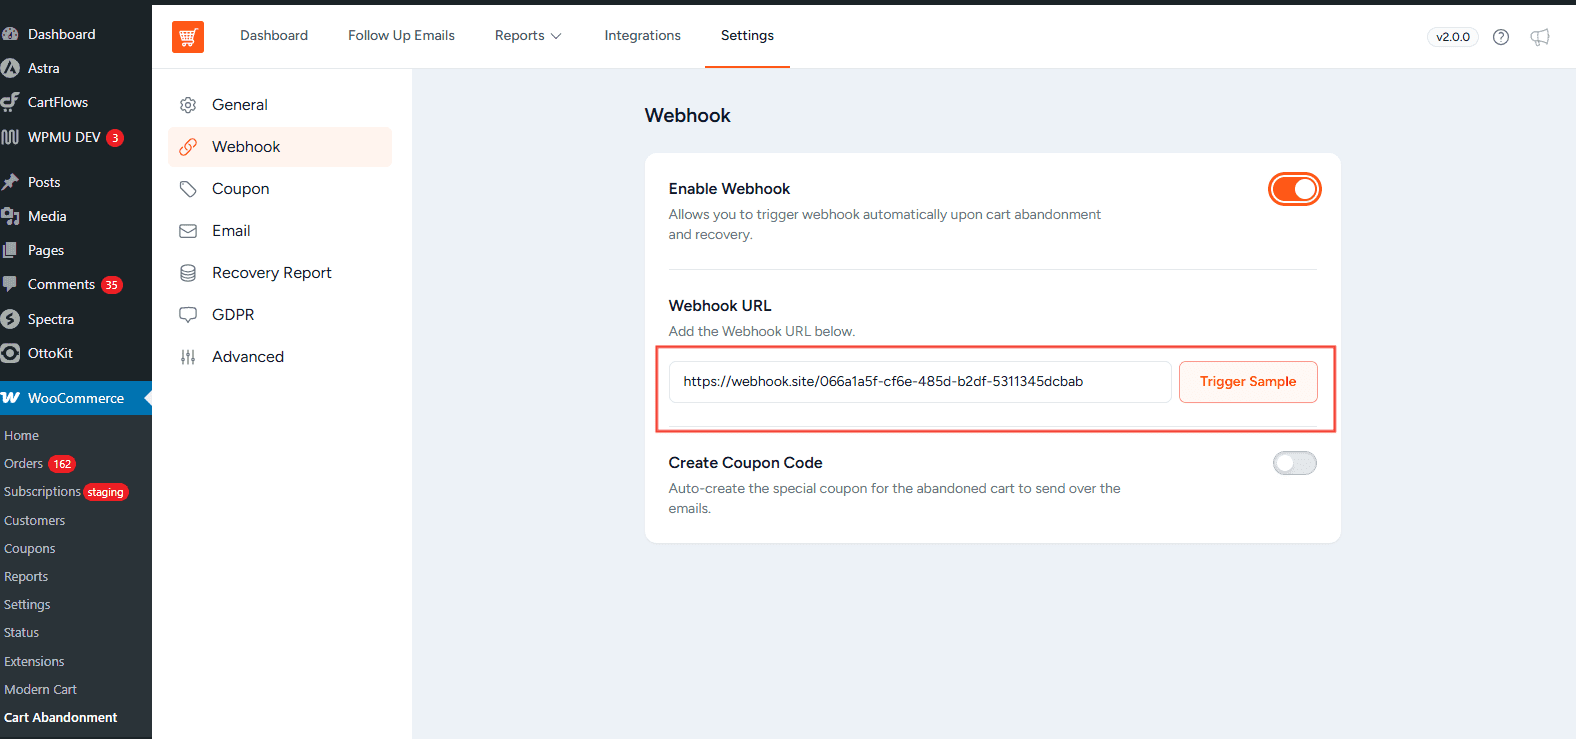
Step 5: Trigger a Sample
- In the Cart Abandonment plugin, use the Trigger Sample option.
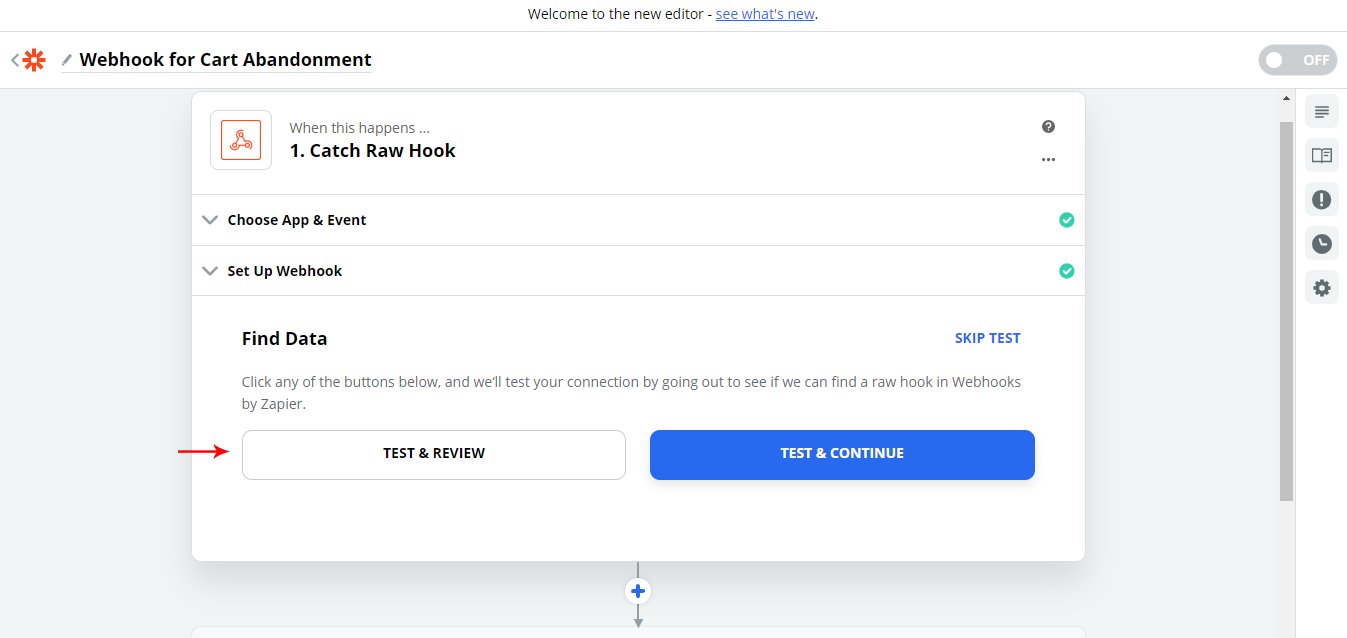
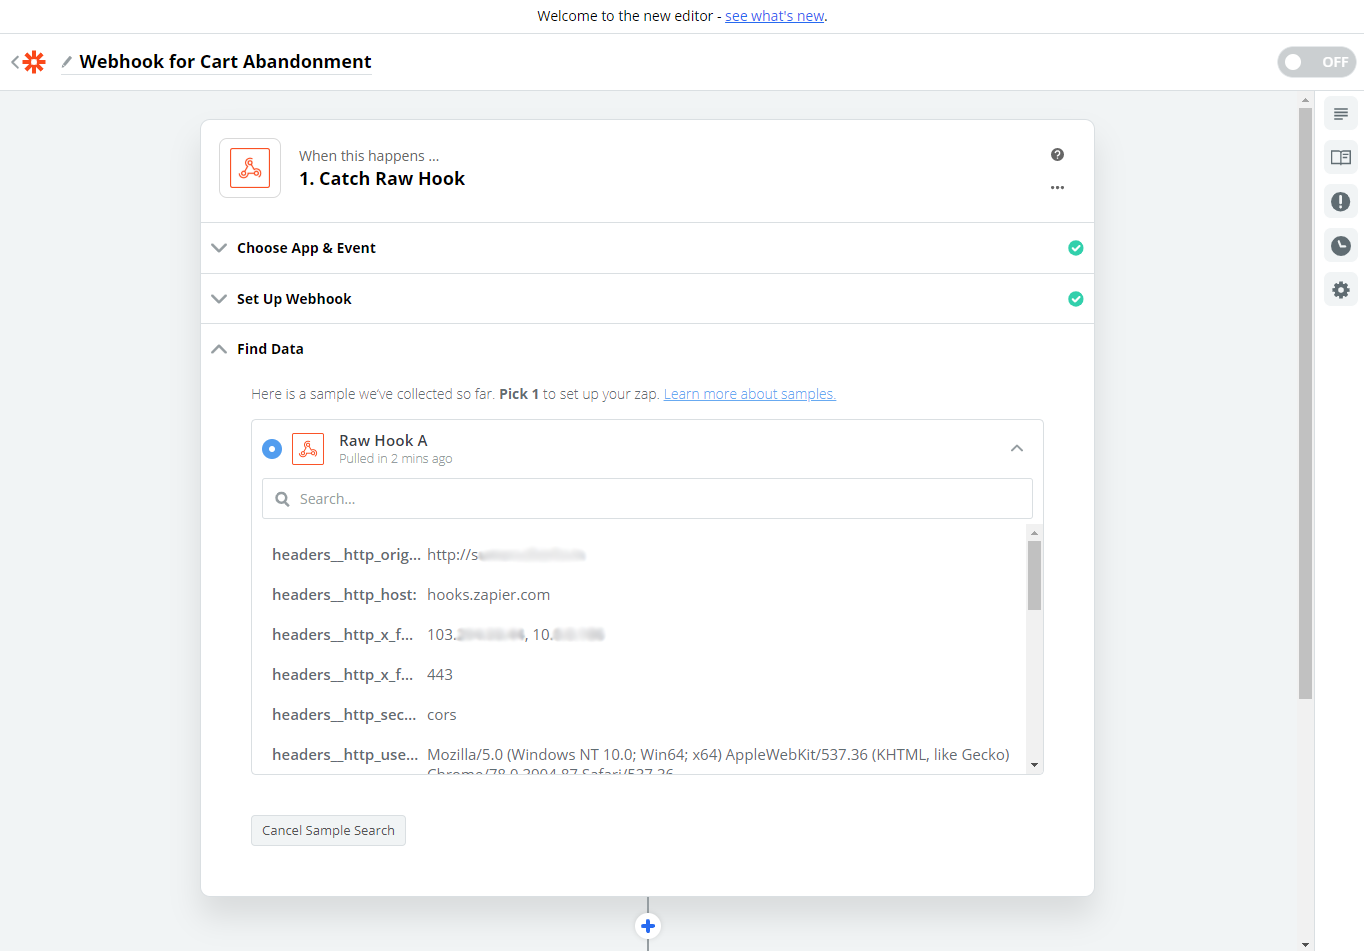
- You can review the webhook data as shown below –
Step 6: Set the Action
- Add an Action Step in your Zap (e.g., Send Email etc.).
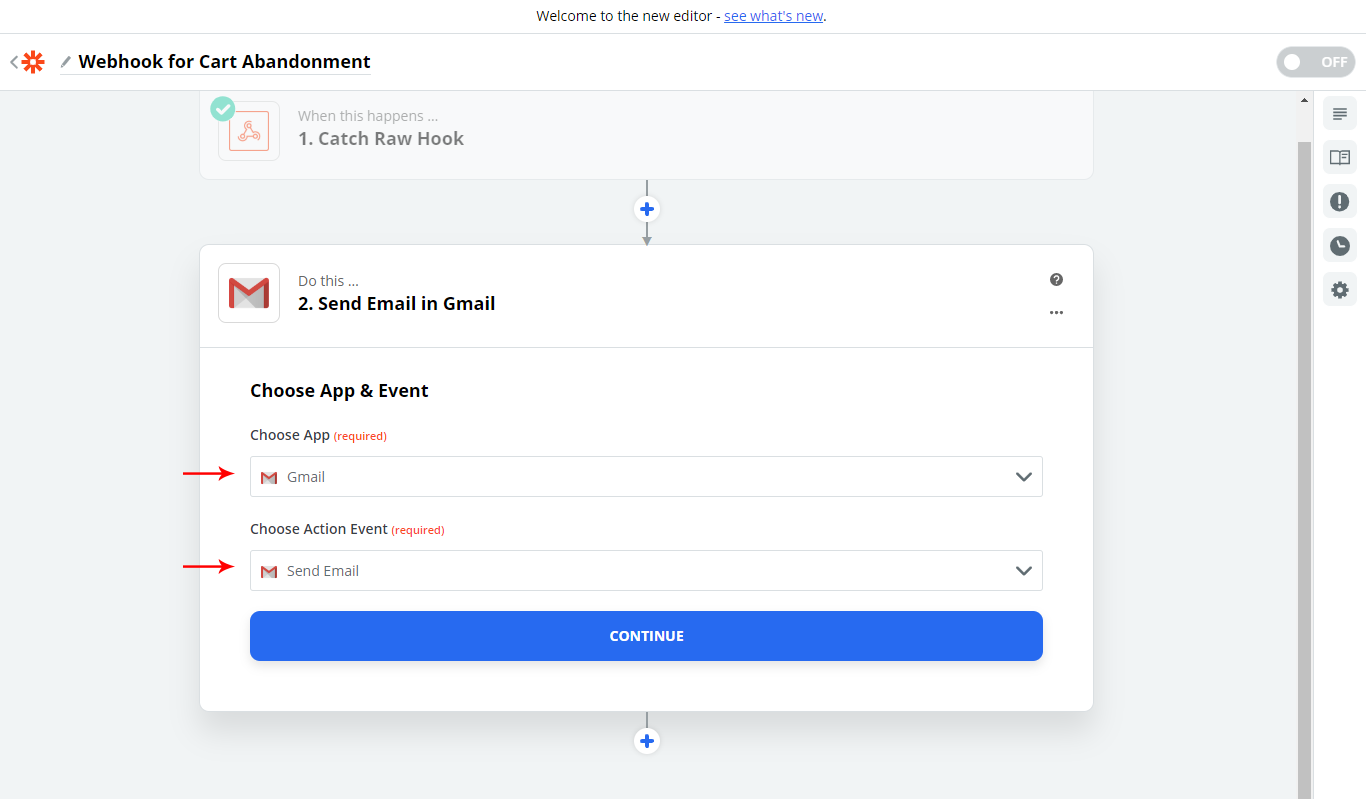
- Customize the action according to your workflow.
Sending Coupons via Webhook
If you’ve enabled the Auto-Generate Coupon Code feature in the plugin:
- Abandoned users will receive a personalized email with a discount.
- You can choose between a fixed or percentage discount and set an expiry timer for the coupon.
Need More Customization?
You can create multiple Zaps with different triggers and actions depending on your needs — whether it’s CRM integration, SMS alerts, or adding users to a mailing list.
We don't respond to the article feedback, we use it to improve our support content.