- Hiding Fields on the Checkout Page
- Installing WooCommerce
- Using WooCommerce
- Adding Products in WooCommerce
- Using Your Theme's Header & Footer in a Step
- Embedding a Checkout Form on the CartFlows Checkout Page
- Hiding WooCommerce Pages and Products
- Using Pricing Tables
- Adding an Affiliate Program
- Setting a Funnel as the Homepage
- Dynamic Offers aka Rule Engine
- Instant Layout for Checkout and Thank You Step
- Adding Products from the URL to the Checkout Page
- Setting Up A/B Testing for Steps
- Deleting Plugin Data During Uninstallation
- Importing Ready-Made Templates for Funnels and Steps
- Importing and Exporting Funnels and Step
- URL Parameters
- Replacing the Main Checkout Order with an Upsell or Downsell
- Rolling back to a Previous Version
- Google Address Autocomplete
- Flatsome UX Builder
- ActiveCampaign
- Paypal Reference Transactions
- How PaypPal/Stripe Works
- Enabling Enfold Avia Layout Builder
- Setting Up Authorize.net for Upsell & Downsell
- Supported Payment Gateways
- Setting Quantity and Discount for Products on the Checkout Page
- Adding Custom Payment Gateway Support for One-Click Upsell and Downsell
- Funnel in Test Mode
- Troubleshooting Plugin and Theme Conflicts
- Resolving the "Please Select a Simple, Virtual, and Free Product" Error
- Fixing Endless Loading on the Checkout Page
- Fixing the "We can't seem to find an order for you." Error on the Thank You Page
- Troubleshooting License Activation Issues
- Fixing the "Checkout ID Not Found" Error
- Fixing the "Session Expired" Error Message
- Resolving "Order Does Not Exist" Error on Upsell/Downsell Page
- Fixing the "Sorry, This Product Cannot Be Purchased" Error
- Disabling Auto-fill of Address Fields Based on Zip Code
- Enabling Theme's Scripts & Styles Without Changing Page Template
- Disabling Auto-fill of Checkout Fields
- Allowing Cache Plugins to Cache CartFlows Pages
- Changing the "Choose a Variation" Text
- VAT Field Not Displaying for WooCommerce EU/UK VAT Compliance Plugin
- Enabling the Product Tab on Store Checkout
- Displaying the Order Summary Open on Mobile Devices
- Refreshing the Checkout Page After CartFlows AJAX Calls
- Overview
- Installing Modern Cart Starter
- Installing Modern Cart Pro
- Activating License Key
- Customizing General Settings
- Customizing Cart Tray Labels
- Customizing Cart Icon Settings
- Customizing Cart Tray Styling
- Understanding the Product Recommendations Feature
- Controlling Product Recommendation Source for Empty Cart
- Installing Free Version
- Installing Pro Version
- Activate License Key
- Configuring the Settings
- Enabling Webhooks
- Product Reports
- SMS Integration
- Shortcode Reference for Email Fields
- Filters to Customize Product Table
- Recovery Email Going to Spam
- Cookies/GDPR Compliance
- Emails not Sending
- Orders Not Capturing
- Dynamic Email Rules
- Excluding Products from Coupon
- Rolling Back to a Previous Version
Roll Back to a Previous Version of Cart Abandonment Recovery for WooCommerce
If you encounter an issue after updating the Cart Abandonment Recovery for WooCommerce plugin, you may want to roll back to an earlier version. This can be done in two ways, either by using a plugin like WP Rollback plugin or by manually downloading a previous version from the WordPress plugin repository.
Method 1: Roll Back Using the WP Rollback Plugin
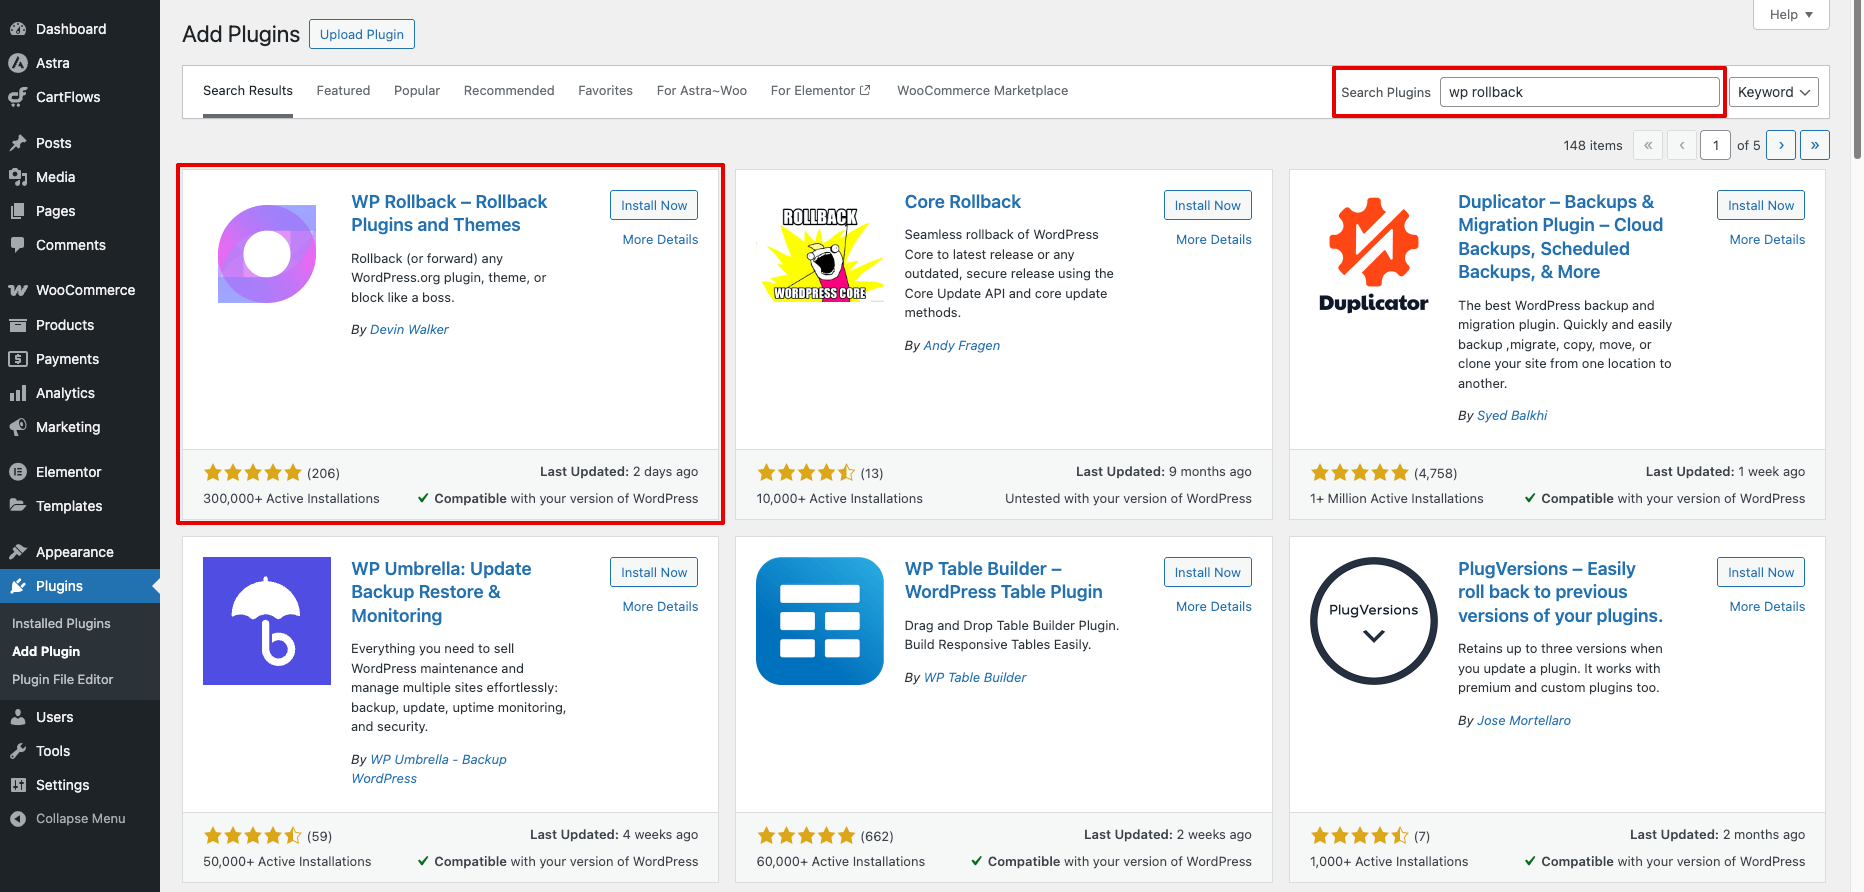
1. Install and activate the WP Rollback plugin on your site.
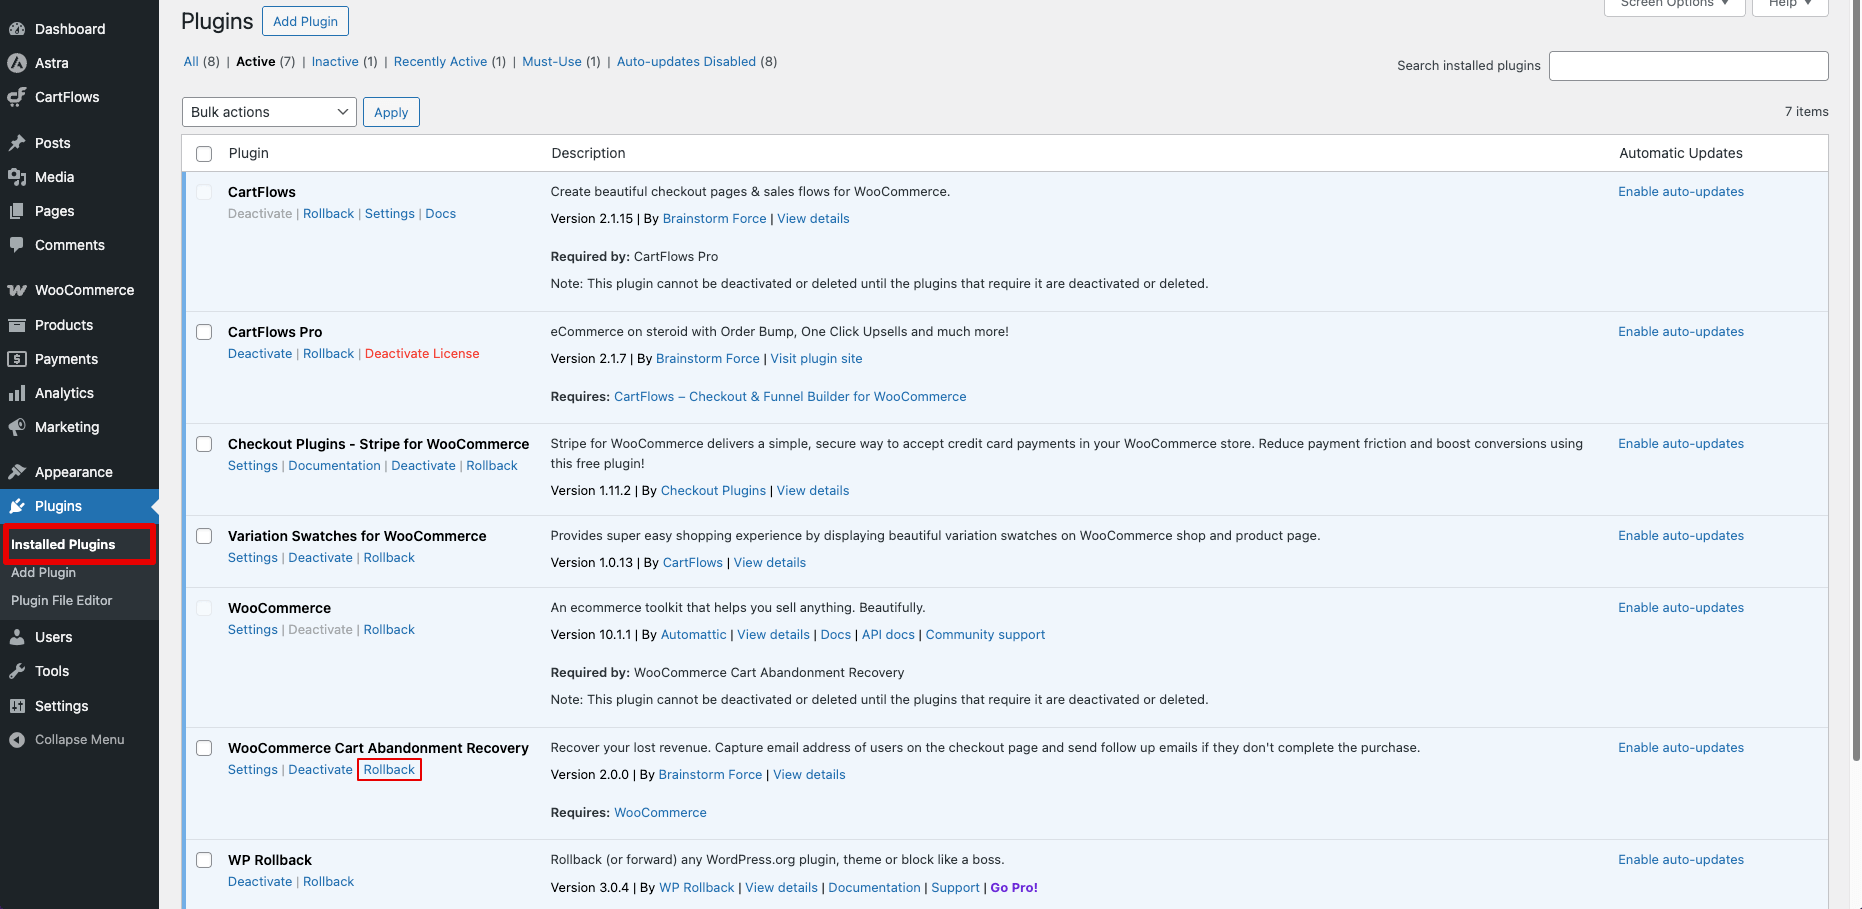
2. Go to Plugins > Installed Plugins in your WordPress dashboard.
3. Locate Cart Abandonment Recovery for WooCommerce in the list, and click the Rollback link.
4. Choose the version you’d like to roll back to, click the Rollback button, and follow the prompts to complete the process.
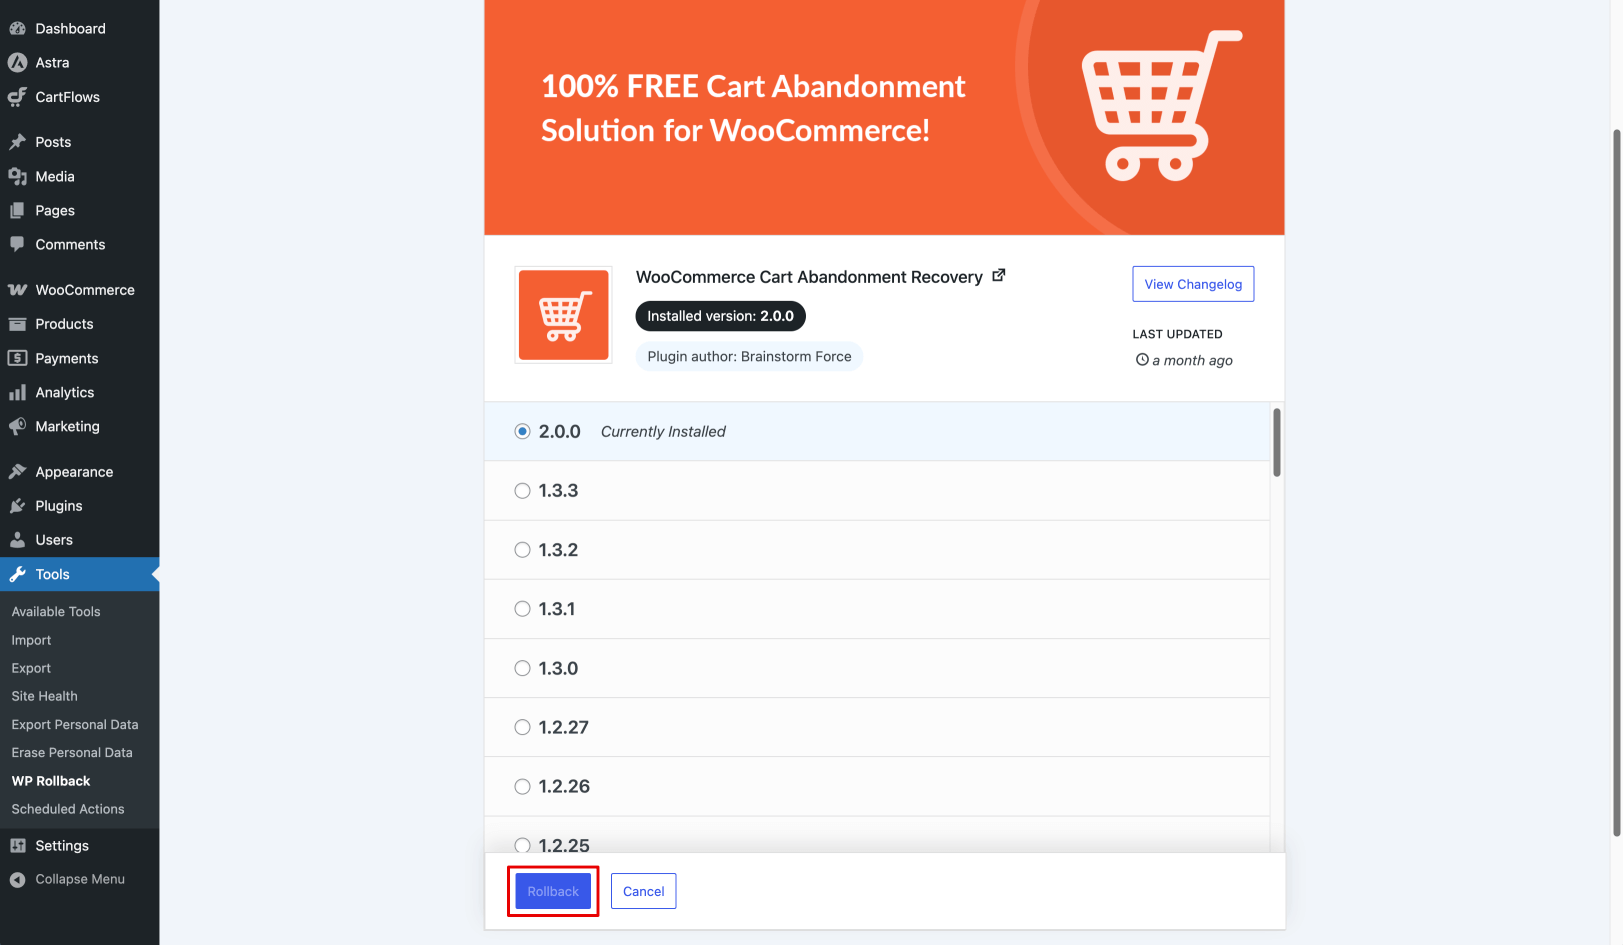
The plugin will automatically switch to the version you selected.
Method 2: Roll Back Manually
1. Go to the Cart Abandonment Recovery for WooCommerceplugin page in the WordPress repository.
2. Scroll down to the Advanced View section.
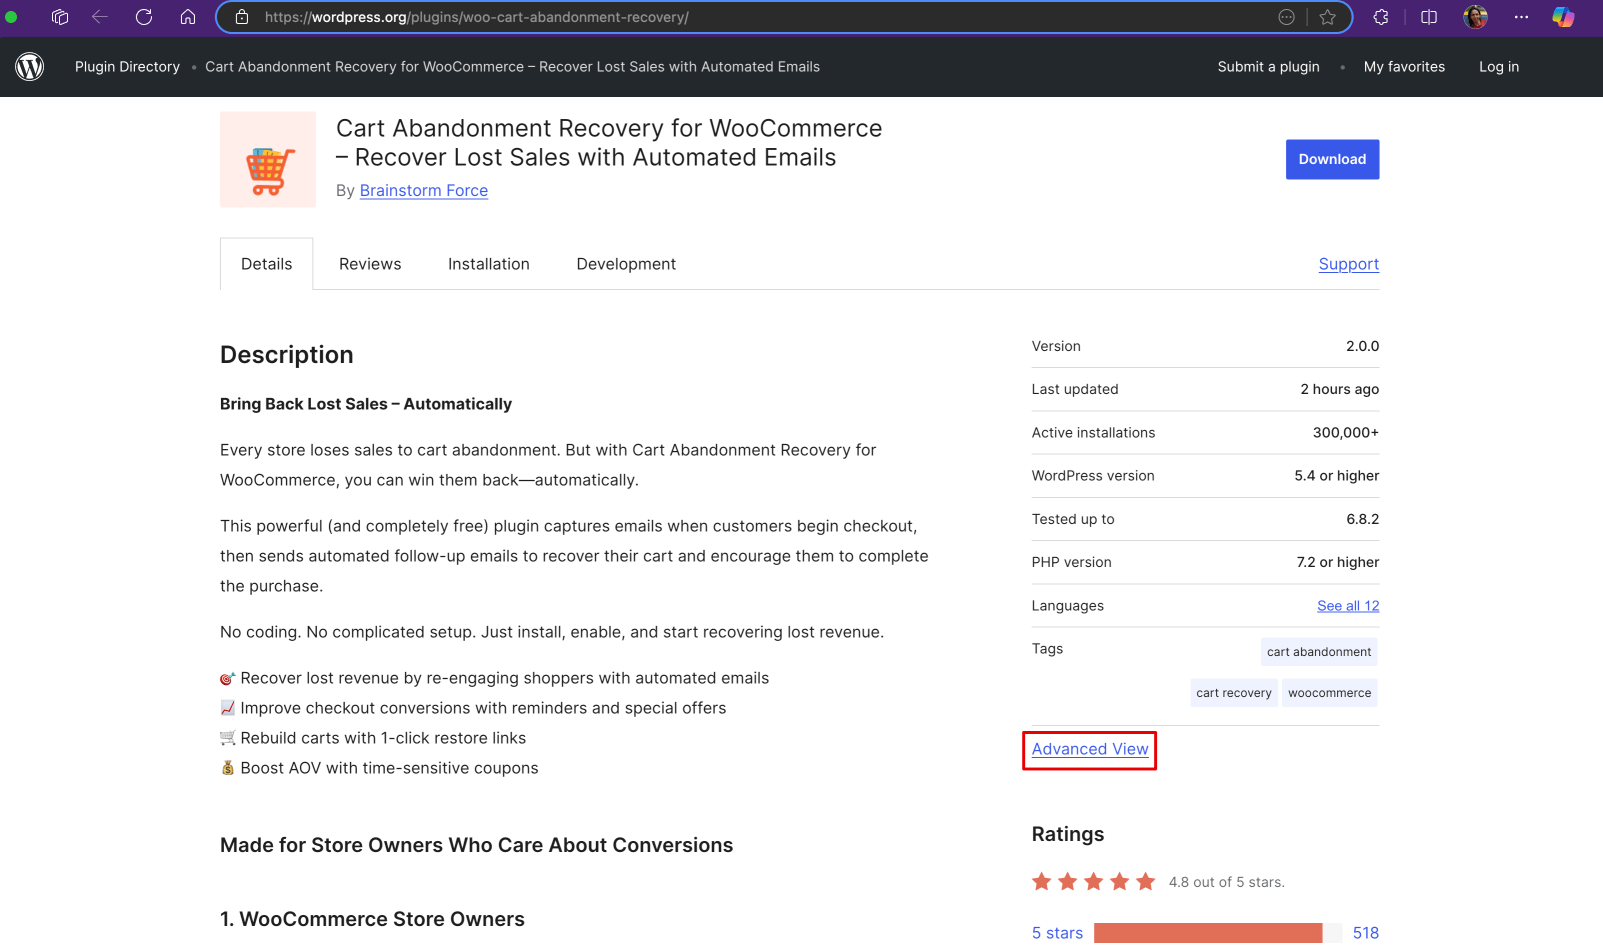
3. Locate the Previous Versions dropdown, select the version you’d like to install, and download the ZIP file.
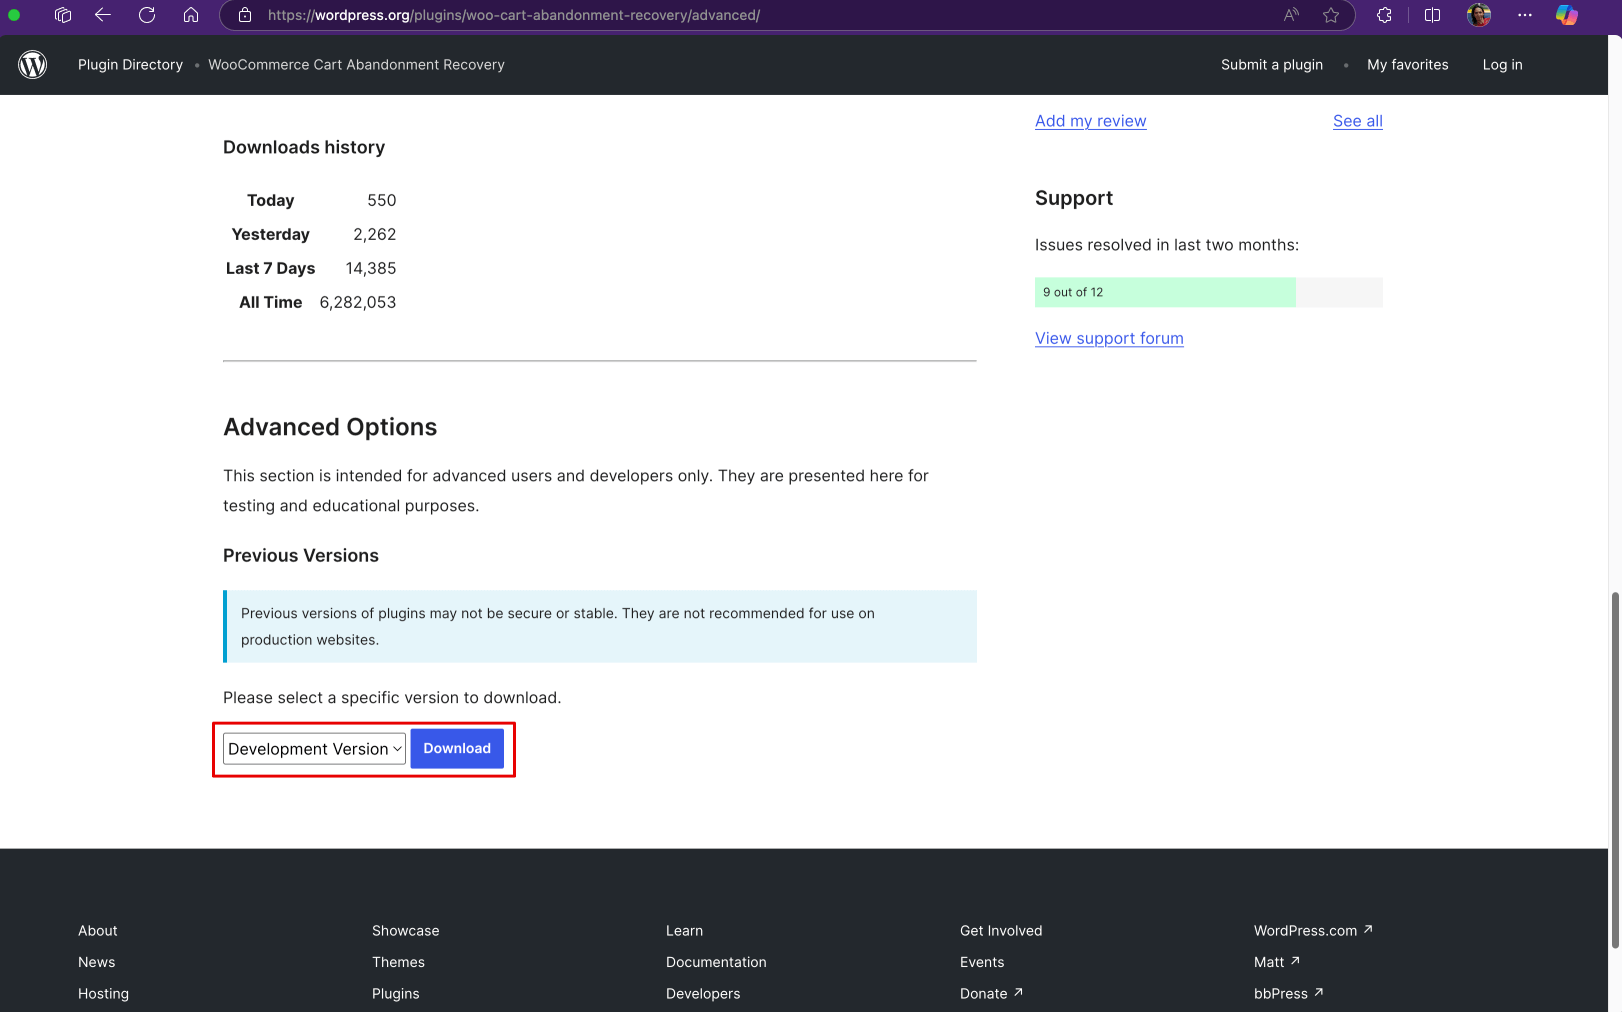
4. In your WordPress dashboard, go to Plugins > Installed Plugins and deactivate the current version of Cart Abandonment Recovery for WooCommerce.
5. Click Delete to remove it from your site.
6. Next, go to Plugins > Add New > Upload Plugin, choose the ZIP file you downloaded, and install it.
7. Activate the plugin.
Your site will now be running the selected version.
We don't respond to the article feedback, we use it to improve our support content.