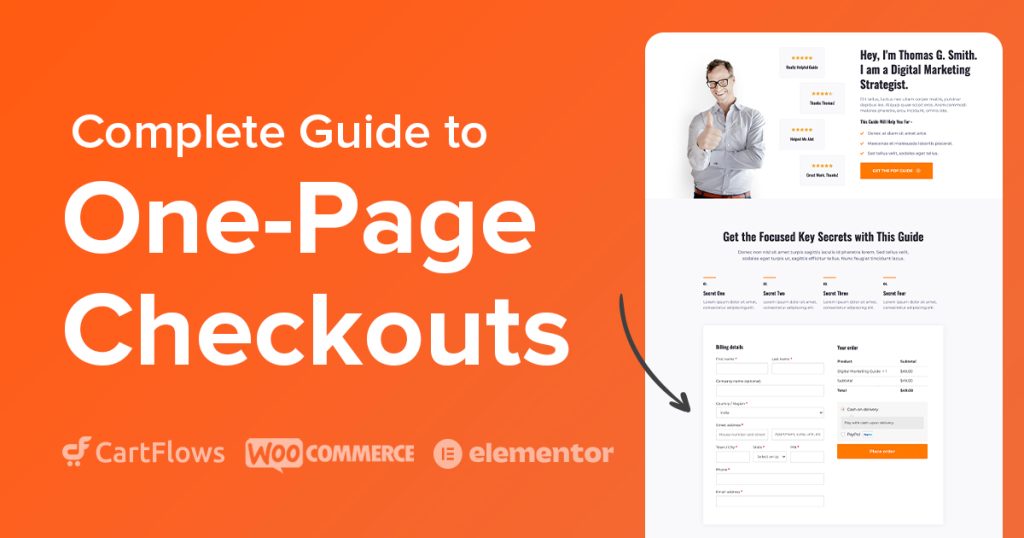
A one-page checkout puts the product, customer details, and payment on a single page instead of spreading them across multiple steps, which reduces friction and cart abandonment. The fastest no-code way to build one in WooCommerce is with CartFlows and your page builder. This guide shows you how, step by step.
As a retailer using WooCommerce, if you want to reduce cart abandonment, boost conversions, and earn more from your store, a one-page checkout helps.
While there is no one-size-fits-all solution for eCommerce, it is true that a one-page checkout page is very effective for most businesses.
It’s effective because users want to buy things quickly and easily.
The easier you make the checkout process, the more likely someone is to use it.
In this article, we’ll discuss:
- What is the WooCommerce one-page checkout?
- How does it differ from the regular checkout pages?
- Why you should implement a one-page checkout for your store
- How to build your own WooCommerce one-page checkout easily
Without any further ado, let’s get started!
- What Is One-Page Checkout And Why Does It Work?
- Why Does The Regular Woocommerce Checkout Fail?
- Switch To A One-Page Checkout To Improve Revenue
- How To Build a Woocommerce One-Page Checkout With Elementor and CartFlows
- Top 4 Best Woocommerce One-Page Checkout Plugins
- Our Top One-Page Checkout Templates for Higher Conversions
- Conclusion
- FAQs: WooCommerce One-Page Checkout
What Is One-Page Checkout And Why Does It Work?
One-page checkout is a single page where the product image, total cart value, the checkout form, and the payment links are available.
It is designed to help your customers purchase products without adding to their decision-making process. It’s also useful for capturing the moment and enabling checkout to be completed before the customer can change their mind.`
As distractions are eliminated and replaced by trust symbols and testimonials, customers see more of what’s good about the product.
This unconscious processing of small details helps customers arrive at the decision to purchase quickly and without hindrance.
This is one of the major reasons why one-page checkout can help improve every business out there!
Why Does The Regular Woocommerce Checkout Fail?
The default checkout page offered by WooCommerce is too long!
Consider this for a minute.
If you’re selling a digital product, the WooCommerce checkout page still asks for the billing and shipping addresses.
Since it’s difficult to remove, you may choose to let it be.
But for customers, that’s an unnecessary addition to the form and they may leave your checkout page without completing the purchase.
According to Statista, 22% of cart abandonment is due to long checkout processes. That’s a large percentage of people abandoning the cart for something that can be fixed so easily!.

Because the default checkout page has fields that may not be necessary, it fails the expectation of a short and fast checkout.
Along with that, the default WooCommerce checkout does not offer a lot of flexibility in terms of adding social validation and trust symbols.
This is a wasted opportunity and something that can cause users to be put off and walk away.
Switch To A One-Page Checkout To Improve Revenue
One-page checkout on WooCommerce is all about speeding up the ordering process and accelerating the customer journey.
WooCommerce One Page Checkout can help reduce cart abandonment rates.
There are many more reasons to switch over to one-page checkouts. And we’ll dive deeper into some of the major reasons to do so. Set up and verify your domain’s SPF, DKIM, and DMARC records, and use DMARC monitoring to confirm they stay aligned over time.
But here’s a quick list of the reasons why a WooCommerce one-page checkout will work better than the regular checkout page:
- Speed up purchases
- Capture the moment
- Better display of add-on products and offers
- Eliminate distractions
- Collect the email so you can recover abandoned carts
- Mobile optimized checkout
Let’s learn a little more about each of these points so you know exactly why investing your time in switching to a one-page checkout makes sense.
1. Speed Up Purchases
With all the information available on the checkout page, your customers can see everything they need without scrolling or changing their browser tabs.
Add some testimonials for social validation and trust symbols to reduce the perceived risk of purchase and you reduce the decision fatigue for your customers
They know that your product is worth it and can now go ahead with the purchase without worrying about risk.
2. Capture The Moment
Customers ready to purchase your product are on an impulse. And if you capture the moment and let them buy their product immediately, you win the sale.
Longer checkouts distract customers, which is where one-page checkouts help.
The faster a customer can complete checkout, the fewer barriers to interrupt the impulse. The more you capture the moment, the higher your number of sales.
3. Better Display Of Add-On Products And Offers

Order bumps and one-click upsells are much easier when you can tap into a customer’s impulse to purchase.
Think of offers like “Add one more product for just $10”.
These offers tap into the impulse and encourage customers to add more products to their cart.
While you may need to play around with offers that work, if you tap into the excitement at the right moment, you can easily increase your average order value (AOV).
Another addition to your checkout page can be the option to split payments over a few months. This works especially well for expensive products if you can bring the cost down to a feasible amount.
CartFlows helps you create discounts and offers easily on your checkout page. And by integrating deeply with multiple payment processors like Stripe and PayPal, you can add custom options to break down larger payments too.
4. Eliminate Distractions
One-page checkouts help you rethink what’s necessary and only add those form fields so they’re much less distracting than a long checkout page.
Since customers do not see other products, other links, or anything else that takes them away from the checkout page, you can eliminate distractions. Which should increase checkout completion.
You can then optimize the checkout page to further increase your revenue through the use of order bumps, upsells, and discounts.
5. Collect Email Addresses So You Can Recover Abandoned Carts

One-page checkout is not just a faster checkout experience, but can also serve as a lead generation page.
With a one-page checkout, you can ask users to enter their name and email in the first two fields.
So even if they get distracted while entering their payment details, you can bring them back by using the details you collected.
The free CartFlows WooCommerce cart abandonment plugin lets you easily automate your cart abandonment recovery process.
6. Mobile-Optimized Checkout
Over half of the traffic to online stores is from mobile. One-page checkouts, being short and simple, can be easily optimized for mobile devices.
To make a checkout page mobile-optimized, start with:
- Large text boxes
- Larger fonts
- Easy navigation menus
- Accessible product and billing information
- Showing the testimonials and social proof on the same page
These elements help customers make faster decisions without getting frustrated by zooming in and out on a smaller screen.
How To Build a Woocommerce One-Page Checkout With Elementor and CartFlows
Enough of theory. Let’s get started with building our WooCommerce one-page checkout using two of our favorite plugins – Elementor and CartFlows.
The reason for choosing Elementor is its ease of use and popularity in terms of page builders. Check this detailed Elementor review to learn more.
If you use another page builder, you can simply follow the steps and replace Elementor with the functionality of your page builder.
1. Choosing a One-Page Checkout Template
Step 1: Select your favorite Page Builder from CartFlows > Settings.

Step 2: Now, navigate to CartFlows > Flows.

Step 3: Click on Add New on the top of the screen to view the templates for the page builder that you selected in Step 1.

Step 4: Browse through the template library that’s now displayed on the screen. You can filter or search through the list using keywords. Alternatively, you can start a checkout from scratch.

Step 5: Now, hover over to the template that you want to import and click View All Steps

Step 6: Next, click Import Flow and the flow will begin importing into CartFlows

Once done, the landing page will now be imported and ready to customize!
2. Customize With Elementor and CartFlows Checkout Templates
Once the flow is imported, you’re ready to make changes to those steps using Elementor.
Step 1: Go to your flows and click Edit for any of the steps that you want to begin editing.

Step 2: The edit page will open like a normal post or page that you create. Simply click Edit with Elementor.

Step 3: Once done, you’ll be able to edit that step of the flow and replace the content and images shown on the page.

Step 4: Start editing your flow step the way you would a normal page and save the changes after you’re satisfied with the result.
Continue to do the same for the rest of the pages and you’ll be good to go!
3. Add/Remove/Edit Custom Checkout Fields
CartFlows Pro allows you to control what each field of your checkout page does.
You can create custom fields to capture more information if required. You can even remove all the fields that you deem unnecessary for your products.
How To Create New Fields:
Let’s start by creating new fields on your checkout page:
Step 1. From your WordPress dashboard, go to CartFlows > Flows. Select a Flow and click Edit.

Step 2. Now, Edit the Checkout Page.

Step 3. Scroll to the bottom for the Checkout Layout section.
Select the Checkout Fields tab and tick the Enable Custom Field Editor checkout.

You’ll find the billing and shipping checkout fields that are displayed on your checkout form. Expand a field by clicking the arrow on the right to see the different options that let you customize WooCommerce checkout fields.
Choose Add New Custom Field. This field allows you to enter an additional field in the Billing or Shipping section of the checkout form.
Step 4: You can create a Text, Text area, Select, Checkbox, or Hidden field type. Once you’re done, click Add New Field and Update the step.
This will update the checkout page to reflect the additional field.

How To Remove Fields in CartFlows
With CartFlows, you can easily add or hide checkout fields. This is an important feature if you’re looking to build a one-page checkout that enables faster purchases.
How do you remove checkout fields and create a one-page WooCommerce checkout?
Let’s start with removing a field to build a one-page checkout.

Step 1: Navigate to CartFlows > Flows > edit your_flow > Edit Checkout page.
Step 2: Navigate to the Form Fields tab and then enable the option – Enable Custom Field Editor if it is disabled.
Step 3: Click the eye icon to hide/remove the fields from the checkout page.
Step 4: Click the Save/Update button and you’re done.
That’s it!
The updates should now reflect on your checkout page once the changes are saved.
4. Adding Single Or Multiple Order Bumps
Order Bumps tap into a customer’s impulse when they’re about to make a purchase. If they’re offered the right products at the right time, you can easily increase the average order value.
CartFlows Pro makes it easy to add single and multiple order bumps to your checkout page.
Step 1: Navigate to CartFlows > Flows
Step 2: Open your flow in which you want to add/edit/update the order bump.

Step 3: Click the edit button of your Checkout Page.

Step 4: Navigate to the Order Bump tab and Click on Add Order Bump button to add multiple order bumps or click on Edit or on the name of order bump to edit the order bump

After Clicking on Add new Order Bump button, a popup will be displayed where you can provide your choice of name to the order bump to identify its letter use.
Step 5: After opening the order bump you will get 4 tabs and they are Product, Design, Content, and Settings.
After entering order bump settings, you can change the name in the same way you do for the steps.

The tabs provided in the order bump are as follows
- Product Tab: Select the product and manage the discounts for that product
- Design Tab: From this tab, you can manage the design:e look and feel of the order bump.
- Content Tab: From this tab, you can manage the display content of the order bump.
- Setting Tab: From this tab, you can manage the setting for that particular order bump.
Also, a new improvement is that you can preview the order bump design while designing and updating the content.
Step 6: Once you are done with the changes, you need to save each tab. Simply click Save Changes at the bottom of each tab.
Top 4 Best Woocommerce One-Page Checkout Plugins
Here are some of the best checkout page builders out there for WordPress and WooCommerce.
1. CartFlows – Best One Page Checkout Builder for WordPress

CartFlows is a highly-flexible sales funnel builder for WordPress and WooCommerce. It is built to be a full eCommerce development solution.
It integrates with many of your favorite plugins to make workflows easier and more seamless.
It makes it easy to build beautiful landing pages as it works with many popular page builders including Elementor, Beaver, and Divi.
If you’re an entrepreneur who has already started generating revenue from your eCommerce store, CartFlows is the logical choice.
With revenue generation and optimization features built-in, you may reach initial profitability much faster with CartFlows.
Service businesses use the same playbook on their own websites. A home renovation company that adds a clean quote-request flow, project galleries, and clear trust signals turns more first-time visitors into booked consultations.
It works perfectly for users who are interested in selling products through content publishing.
So this will be useful for eCommerce business owners, course creators, drop shippers, online coaches, authors, and other content creators.
2. Modern Cart – A Frictionless Cart Experience for Faster Checkouts
If you’re serious about creating a smooth, high-converting checkout journey, Modern Cart is the missing piece you’ll love.
While CartFlows helps you build powerful checkout flows, Modern Cart takes care of what happens right before check out starts.
It replaces the clunky default WooCommerce cart with a faster, more intuitive experience.
Your customers can easily adjust product quantities, apply coupon codes, and even explore smart product suggestions without refreshing the page or getting frustrated.
When you add it to your one-page checkout, this frictionless cart flow keeps the momentum strong, helping you reduce abandoned carts and maximize conversions.
Want to see Modern Cart in action? The video below shows how it transforms the shopping experience!
Get started with Modern Cart.
3. Ultimate Addons For Elementor (UAE)

Elementor is the leading website builder platform for WordPress. It is ideal for web professionals including developers, designers, and marketers.
By combining Elementor with Ultimate Addons For Elementor, you can design beautiful checkout pages effortlessly.
So if you only need to build checkout pages, this plugin can enhance the functionality of Elementor to help you create these pages easily.
4. One Page Checkout by WooCommerce
WooCommerce realized that the default checkout is long, so they launched a plugin to help fix it. One Page Checkout by WooCommerce helps you display the selected products and the checkout form on the same page. Customers can edit their order and continue to pay without leaving the checkout page.
You can create different checkout forms with this plugin and add the shortcodes to any landing page that you build.
Our Top One-Page Checkout Templates for Higher Conversions
CartFlows has an ever-growing single-page list of templates for different purposes. You can explore our checkout templates here or browse through the templates for landing pages, opt-ins, upsells, and downsells.
Creating a high-converting one-page checkout isn’t just about layout and speed – it’s also about persuasive copy. Your product descriptions, guarantees, testimonials, and even microcopy near the payment button can significantly impact buying decisions.
If you’re struggling to craft compelling, well-structured content that builds trust and drives action, you might consider working with professionals who specialize in structured writing and research. Many entrepreneurs hire research paper writer at EduBirdie to help structure complex ideas clearly and persuasively – a skill that can also be applied when writing high-converting sales content.
If you need help creating content for sales funnels or checkout pages, why not let AI write it for you? The methods of annotating texts and training the ML models make them capable to write nearly human-like. AI writing tools like Jasper, Copy AI, Knolli, Editpad and others can provide original content on demand.
While AI tools can save time, it’s very important to Humanize AI content to make it read naturally and avoid robotic-sounding text.
The following is a list of our favorite one-page checkout templates that you can use right away:
WooCommerce One Page Checkout Template #1

I especially like this page because of the minimalist approach. This page only displays the final checkout form, trust symbols, and the total payment amount at the end.

The strategically placed Risk-Free stamp adds to the trust so your customers are more likely to proceed with payment. You can use this checkout if you have a more minimal-designed store.
One Page Checkout Template #2

This page would work really well for single product checkout. It displays the product, the benefits, and an image of the product on the left. The minimal, 2-step checkout form is displayed right beside this information.
If a user chooses to scroll down, there are video success stories and written testimonials from existing customers that further reinforce trust in the product.
Checkout Template #3

This template is more of a classic. It can work with most stores, irrespective of the design by simply changing the blue header on the top.
So when you can’t think of a better template for your needs, go ahead with this one and you’re ready to go!
Conclusion
Building a one page checkout in WooCommerce is one of the major steps you can take towards your conversion rate optimization journey.
Effortless checkouts like these help you speed up the entire process and decision making for your customers.
While making elegant and fast checkout pages is much harder in WooCommerce, CartFlows makes it really simple to start from scratch and build an advanced checkout flow with ease.
So go ahead and try it out. You may be able to increase conversions with these few simple steps we’ve talked about here!