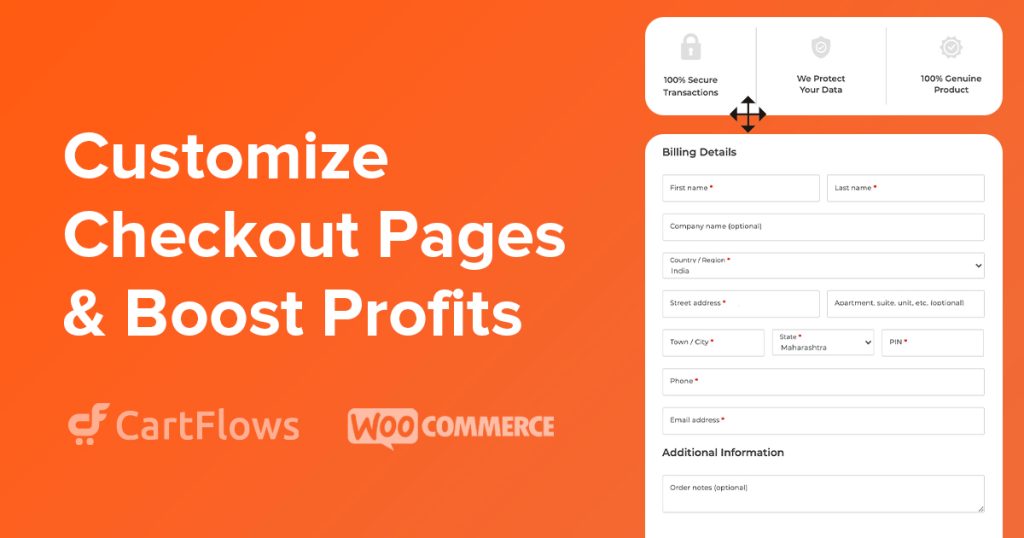
To customize the WooCommerce checkout page, you can add or remove checkout fields, build a one-page layout, calculate shipping, add coupon and multiple payment options, insert order bumps, and strip out distractions. The default checkout does not let you edit fields, so you need a plugin. The fastest no-code way is CartFlows with your page builder.
Below are 7 easy ways to customize your WooCommerce checkout page, with step-by-step instructions for each.
Let’s get started!
- What Is A Checkout Page?
- 3 Reasons Why You Should Customize Woocommerce Checkout Page
- How To Get Started With Customizing Your Checkout Page
- Speed Up Your Customization Process With Powerful Checkout Templates
- 7 WooCommerce Checkout Page Customizations
- Conclusion
- WooCommerce Checkout Page – Frequently Asked Questions
What Is A Checkout Page?
The checkout page is the final page a buyer is shown before completing the payment. This page helps collect information about the customer, the shipping details (if required), the payment information, and other details required for the fulfillment of their order.
Here’s what the default WooCommerce checkout page looks like:
")
This looks quite normal. Why are we discussing customization?
There’s a catch.
WooCommerce does not let you edit what fields are displayed. So if you sell digital products, you’ll still need to display the address field.
Such a distraction.
3 Reasons Why You Should Customize Woocommerce Checkout Page
According to Baymard Institute, 70% of carts are abandoned. This means that a majority of your users will never make a purchase.
Customizing the checkout experience helps reduce cart abandons.
A custom WooCommerce checkout page lets you add social proof elements to build trust, display related products to increase your average order value (AOV), and even redesign the entire page to suit your website style.
These modifications not only look aesthetically pleasing, but customized checkout pages also convert much better.
Let’s get into 3 main reasons why you should be spending time on the customization of this last step.
1. Improve User Experience
If you sell digital products, the default WooCommerce checkout is distractingly long. In the case of physical products, billing and shipping addresses can be auto-filled using the browser’s saved data.
")
This is the major reason why you need to consider customizing your WooCommerce checkout page.
Browsers can auto-fill names, phone numbers, addresses, and even card details unless the user has opted out.
Since most users work with defaults, you can leverage the same to speed up the checkout.
Automatically fill in as much of your form as possible using these details if you can. That way, you’ll reduce the amount of time your customer has to spend distracted from the product they’re purchasing!
Every eCommerce entrepreneur who’s searching for ways to boost conversions must try this if they haven’t already.
2. Optimize Conversions
Customers who reach the checkout page are on the brink of their purchase decisions. Since they haven’t made the payment yet, they can hit the back button at any point in time.
There are multiple reasons people abandon their carts.
Here are a few of the top reasons:
- Lack of trust
- High or unexpected shipping costs
- Complex forms
Trust is the #1 factor that determines if a user will proceed or not.
Customers need to be able to trust your store to keep the promise and deliver the goods to their homes.
To do so, you need to add trust elements to your page.
")
But why stop at that?
Increase the trust through social validation using checkout page testimonials like the one below:
")
Testimonials address your customer’s last-minute doubts and help them take a leap of faith when purchasing from you for the first time.
Once the initial purchase is made, it’s much easier to upsell/downsell your users with additional offers.
3. Increase Average Order Value (AOV)
Order bumps, upsells, downsells, and discount codes can help you raise your AOV. Not all of this is possible with the default checkout page.
")
An order bump + testimonials combo is a powerful way to reinforce trust and excitement.
Customizing your checkout page allows you to add a variety of different elements that:
- Boost your AOV
- Build a relationship with your customers
- Make them feel better about purchasing more from you!
Suggesting relevant products as order bumps taps into their impulse and get them excited about adding more products to their cart.
It also helps them instantly connect with you as they see you understand their needs.
This is a win-win situation that we want to create for every store!
How To Get Started With Customizing Your Checkout Page
Before you begin customization, you need to understand the goal.
You could have one of the following goals:
- Make the page shorter to enable faster checkout
- Encourage impulse purchases with one-click checkout
- Increase your AOV through offers
- Reduce cart abandonment
- Improve branding
- Or fix the styling to match your website
You can also export WooCommerce data to Google Sheets at this stage to track key metrics, monitor progress, and make informed adjustments.
While the best practices of each goal are out of scope for this article, we’ll discuss parts of these goals in the sections below.
Speed Up Your Customization Process With Powerful Checkout Templates
Redesigning templates can be a hassle if you’re modifying website code. It’s messy, difficult to maintain, and hard for others to make changes in the future.
To speed up the customization process, you need to first start with a no-code sales funnel and checkout page builder like CartFlows.
At present, it has over 200,000 active users who love the plugin. It offers drag-and-drop functionality that lets you design pages from scratch, integrates with your favorite page builders so there’s nothing new to learn, and helps you increase your AOVs with ease.
But there’s one powerful feature that speeds up your process even further, CartFlows checkout templates.
With its large variety of checkout templates, you can simply choose one that suits your business, edit the content, and go live within minutes.
As these templates are designed by experts and tested out in the market, we know they convert well.
So if you’re a beginner, don’t waste time endlessly searching and implementing every best practice out there.
Just pick a template, edit it, and get back to spending time on your business.
7 WooCommerce Checkout Page Customizations
We covered a lot so far. Now, let’s get into the real customization.
What are the different elements that you can customize on your WooCommerce checkout page?
In this section, we’ll use CartFlows along with Elementor to customize some of the elements of our checkout page. You can use any other page builder along with CartFlows and follow through the steps.
Create Custom Checkout Fields Specific to Your Product
CartFlows Pro allows you to control what each field of your checkout page does. You can create custom fields to capture more information if required.
Let’s see how that works.
Step 1. From your WordPress dashboard, go to CartFlows > Flows. Select a Flow and click Edit.
")
Step 2. Now, Edit the Checkout Page.
")
Step 3. Scroll to the bottom for the Checkout Layout section.
Select the Checkout Fields tab and tick the Enable Custom Field Editor checkout.
")
You’ll find the billing and shipping checkout fields that are displayed on your checkout form. Expand a field by clicking the arrow on the right to see the different options that let you customize the field.
Choose Add New Custom Field. This field allows you to enter an additional field in the Billing or Shipping section of the checkout form.
Step 4: You can create a Text, Textarea, Select, Checkbox, or Hidden field type. Once you’re done, click Add New Field and Update the step.
This will update the checkout page to reflect the additional field.
")
How To Remove Checkout Fields To Build a One-Page Checkout
With CartFlows, you can easily add or hide checkout fields. This is an important feature if you’re looking to build a WooCommerce one page checkout that enables faster purchases.
How do you remove checkout fields and create a one-page WooCommerce checkout?
Let’s start with removing a field to build a one-page checkout.
")
Step 1: Navigate to CartFlows > Flows > edit your_flow > Edit Checkout page.
Step 2: Navigate to the Form Fields tab and then enable the option – Enable Custom Field Editor if it is disabled.
Step 3: Click the eye icon to Hide/Remove the fields from the checkout page.
Step 4: Click the Save/Update button and you’re done.
That’s it!
The updates should now reflect on your checkout page once the changes are saved.
How To Calculate the Shipping Costs and Shipping Fields on Checkout
For physical products, you need to capture the buyer’s shipping address and calculate the shipping cost.
But first, we need to create shipping zones to ensure that the calculations are done correctly. Shipping zones can be created in the WooCommerce settings.
Follow this simple and easy article to set up the shipping options on WooCommerce first before you move into the customization.
Now, after setting up the shipping, there might be a case that you want to hide it on any particular checkout page of the CartFlows. Fortunately, we have provided the option to enable and disable it.
How to enable and disable the shipping fields on the WooCommerce checkout page
You can follow below simple steps to enable/disable the shipping fields section on the CartFlows checkout page.
Step 1: Go to CartFlows > Flows > Your Flow
")
Step 2: Click edit on the checkout page.
")
Step 3: Scroll to the Custom Fields tab and uncheck “Ship to Different Address”.
")
Step 4: Click Update and check if your changes look good on your checkout page!
Customize Coupon Field On Checkout
Before we get into more customization, here’s an article that shows you create custom coupons for your WooCommerce store.
Once you have created the required coupons, you can proceed to customize your coupon fields on your checkout pages.
To create collapsible coupon fields on CartFlows, follow these steps below:
- Step1: Edit the Checkout page under the CartFlows Dashboard > Flows > Flows Settings.
- Step 2:Now, go to Checkout Layout > Checkout Fields and you’ll see all the field customization options available to you.
- Step 3: Enable the collapsible field option:
- Firstly for the field to be collapsible you need to make sure the fields are not marked as required.
- Next, you enable the Collapsible checkbox after that Save/Update the changes and you have made your option field collapsible.
- Step 4: Save the settings go back to your page to confirm the changes have been applied
How to enable the coupon field on the WooCommerce checkout page with Cartflows
Let’s see how we can create a coupon field and display it on the checkout page.
Step 1: Go to CartFlows > Flows > Your Flow.
")
Step 2: Click Edit on the checkout page.
")
Step 3: Navigate to the Custom Fields tab and enable the Coupon field option.
")
Once done, the coupons that you set up on WooCommerce will be usable on the CartFlows checkout page.
From the next time onwards, you can simply create new coupons and do not need to go through the entire process of setting things up from scratch!
Want to go beyond basic coupon codes?
The default WooCommerce coupon field only supports simple percentage or flat discounts entered manually. If you want your checkout to do more of the selling for you, Power Coupons lets you build BOGO deals, tiered bulk discounts, and auto-apply coupons that trigger automatically based on cart contents, customer role, or purchase history, with no code required from the customer.
This turns your coupon field from a simple discount box into an active conversion tool, encouraging bigger carts instead of just discounting the one your customer already has.
Remove Distractions From The Checkout Page For Better Conversions
One of the most important reasons for customizing the WooCommerce checkout page is to reduce or eliminate distractions.
We’ve already discussed what distractions are and how they affect the conversion rate.
Since you already know how to add and remove checkout fields from WooCommerce checkout pages, let’s jump right into removing distractions.
")
How to remove distractions from the checkout page by displaying only the essential checkout fields
Here are the checkout fields that you can use for physical and digital products to help you reduce distractions and speed up the checkout process.
For digital products:
- First and last name field
- Email and optional phone number
- Billing address if necessary
For physical products:
- First name and last name
- Email and phone number
- Shipping address (with checkbox to make it default)
- Billing address if (with checkbox to copy shipping address)
Place the card details section right after the user has entered all the required information here.
Display 2-3 selective testimonials on the checkout page so they’re always visible, especially when the user is entering their card details.
Display money-back guarantee or trial periods as per company policies to reinforce that the transaction is risk-free.
And finally, add trust symbols as users subconsciously look for these symbols to proceed with checkout.
With these few changes, you have a lean checkout page that asks only what’s necessary and provides all the information required on a single page.
Multiple Payment Options on the Checkout Page
People abandon carts for multiple reasons. Not having enough payment options to choose from is one of those reasons.
")
With the new payment gateways, it has become really easy to accept any form of payment that your customers prefer.
For example, Stripe is one of the most popular payment gateways at present. Integrating with Stripe lets you accept many payment methods from your customers – debit and credit cards, wallets, bank transfers and so on.
You can also integrate your checkout page with PayPal so customers who aren’t comfortable with Stripe can choose to go with PayPal.
If your customers prefer any form of digital wallets, try and accept those as well. While the revenue generated from all the payment methods will differ, it’s better to keep the options open than to not offer them and cause customers to leave.
How to integrate with multiple payment methods using CartFlows
At CartFlows, Stripe is our favorite payment gateway. We love this gateway because of how easy it is to work with – for you as well as for us.
It integrates seamlessly with CartFlows and lets you start billing your customers right from your dashboard.
Thanks to the deep integration, you can also view your revenue directly from the CartFlows dashboard.
Adding Order Bumps For Higher AOVs
Order Bumps tap into a customer’s impulse when they’re about to make a purchase. If they’re offered the right products at the right time, you can easily increase the average order value for your store.
CartFlows Pro makes it easy to add single and multiple order bumps to your checkout page.
Step 1: Navigate to CartFlows > Flows
Step 2: Open your flow in which you want to add/edit/update the order bump.
")
Step 3: Click the edit button of your Checkout Page.
")
Step 4: Navigate to the Order Bump tab and Click on Add Order Bump button to add multiple order bumps or click on Edit or on the name of order bump to edit the order bump
")
After Clicking on Add new Order Bump button, a popup will be displayed where you can provide your choice of name to the order bump to identify it letter use.
Step 5: After opening the Order bump you will get 4 Tabs and they are Product, Design, Content, and Settings.
After entering inside the order bump setting, you can change the name of the order bump in the same way you do for the steps.
")
The tabs provided in the order bump are as follows
- Product Tab: Select the product and manage the discounts for that product
- Design Tab : From this tab you can manage the design i:e look and feel of the Order Bump.
- Content Tab: From this tab you can manage the display content of the Order Bump.
- Setting Tab: From this tab you can manage the setting for that particular order bump.
Also, a new improvement is that you can preview the order bump design while designing and updating the content.
Step 6: Once you are done with the changes then it is mandatory to save each tab to save the changes by clicking the save changes button available at the bottom of each tab.
Exit-intent Popup
When a buyer on your checkout page gets distracted and is about to leave, an exit-intent popup can grab their attention and pull them back!
")
How do exit-intent popups work?
Your website keeps track of a user’s mouse movements. As soon as it detects that the mouse is moving outside of the browser tab, a popup is instantly displayed.
This grabs the user’s attention and brings that back to your page.
How do you create an exit-intent popup?
You don’t need to be a techie for that! Elementor offers powerful drag-and-drop features to build pages as well as opt-ins. It also allows you to create beautiful exit-intent popups from the same interface.
How cool is that?
Simply use the same page designer and build a beautiful, catchy popup from scratch or use the powerful opt-in template to speed things up.
Elementor will handle the mouse tracking and display the popup and the right time.
Conclusion
Alright! You’re set. Equipped with this knowledge, we hope you get the most revenue out of your store with minimal upfront effort.
We’ve covered some of the best practices here, but consider this as your starting point for further questions that pop into your head.
The journey to conversion and revenue optimization will lead you to some really interesting results in the long term!
So take your time to implement one change at a time and try things out. See how your audience reacts to the changes.
Soon you’ll have enough data to get the best results with the least effort from your store!